Whelen RFNF85 User Manual
Page 2
Page 2
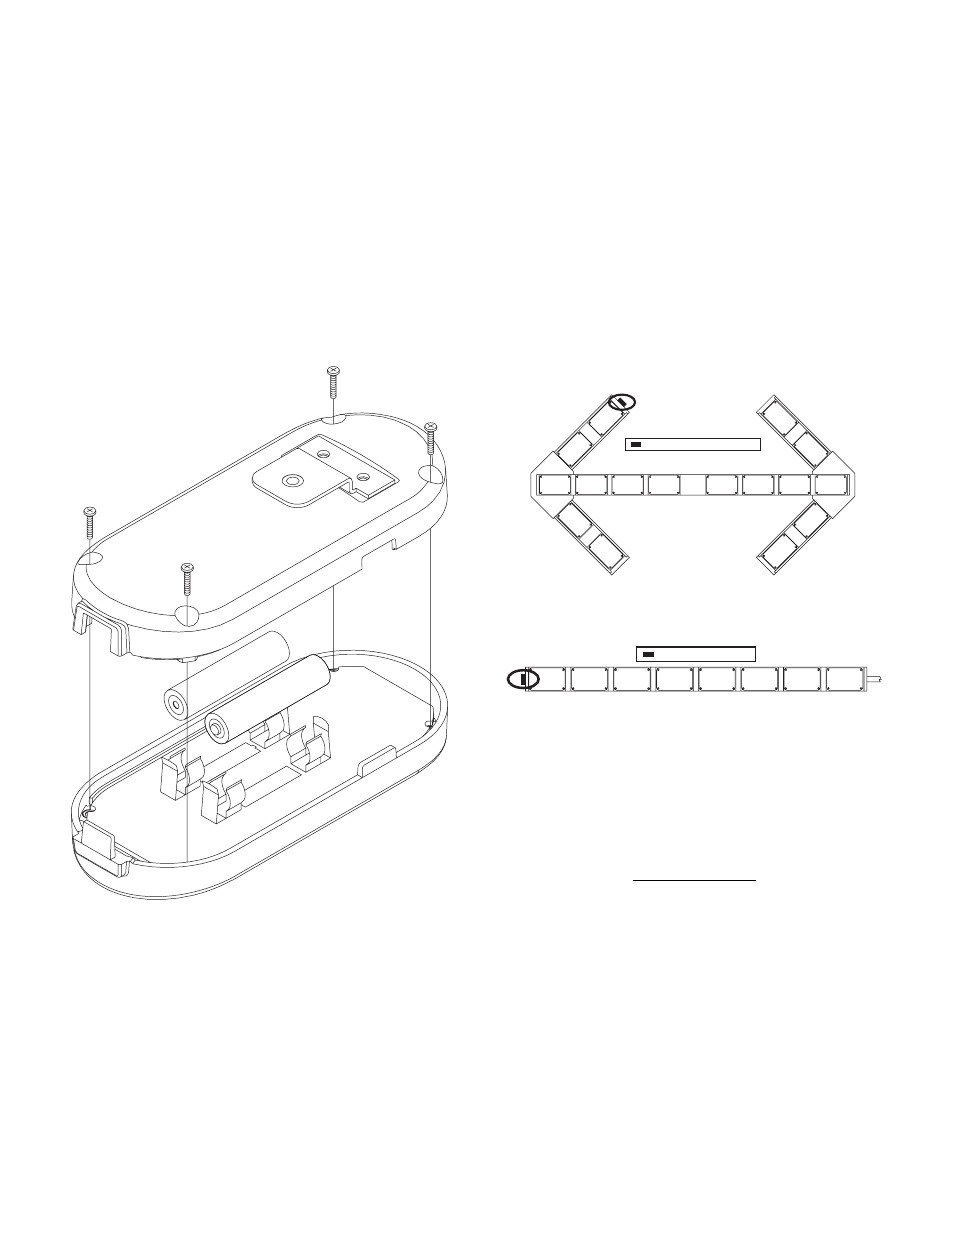
= Receiver Location (typical)
= Receiver Location
Note! This controller will only work with Traffic Advisor™
models that have been equipped at the factory with
wireless receivers.
Battery Installation
1.
Remove the 4 Phillips head screws that secure the back
cover onto the controller. Remove and retain the screws
and cover from the controller.
2.
Locate and install the two (2) AAA size batteries included
with the controller. Be sure to install the batteries so that
their orientation and polarity match the battery outline on
the circuit board.
3.
Return the rear cover to its original position and secure it
onto the controller using the screws removed in step 1.
-
+
-
+
Binding Procedure
The Traffic Advisor and its controller are pre-bound at the
factory to work right out of the box. However, if either of these
are replaced, the binding procedure must be performed
before the Traffic Advisor and its controller can be put into
service.
The binding procedure will configure the controller so that it
will only operate the Traffic Advisor to which it is bound. Keep
in mind that a controller can not be bound to more than one
Traffic Advisor at a time.
1.
Turn the power to the Traffic Advisor on. There should be
no pattern displayed during this procedure.
2.
Locate the receiver module mounted on the Traffic
Advisor array. On arrow-style arrays this module is
typically located in the upper-left section of the array as
shown.
1.
On bar-style arrays, the receiver module is mounted on
the endcap as shown.
2.
Place and hold the controller against the receiver
module. Make sure that the LED indicators on the
controller can clearly be seen. The controller MUST
remain in contact with the receiver module during
the entire binding procedure (70 seconds max.)
3.
Input the following sequence on the controller.
IMPORTANT! Do not allow more than one (1) second
between key presses!
Binding Sequence
S/L > S/L > S/L > Left Arrow > S/L > Right Arrow > S/L
If this sequence has been successfully entered, the center
LED indicator will flash to indicate that the binding process
has begun. This process will last a maximum of seventy (70)
seconds.
If the binding procedure is successful, the center three (3)
LED indicators will simultaneously flash for three (3) seconds.
Test the controller to confirm proper operation.
If the binding procedure is unsuccessful, the center LED will
stop flashing. In this event, wait for the controller backlight to
go out and repeat the binding procedure from the beginning.
If the binding procedure is unsuccessful after 2 more
attempts, contact Whelen Customer Service.