Installation, Top mount, Bottom mount – Whelen G7PA User Manual
Page 2: Magnetic mount, Fig. 1 lightbar base
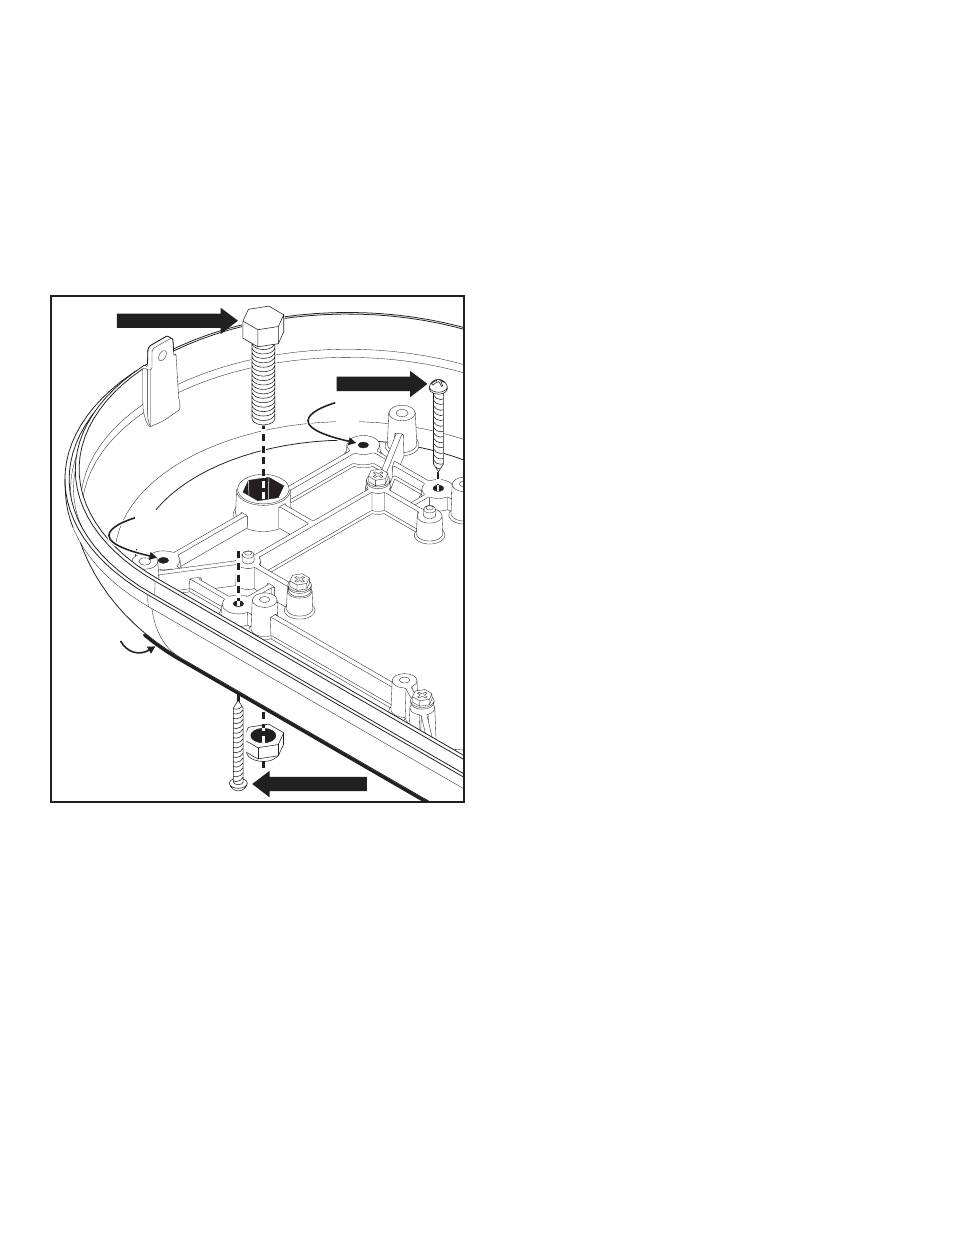
Page 2
IMPORTANT! The lightbar should be located a minimum of 16"
from any radio antennas!
Installation:
•
Since this installation will require drilling, It is absolutely
necessary to make sure that no other vehicle components
will be damaged in the process. Check both sides of the
mounting surface before starting and if damage is
possible, select a different mounting location.
•
Always deburr all holes and remove any metal filings from
the vehicle.
Top Mount:
1.
Remove the 2 screws at each end of the lightbar that secure the
dome to the base and remove the dome.
2.
With a 3/16” drill bit, drill out the 4 mounting bosses in the base for
clearance holes for #8 sheet metal screws (Figs. 1 & 2).
3.
Be sure the mounting area is relatively flat. Using the lightbar
base as a template, scribe the 4 mounting hole locations onto the
mounting surface.
4.
Mark off the wire access hole located right behind the lightbar.
1.
Drill the mounting holes you marked off in step 3 with a #29 drill bit
and the wire access hole with a 3/8” drill bit.
2.
Install a 3/8” rubber grommet in the wire access hole and route the
wires through, then apply a silicone sealing compound around the
wires and grommet.
3.
Carefully position the lightbar over the mounting holes and secure
the lightbar to the mounting surface using the #8 sheet metal
screws supplied.
4.
Replace the dome with the 2 screws removed in step 1.
Bottom Mount:
1.
Be sure the mounting area is relatively flat. Using the information
in figure 2 scribe the 4 mounting hole locations onto the mounting
surface.
2.
Mark off the wire access hole, located right behind the lightbar.
3.
Drill the mounting holes you marked off in step 1 with a 3/16” drill
bit and the wire access hole with a 3/8” drill bit.
4.
Install a 3/8” rubber grommet in the wire access hole and route
the wires through, then apply a silicone sealing compound around
the wires and grommet.
5.
Carefully position the lightbar over the mounting holes and secure
the lightbar to the mounting surface using the #8 sheet metal
screws supplied.
1.
Be sure the mounting area is relatively flat. Using the information
in figure 2 scribe the 2 mounting hole locations onto the mounting
surface.
2.
Mark off the wire access hole, located right behind the lightbar.
3.
Drill the 2 mounting holes using an 11/32 drill bit and the wire
access hole using a 3/8” drill bit.
4.
Tighten each locknut onto its bolt to draw the bolt head into the
base than remove the locknuts.
5.
Align the bolts with the 2 mounting holes you drilled and position
the lighthead onto the mounting surface.
6.
Install a 3/8” rubber access hole and route the wires through,
then apply a silicone sealing compound around the wires and
grommet.
7.
Secure the lightbar with the locknuts provided.
Magnetic Mount:
WARNING!The use of any magnetic or suction cup
mounted warning light on the outside of a vehicle, while in
motion, is not recommended and is at the sole discretion
and risk of the user.
Place the lightbar onto the vehicle, wire it to power and installation is
complete. If you have the cigarette plug model, just plug it into your
vehicle cigarette lighter and you are ready to go.
TOP MOUNTING
BOTTOM MOUNTING
CENTER MOUNTING
Fig. 1 Lightbar Base
Optional
mounting
hole
Optional
mounting
hole
Gasket