Fig. 3 flash tube replacement, Flash tube replacement – Whelen G7PA User Manual
Page 3
Page 3
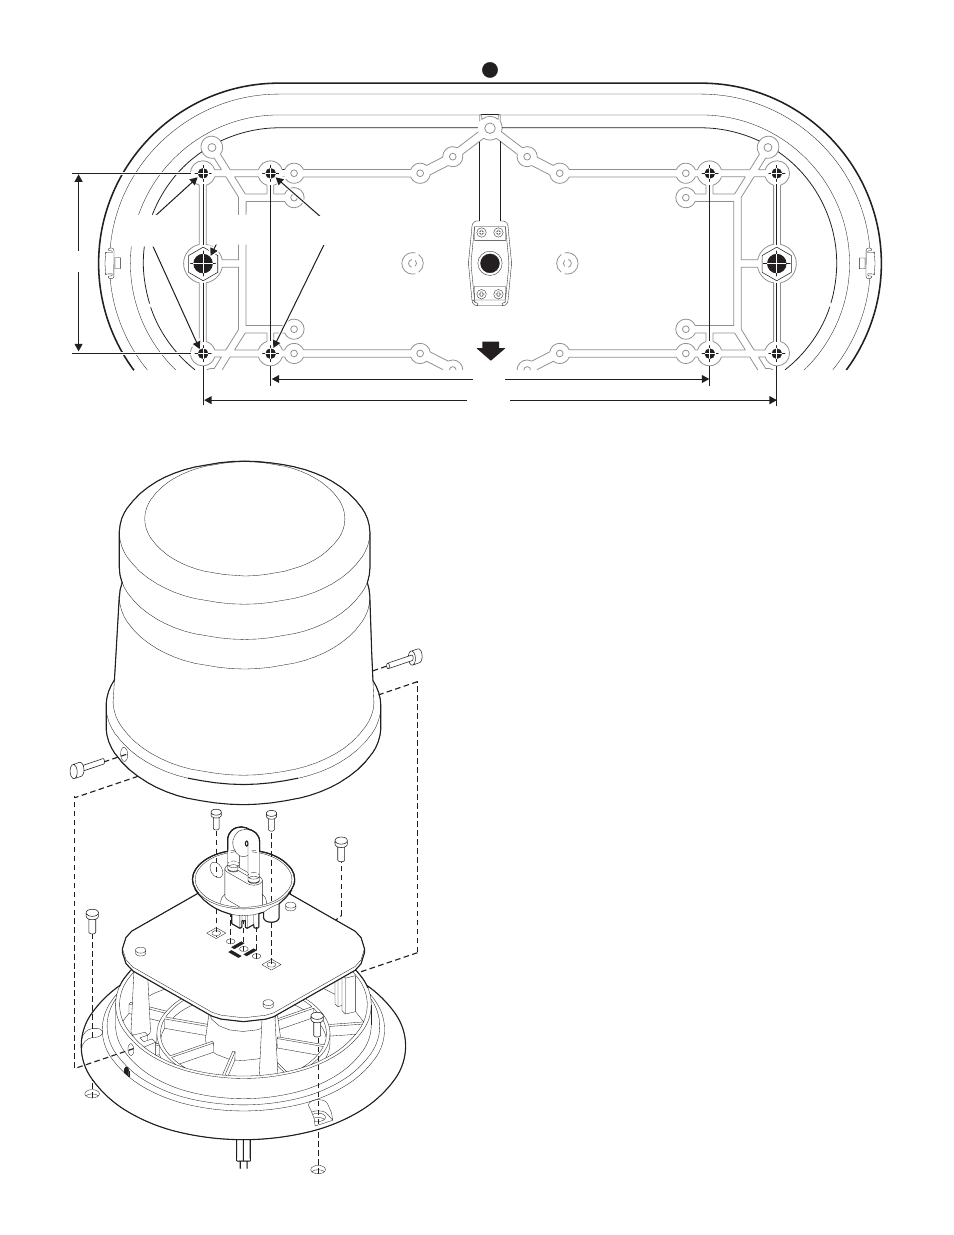
Fig. 3 Flash Tube
Replacement
LENS
SCREW
(QTY 2)
MOUNTING
SCREW
(QTY 3)
FLASH TUBE
ASSY. SCREW
(QTY 2)
Flash Tube Replacement:
1.
Remove the 2 screws at each end of the lightbar that secure the
dome to the base and remove the dome.
WARNING!The strobe power supply is a high voltage device.
Do not remove flash tubes or dismantle strobe
light head assembly while in operation. Wait 10
minutes after turning power off before starting
work or trouble shooting.
Note: If the edge of the base interferes with the screwdrivers
access to the lens screw, you may have to remove
the 3 mounting screws holding the beacon to the
base and lift the beacon.
2.
Remove the beacons lens screws and remove the lens. If your
beacon is equipped with diamond mirrors, to gain access to the
beacon lens screws you may have to first remove the mirrors
3.
Install the new flash tube making sure to align the 3 prongs on the
flash tube with the 3 slots in the power supply (Fig. 3).
4.
Secure the new flash tube with its screws and reassemble the
beacon and lightbar.
Fig. 2 Mounting Holes
Top view of base
WIRE EXIT
HOLE HERE
FRONT OF
LIGHTBAR
4"
CENTER
MOUNT
OPTIONAL
MOUNTING
MOUNTING
HOLES
9 "
¾
12 "
¾