Whelen IB8JJJJ User Manual
Page 4
Page 4
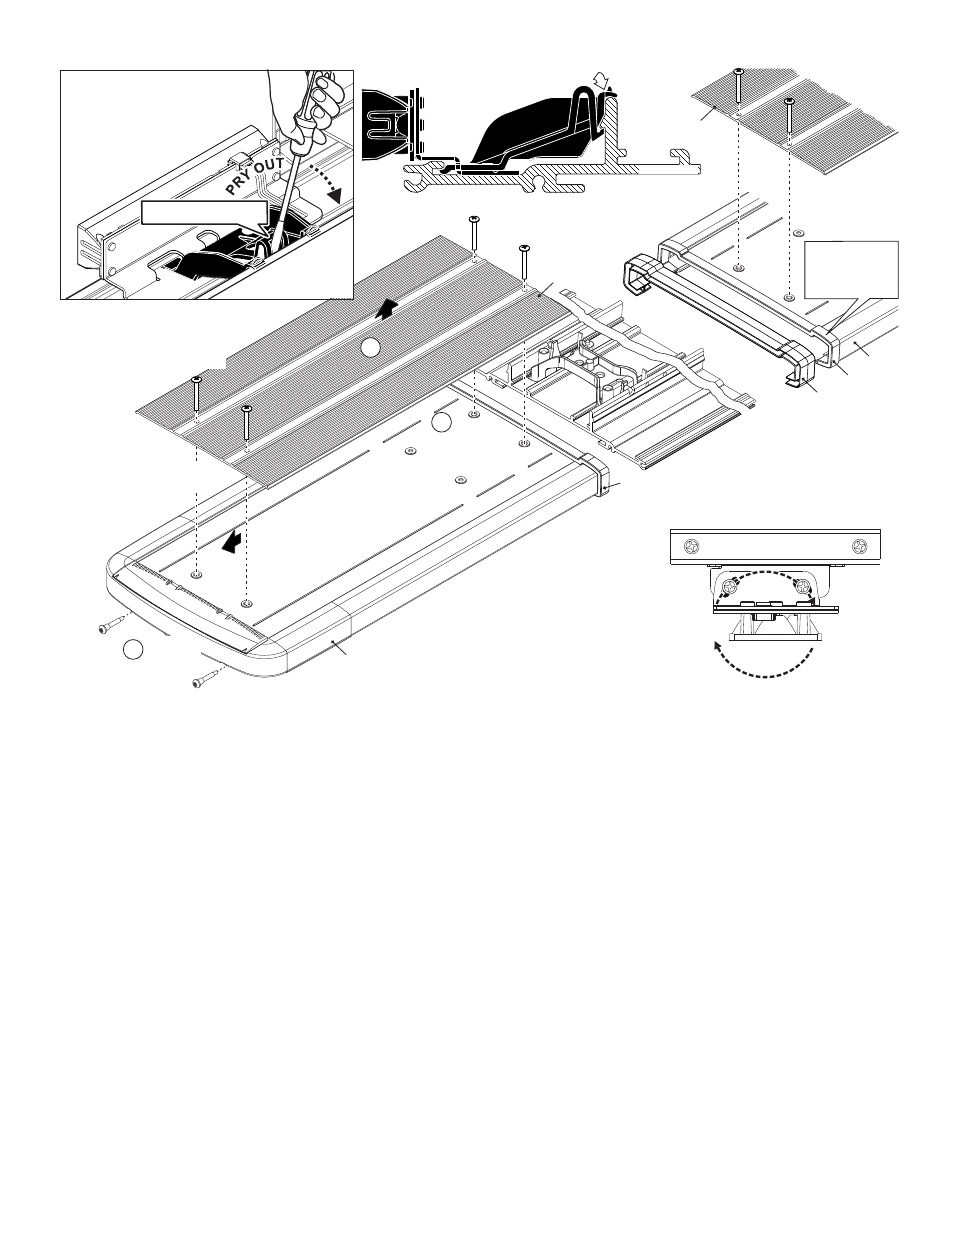
Slide LENS out of EXTRUSION
2
REMOVE
SCREWS
LENS DIVIDER
SEAL
SEAL
COVER
COVER
LENS
LENS
3
SIDE
VIEW
PRESS CENTER OF BRACKET TO SNAP-IN
BRACKET
EXTRUSION
REMOVE SCREWS
and MET
AL
COVER
REMOVE SCREWS
and MET
AL
COVER
REMOVE SCREWS
and MET
AL
COVER
1
NOTE:
When reassembling the lightbar
be sure the gaskets and divider
line up and fit properly.
Note: Mount seal
onto lens before
inserting lens into
divider.
Lighthead Removal:
Insert a flathead screwdriver as shown
and pry the bracket out of the extrusion.
The side view shows how the
bracket fits into the extrusion
for re-mounting. Press
down on the bracket
in the center to
snap in.
Press down on bracket
here to re-install
Accessing the Lightbar:
1.
2.
3.
Remove the screws which hold
on the metal panel on top.
Remove the two endcap screws.
Slide the lens off of the
extrusion.
1.
3.
ALLEY LIGHT
The angle of the Alley lights and
Takedowns can both be adjusted
horizontally. Loosen the two
adjustment screws and pivot the
lighthead to achieve the desired angle,
than re-tighten the screws. An Alley
Light is shown for example.
Adjusting Alleys
& Takedowns: