Permanent mounting – Whelen MKLP81 User Manual
Page 3
Page 3
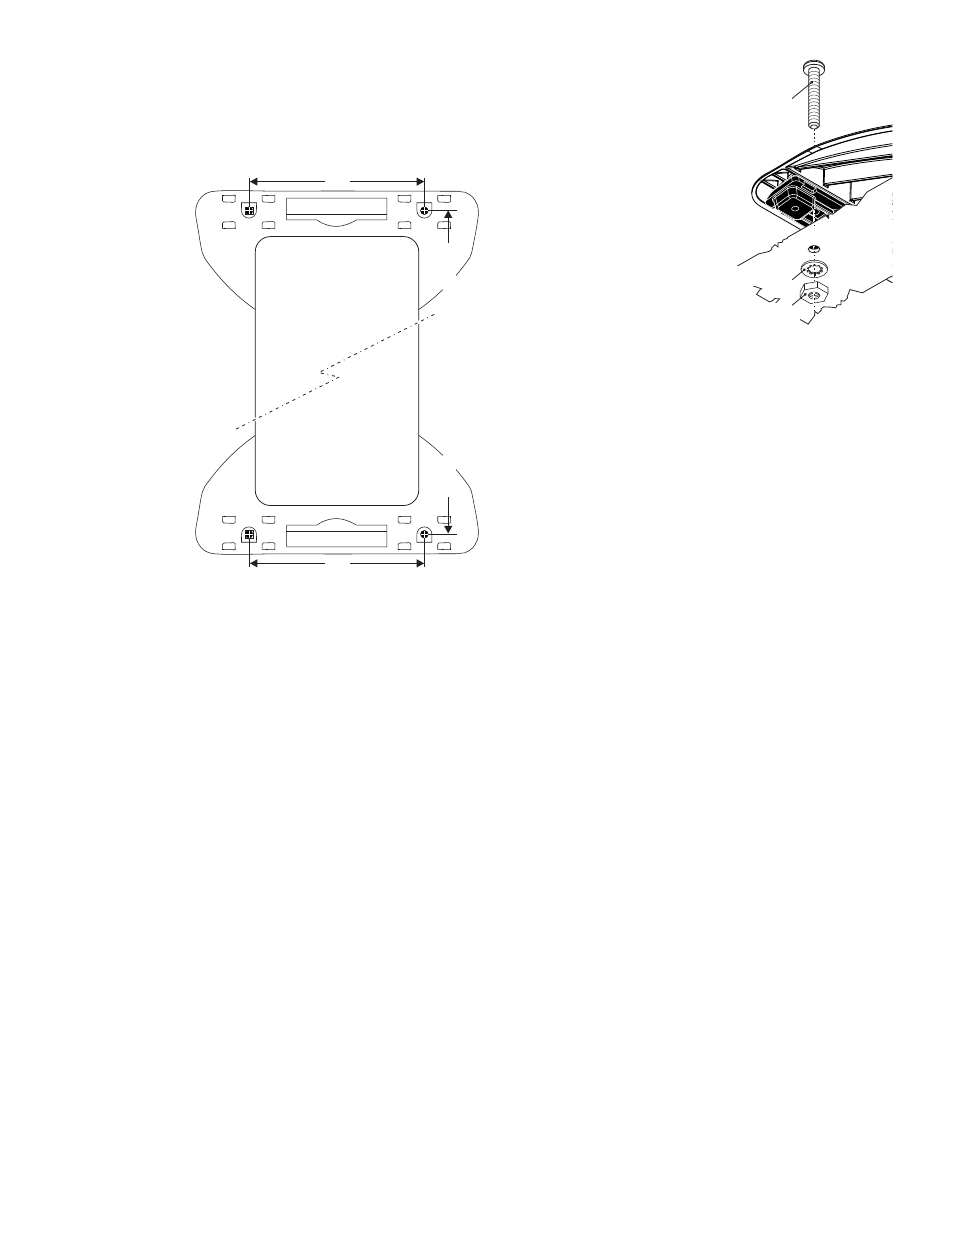
6½"
Measure distance on lightbar being mounted
6½"
Permanent Mounting:
Caution:
Permanent mounting of this product will require drilling.
It is absolutely necessary to make sure that no other vehicle
components could be damaged by this process. Check both sides of
the mounting surface before starting. If damage is likely, select a
different mounting location.
1.
Install the mounting
foot to the
lightbar following
steps 1 thru 4 of
“Strap Mounting”.
2.
Position the
lightbar onto the
vehicle in its exact
mounting location and
mark the location of the
mounting holes onto the
mounting surface using the
mounting feet as templates.
If the permanent mounting
holes in the mounting feet
are difficult to access,
you can use the
measurements shown
here to mark off and
drill the mounting
holes. You will
also need to
measure the
distance between
the mounting feet
for your application since
lightbar width will depend on
the lightbar you are mounting.
3.
Remove the lightbar and drill
the 4 mounting holes.
4.
Install the lightbar using the
supplied 1/4 - 20 Phillips Pan
Head Metal Screw, 1/4”
Internal Tooth Lock Washer
and 1/4 - 20 X 7/16 Hex Nut.
IMPORTANT! It is the
responsibility of the installation
technician to make sure that the
installation and operation of this
product will not interfere with or
compromise the operation or
efficiency of any vehicle equipment! Before returning the vehicle to
active service, visually confirm the proper operation of this product,
as well as all vehicle components/equipment.
PERMANENT
M O U N T I N G
MOUNTING
S U R FA C E
1/4 - 20 X 2-1/2"
PHILLIPS PAN HEAD
METAL SCREW
1/4"
INTERNAL TOOTH
LOCK WASHER
1/4 - 20 X 7/16
HEX NUT