3 wall mount installation – PLANET IVS-H120 User Manual
Page 12
12
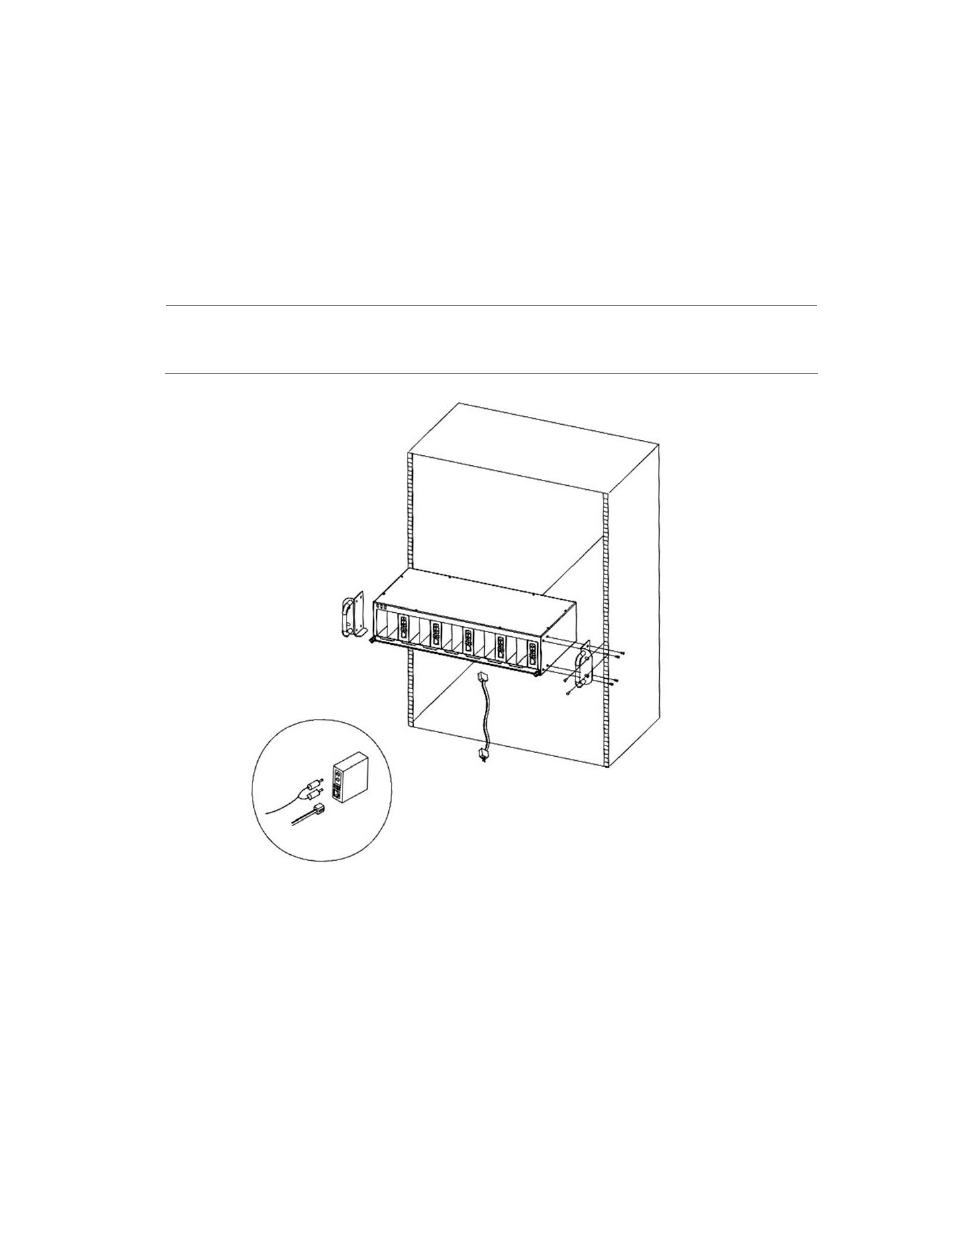
3. Attach a rack-mount bracket to each side of the Chassis with supplied screws attached to the
package.
4. After the brackets are attached to the chassis, use suitable screws to securely attach the
brackets to the rack, as shown in Figure 2-2.
5. Precede with the steps 1~4 of session 2.3.1 Stand-alone Installation to connect the network
cabling and supply video source to Video Server.
Caution:
You must use the screws supplied with the mounting brackets. Damage caused
to the parts by using incorrect screws would invalidate your warranty.
Figure 2-2 Mounting the Chassis in a Rack
2.3.3 Wall Mount Installation
There are two wall holes on the rear of IVS-H120 that allows the video server can be easily
installed with DIN-Rail mounting. To install the IVS-H120 on the wall, please follows the
instructions described below.
1. To measure the holes spaces and screw the screws on the wall.
2. To hitch the IVS-H120 with screws to fix the video server on the wall.