Button features – Blackmagic Design URSA Mini Pro 12K (PL) User Manual
Page 165
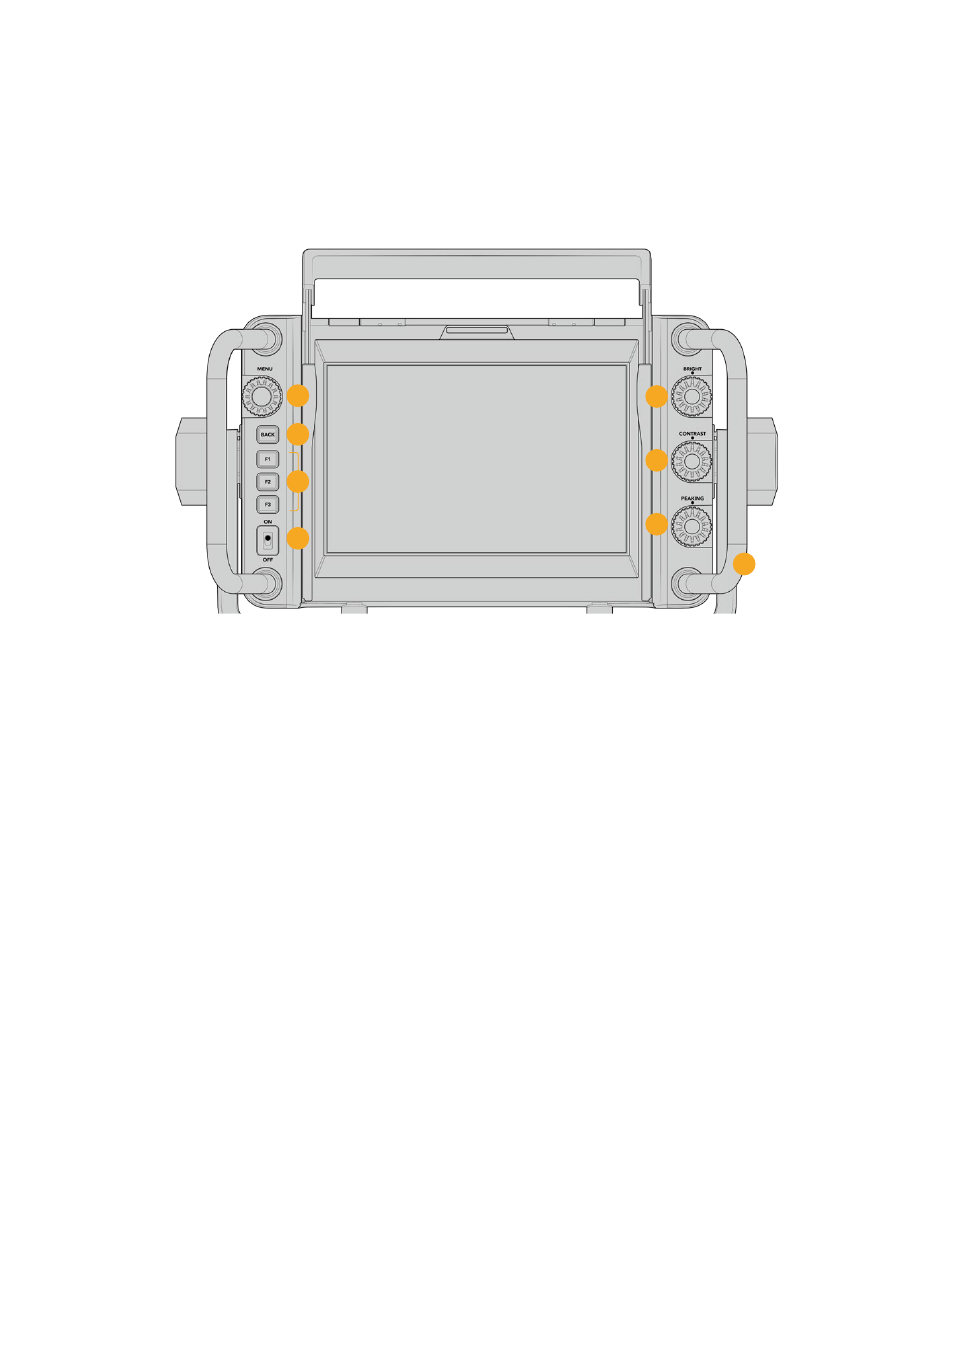
Button Features
The tactile dials down the right hand side let you change brightness, contrast, peaking quickly
and easily. The dials are ergonomically designed so you can adjust the dials from the side with
your thumb when using the sun hood, or with two fingers for finer more controlled adjustment.
1
5
6
7
8
2
4
3
1
Menu Dial
The push button ‘menu’ dial allows
you to enter the menu, and navigate
through the viewfinder settings.
2
Back button
Exits the menu system
3
F1, F2, F3
Assignable function buttons. You can
assign functions to these buttons for
easy access to your most commonly
used functions.
4
ON/OFF switch
Switches the Blackmagic URSA Studio
Viewfinder on and off.
5
Bright
Adjusts the brightness of the image
on screen. Overlays on screen will
show the brightness level on a scale
of -100 to +100.
6
Contrast
Adjusts the contrast of the image on
screen. Overlays on screen will show
the contrast level on a scale of
-100 to +100.
7
Peaking
Adjusts the focus peaking level for the
image on screen. Overlays on screen
will show the peaking level on a scale
of -100 to +100. In the setup menu you
can select between various styles of
peaking to suit your environment.
There is the option for the traditional
style of focus peaking that many will
be familiar with from other broadcast
systems, as well as the option to use
colored lines for focus. As with
URSA Mini you have the option of
‘red’, ‘green’, ‘blue’, ‘black’ and ‘white’
lines which gives you flexibility to
make them easily viewable when
shooting in environments that have a
lot of a particular color.
8
Handles
The built in handles are large and
allow you to hold the Studio
Viewfinder in place as you reposition
the camera while shooting. They also
provide protection for the screen
when setting up and packing down.
165
Blackmagic URSA Studio Viewfinder