HP LaserJet Pro 4001dw Monochrome Wireless Printer User Manual
Page 72
1.
Open the printer and remove any jammed sheets of paper. Verify that no torn remnants of paper
remain inside of the printer.
2.
Load the tray with the correct size of paper for the job.
3.
Make sure the paper size and type are set correctly on the printer control panel.
4.
Make sure the paper guides in the tray are adjusted correctly for the size of paper. Adjust the guides
to the appropriate indentation in the tray. The arrow on the tray guide should line up exactly with the
marking on the tray.
NOTE:
Do not adjust the paper guides tightly against the paper stack. Adjust them to the
indentations or markings in the tray.
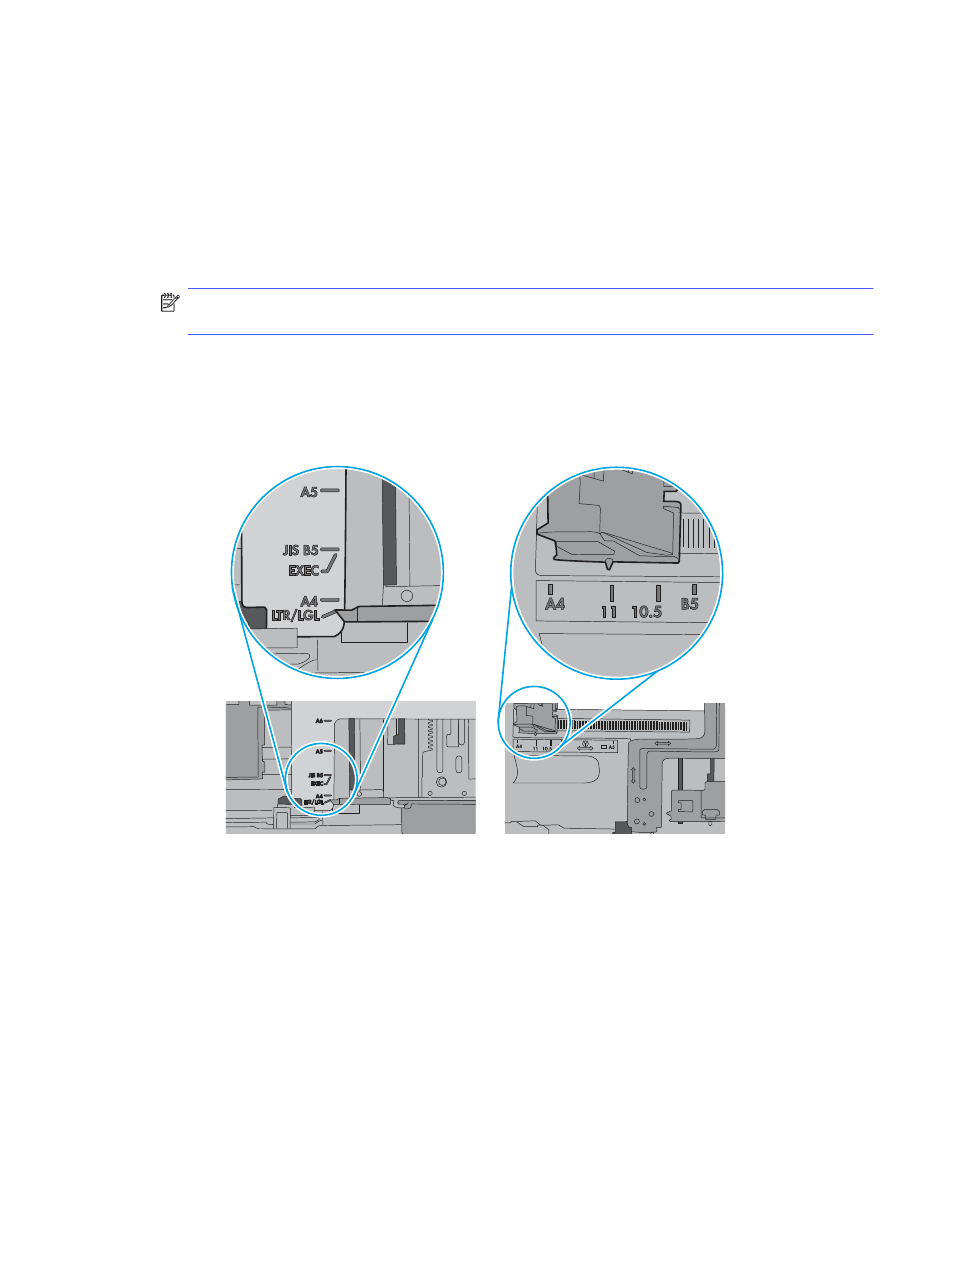
The following image shows examples of the paper-size indentations in the trays. Most HP printers
have markings similar to these.
Figure 6-1
Examples of size markings
5.
Verify that the humidity in the room is within specifications for this printer, and that paper is being
stored in unopened packages. Most reams of paper are sold in moisture-proof wrapping to keep
paper dry.
In high-humidity environments, paper at the top of the stack in the tray can absorb moisture, and it
might have a wavy or uneven appearance. If this happens, remove the top 5 to 10 sheets of paper
from the stack.
In low-humidity environments, excess static electricity can cause sheets of paper to stick together.
If this happens, remove the paper from the tray, and flex the stack by holding it at each end and
bringing the ends up to form a U shape. Then, rotate the ends down to reverse the U shape. Next,
hold each side of the stack of paper, and repeat this process. This process releases individual
sheets without introducing static electricity. Straighten the paper stack against a table before
returning it to the tray.
The printer does not pick up paper
63