Installation, For qualified installers only), Facing overview – Avalon Firestyles 864 See-Thru GS2 Installation User Manual
Page 35: Optional faceplates – sizing chart
Installation
(for qualified installers only)
35
© Travis Industries
4141208
100-01404
Facing Overview
Upgrade faces are available for this fireplace and may influence facing installation. Consult with your
Travis Dealer if you are using an upgrade face.
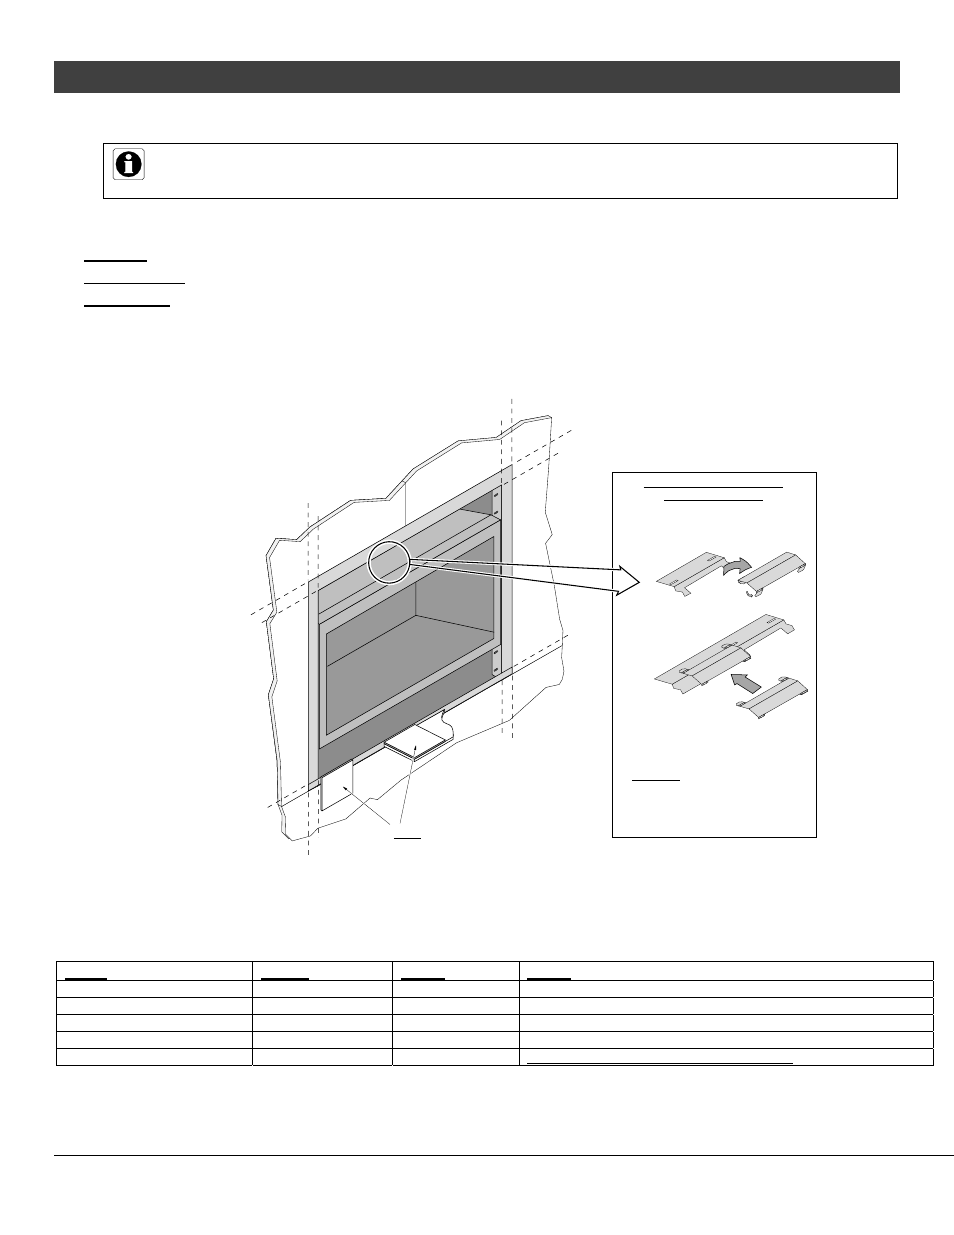
Optional non-combustible facing may be installed on the fireplace. Use the guidelines below to determine the
location (also see the following pages for detailed diagrams.
Tile Line
Any non-combustible facing under 1" (25mm) thick (see "Thin Facing" on page 36).
Masonry Line Any non-combustible over 1" (25mm) thick (see "Thick Facing" on page 38).
Hearth Line
Non-combustible hearth/facing should be installed up to this location (1" (25mm) above the base of the
fireplace). The fireplace may be raised to accommodate thicker hearth materials.
Optional Faceplates – Sizing Chart
Name
Height
Width
Notes
FPX Artisan, Classic, Fr Ctry
35-3/4” (908mm) 41”
(1041mm) 45-3/4”
(1162mm) Radius – May fit over top of tile facing
Winthrop Victorian Lace
34-1/8” (867mm)
36-7/8” (937mm)
Optional facing will butte to edge of faceplate (tile line)
Wilmington Hearthview
35-3/4” (908mm)
41” (1041mm)
May fit over top of tile facing
Winthrop Bungalow
34” (864mm)
36-7/8” (937mm)
Optional facing will butte to edge of faceplate (tile line)
Shadowbox 38.0625”
(967mm) 50”
(1270mm)
Face extends 1” below base of fireplace
Masonry Line
Hearth Line
Tile Line
Tile Line
Masonry Line
Tile Line
Masonry Line
Tile Line
Masonry Line
Tile Line
Masonry Line
Hearth Line
Masonry Line
Tile Line
NOTE: The hearth or facing can extend no
greater than 1” (25mm) above the base of the
fireplace. The fireplace may be raised to
accommodate thicker hearth materials.
Remove the center deflector (use needle-
nose pliers if necessary).
These tabs bend down
to allow for removal.
Re-attach the deflector to the louver.
Bend the tabs as shown, making sure
the deflector is secure and flat.
WARNING: The deflector must be
replaced in its original position if a
different face or grill is used.
SPECIAL INSTRUCTIONS FOR
WILMINGTON FACES