Installing a 2.5" sata drive, Chapter 3 – DFI EC700-BT Manual User Manual
Page 12
Advertising
www.dfi .com
12
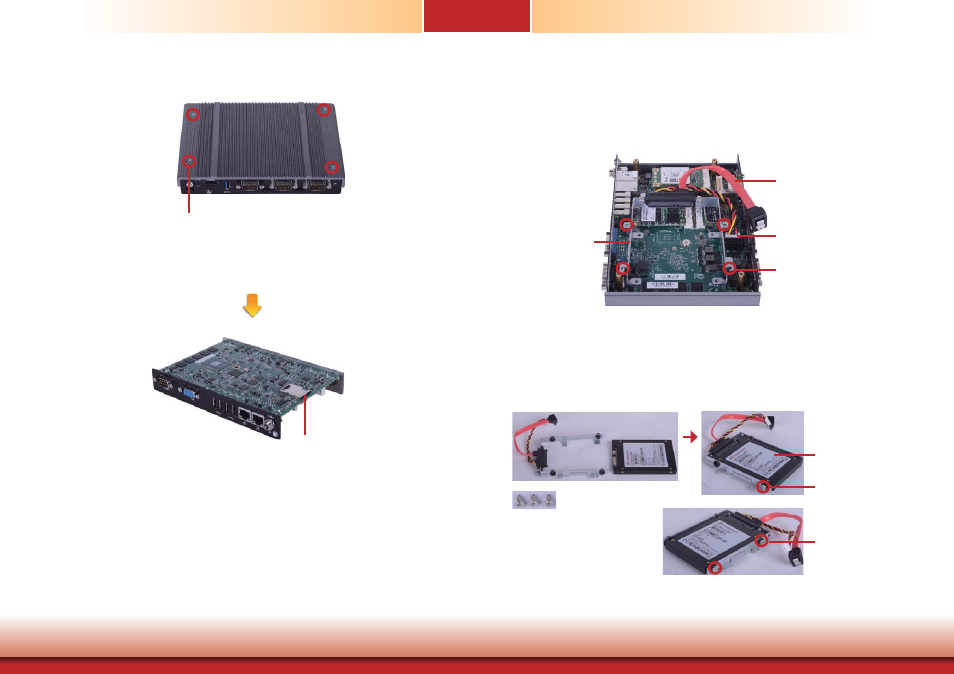
Chapter 3 Installing Devices
Chapter 3
Installing a 2.5” SATA Drive
1. Locate the SATA drive bay on the system board. Unplug the SATA power and data cable, and
remove the 4 mounting screws that secure the drive bay to the system board.
2. Align the mounting holes of the SATA drive with the mounting holes on the HDD bracket and
then use the 3 provided mounting screws to secure the drive in place.
Mounting Screws
Mounting Screw
2.5" SATA drive
Mounting Screw
Mounting Screw
SATA drive bay
SATA power cable
SATA data cable
SIM slot
Mounting Screw
removing 4 screws on the top side of the chassis cover
SIM l t
Advertising