Wheels – HP Velotechnik trikes User Manual
Page 60
56
Wheels
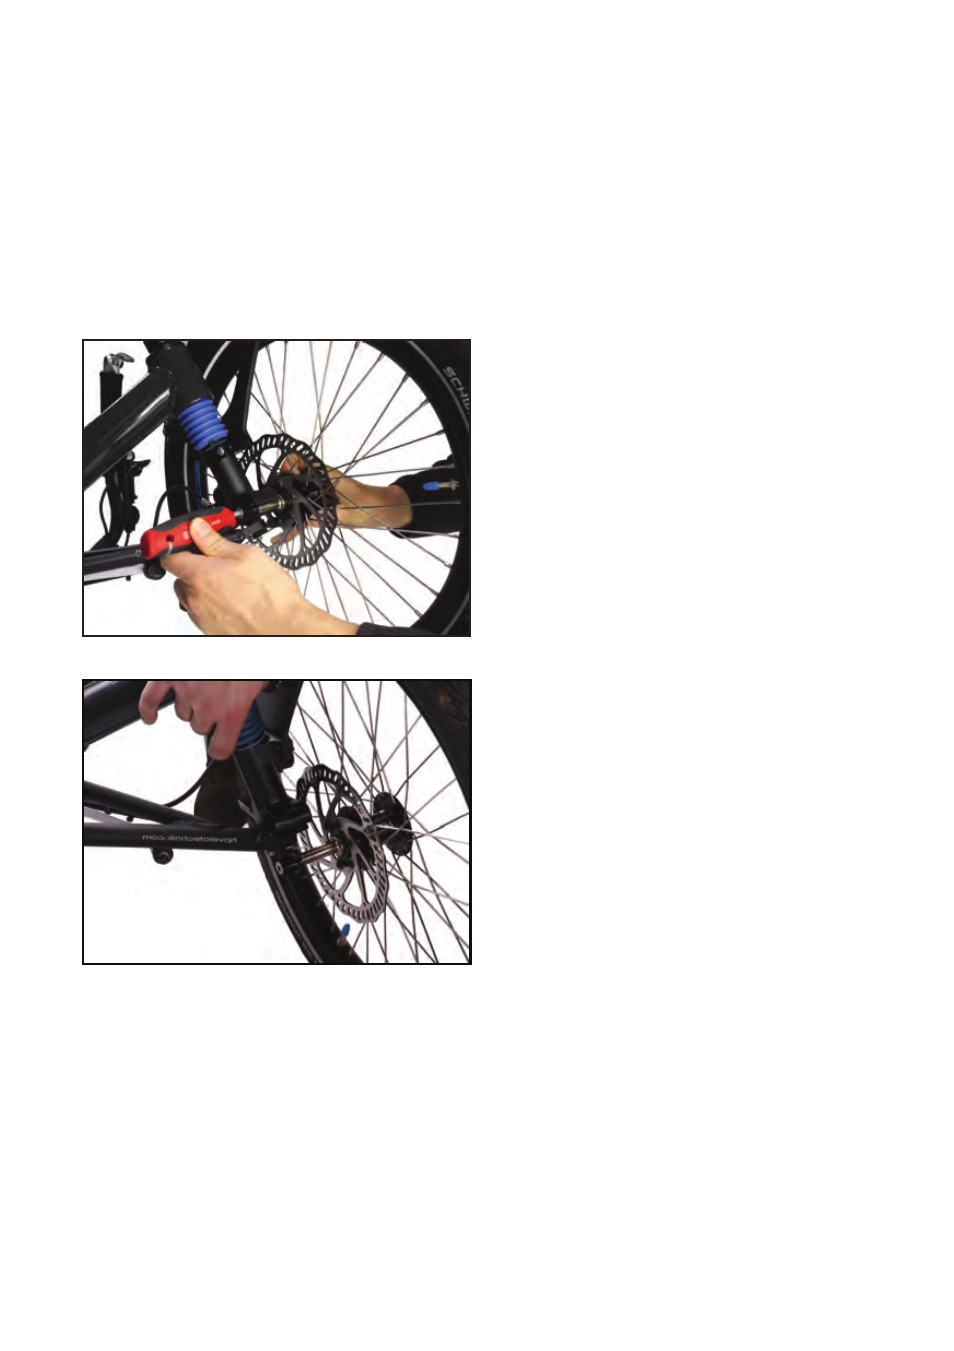
Disassembling the front wheels
To remove a front wheel, loosen the bolt in
the locking part at the inside of the knuckle at
least 6 mm. Pull the locking part away from
the knuckle. Pull the wheel a few mm away
from the knuckle and slide the axle through
the slot in the knuckle.
1: Loosen the screw in the locking part
2: Taking out the front wheel out of the knuckle
Take care not to bend the brake disc. When
reinstalling the wheel, slide the disc carefully
between the brake pads and take care not to
damage them. Tighten the screw in the lock-
ing part with 8–10 Nm.
Disassembling the rear wheel
Rear wheels can be fastened with a quick re-
lease mounting and therefore they are suscep-
tible to theft. For this reason always lock the
wheels along with the frame to a solid object
when you park your bicycle somewhere.
Please pay attention to the instructions about
quick release levers on page 8.
Tyres
The correct air pressure is decisive for
smooth running and a good protection against
punctures. The maximum pressure is printed
on the sidewall of your tire. You might find an
indication of the minimum required pressure
on the sidewall of the tire as well.
Since the tubes in the tires gradually loose air
you should check the air pressure before
every ride.
The tubes come with Presta valves (also called
french valves). They are very airtight and easy
to pump up.
To do so, first screw off the valve cap. Now
you see a small threaded rod with a knurled
nut that comes out of the valve. Loosen the
knurled nut as far as it is possible.
To pump up the tire and check the pressure
you need a pump with a gauge, preferably a
solid floor pump. Put the knob of the pump
on the valve, push it completely on the valve
and then retract it a little bit. Now you can
pump up your tire easily.
After you have pumped up the tire to the de-
sired pressure pull off the pump knob. Secure
the valve by turning the knurled nut on the
threaded rod properly against the valve body.
Finally put on the valve cap again.