Front suspension elements – HP Velotechnik trikes User Manual
Page 84
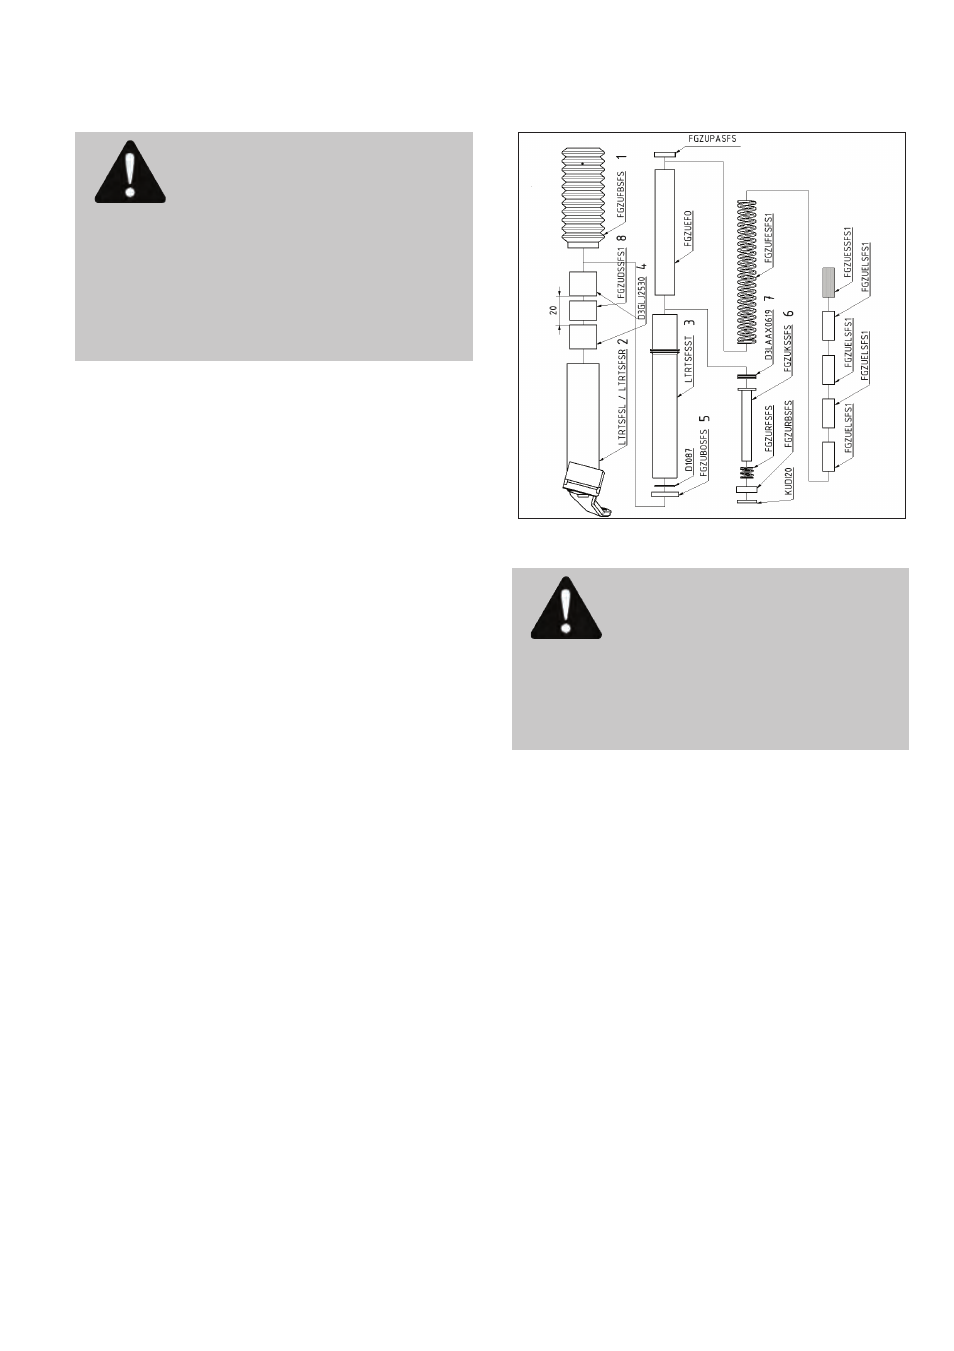
Front suspension elements
80
Caution! We recommend using
Concept-Lube available from
HP V
ELOTECHNIK
for best performance.
You can also use aging-resistant, lithium
soap based grease to lubricate. Never use
grease containing solid lubricants such as
molybdenum disulfide or zinc sulphide.
Insert the elastomer band without wrinkles in
the knuckle between the two bushings. Slide
the stanchion tube back into the knuckle. Slide
on the shock boot and insert its upper end
into the stanchion tube's groove. Apply a new
zip tie to its lower end. Slide on the washer
H. Press the suspension strut into the elas-
tomer bearing in the frame. Assemble spacer
F, cap E, spacer D, clamp C, and end cap B.
Fix the suspension strut in its elastomer bear-
ing by tightening the end cap with 1-2 Nm and
fasten the clamp.
Connect the suspension strut with the spheri-
cal plain bearing in the wishbone by the
M6x40 hex bolt (part order: strut - thin seal-
ing ring I - pivoting bearing J - spacer 6mm
long K with thick sealing ring L - screw head
A). Tighten the screw with a torque of 9-10
Nm. By doing this, the piston is locked at the
lower end of the suspension strut in its cor-
rect position.
Exploded view of the suspension strut interior
Caution! Use thread locker (e.g.
Loctite 243) with all bolted connections
that are not equipped with self-locking
nuts, else the connections may become
loose.
When mounting the rod end at the suspen-
sion strut, take care to assemble the parts in
the correct order, from upside: screw head,
steering lever, washer 6, spacer 6 mm length,
rod end, self-locking nut M6. In case you have
removed the rubber cap, circlip pliers will
help you to reassemble.