Front suspension elements, Handling instructions – HP Velotechnik trikes User Manual
Page 83
Front suspension elements
79
Handling instructions
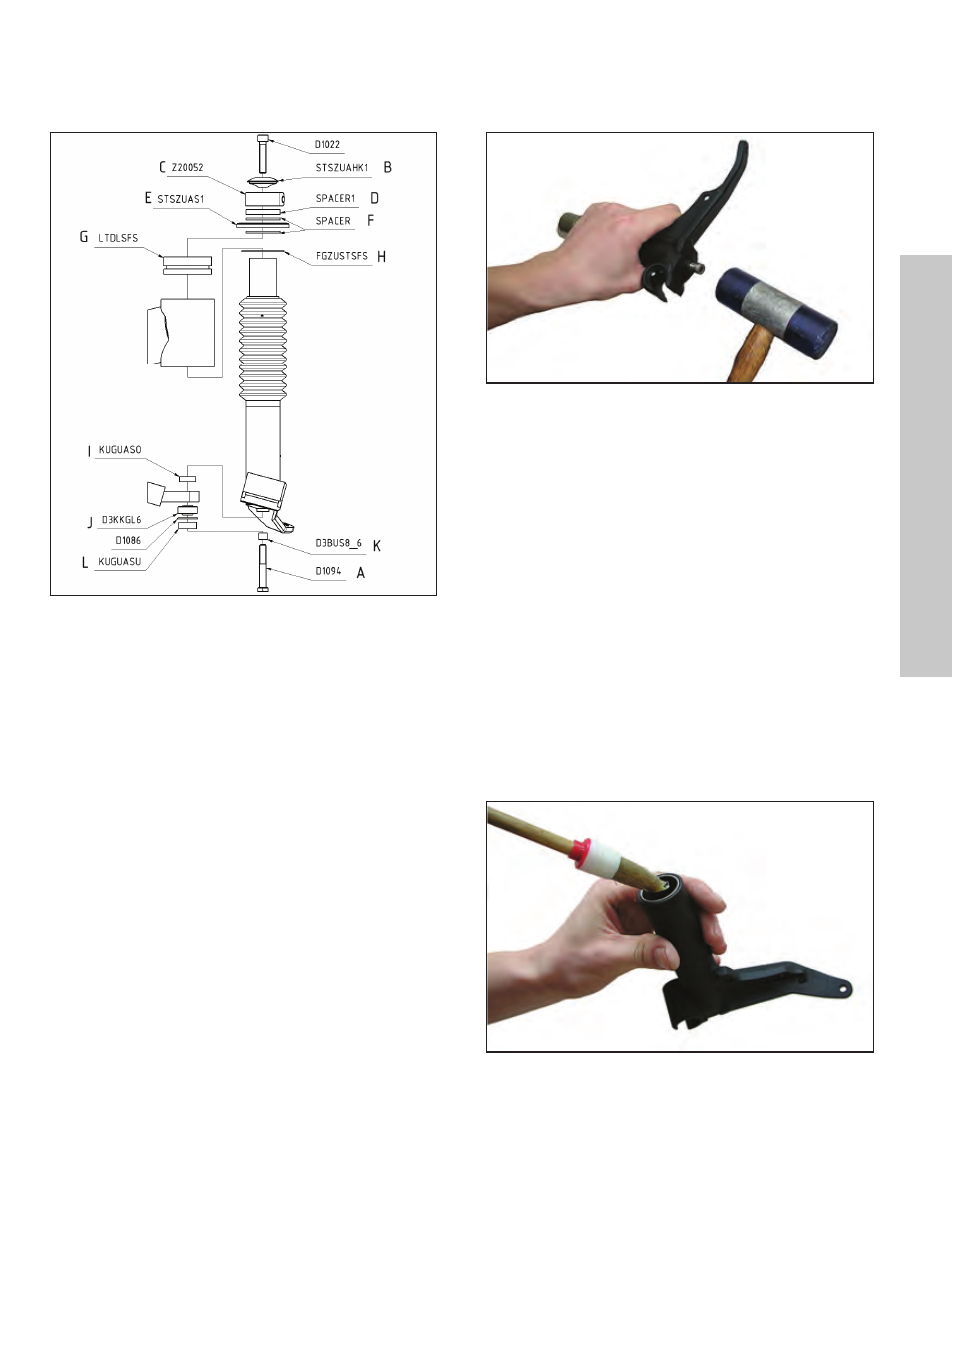
Exploded view of the suspension strut assembly
Slide off the washer H at the suspension
strut's upper end. For further disassembly, cut
the zip tie at the bottom of the shock boot 1
and slide the shock boot off the strut. Now
screw in hex bolt A, on the underside of the
strut for approximately 4mm. Grab the sus-
pension strut firmly at the knuckle (lower
black part) and beat the screw head with a
rubber hammer to release the piston 6 inside.
A hammer punch on the bolt releases the piston inside
the knuckle.
Remove the hex bolt A and slide the stan-
chion tube 3 (golden) out of the knuckle.
The elastomer band 8 can now be removed.
Clean the sliding surfaces of the stanchion
tube and the bushings 4, as well as the inside
of the knuckle 2. Use a clean soft cloth. If
there is noticeable play in the bushings or if
the bushings are damaged, please contact your
dealer. Lubricate the surfaces of the clean
bushings 4. Check the proper position of the
bottom out elastomer 5 inside the knuckle.
Apply a thin layer of grease on the stanchion
tube 3.
Applying grease to the bushings.