Microcom 466 User Manual
Page 16
Basic Operation
Chapter 2
466 Operators Manual
10
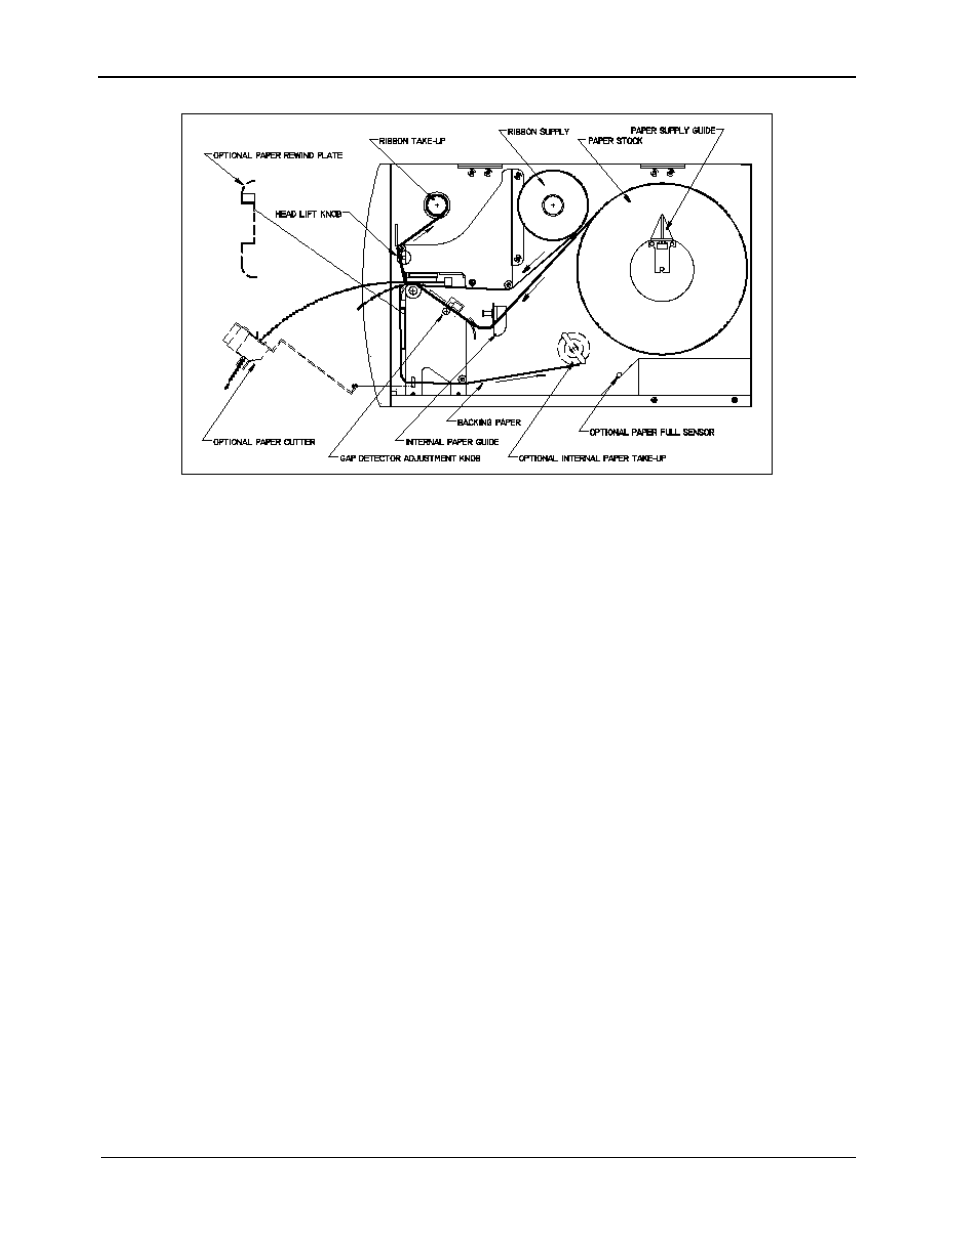
Printer Feed Mechanism
Figure 5
2.5.1 NORMAL AND TAG/TEAR MODES
Place the label roll on the internal supply shaft and adjust the paper width stop. Raise the print
head and feed the paper through the printer until it comes out of the front. Lower the print
head.
2.5.2 PEEL-AND-DISPENSE MODE (optional)
1.
Follow the paper loading in the normal and tag mode directions.
2.
Mount the peel plate adapter to the front of the printer.
3.
Feed and remove enough labels to expose about two feet of backing paper.
4.
Wrap the backing paper around the peel plate adapter and fasten it to the take up
spool.
5.
If necessary, press the line feed button to properly align the labels.
(Avoid a paper jam, removing the labels as they start to peel.
6.
Enable the peel-and-dispense mode using the ^A1^D98?.
*If the label height is over 2", a label support rack should be used. This rack will
support the peeled label until it is removed.
2.6
PRINT HEAD SUPPORT ADJUSTMENT
When using narrow media, less than 3.5" wide, it is possible to increase print quality and
prevent premature drive roller wear by correctly adjusting the print head support screw. To
make the adjustment, simply turn the head adjustment screw (see Figure 6) clockwise until the
print head is slightly lifted from the drive roller. Once the head has been lifted from the
roller(see Figure 7), verify that the print head has not been lifted too far by printing a test label.
If the print quality on the right side of the label appears weak, then lower the print head by
turning the screw counter clockwise until the print quality is corrected. If the quality problem
appears on the left side, turn the screw clockwise until the print quality is corrected.