Snapshots, Snapshots basics, Taking snapshots using software trigger – Sumix SMX-M7xx User Manual
Page 49: Chapter 6 snapshots, Napshots, Chapter 6
Snapshots: Snapshots Basics
49
Chapter 6
S
NAPSHOTS
Snapshots Basics
The SMX-M7xx Series Cameras can work only in one of the two modes at the same time:
Video or Snapshot. When the camera is not in the video mode, it is possible to take a
snapshot - to capture a still image. A snapshot can be triggered by the software, or by
external (with respect to the camera) hardware.
The Video mode is the normal mode when the camera is producing the image data. The
Snapshot mode forces the camera to capture a still image (a single frame).
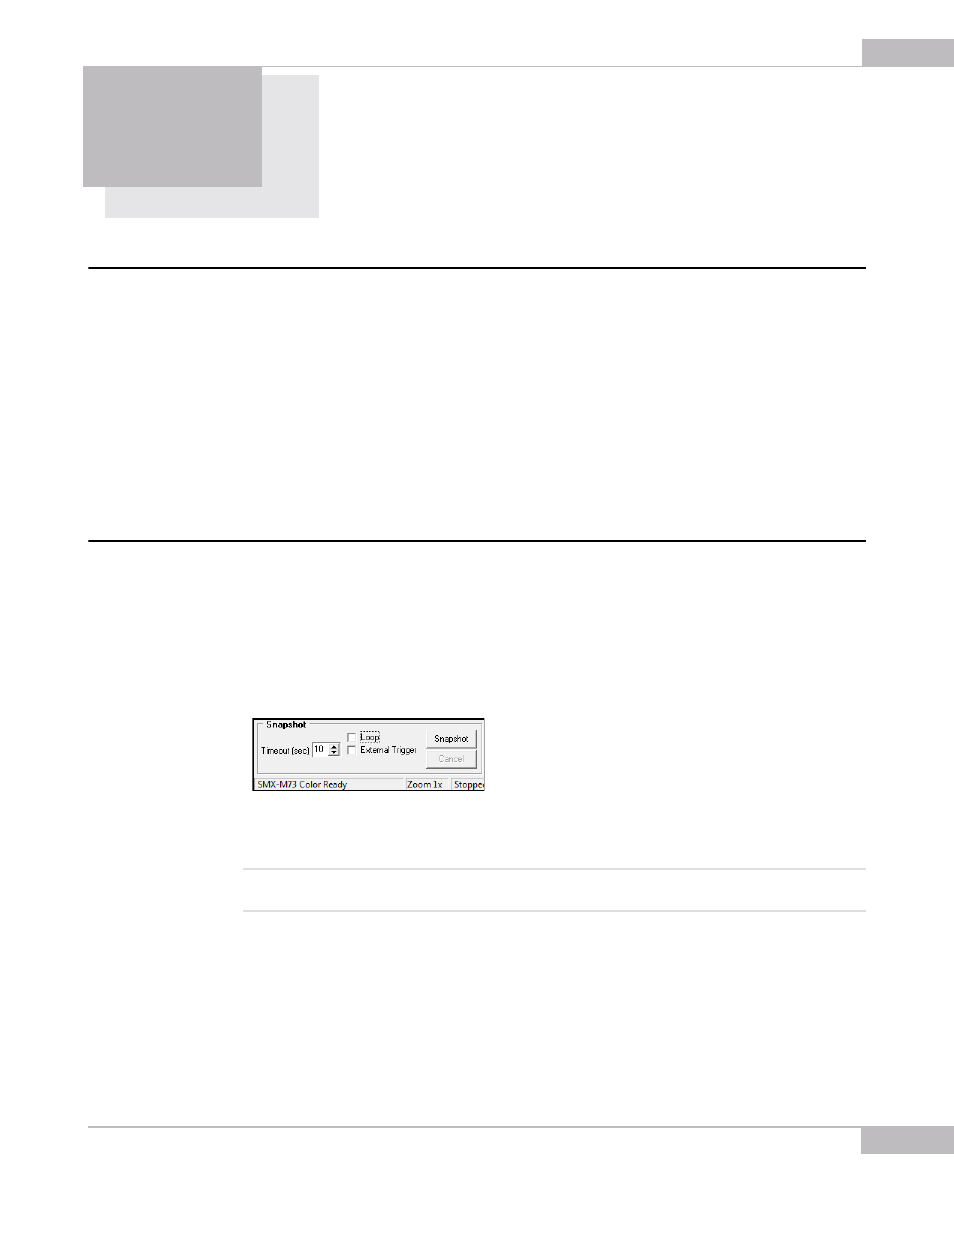
To take a snapshot from the camera, use the Snapshot section of the camera
application main window. Remember that you need to stop video (Shift+F5) before you
turn on the snapshot mode. To start the snapshot process, press the Snapshot button.
Taking Snapshots Using Software Trigger
To make a snapshot using the software trigger:
1
Turn the video mode on (press F5 or the Start Video button in the toolbar).
2
Set exposure, gain, viewport, etc.
3
Turn the video mode off (press Shift+F5 or the Stop Video button in the toolbar).
4
Click the Snapshot button in the Snapshot section of the main window.
Figure 6-1 Making a snapshot using software trigger
5
The Snapshot window will open.
Note:
In the Video mode, the Exposure slider controls the exposure time for the video. When the video is stopped, the
Exposure slider controls the exposure time of the snapshot.
For continuous sequence of snapshots, use the Loop option. The stream of continuous
snapshots will be displayed in the Snapshot window. This mode can be useful to adjust
the picture parameters for the Snapshot mode.
To make a continuous sequence of snapshots:
1
Turn off the video.