Installing s12500-x lpus, Installing an interface module adapter, Installing an s12500-x lpu – H3C Technologies H3C S12500X-AF Series Switches User Manual
Page 28
24
Installing S12500-X LPUs
Installing an interface module adapter
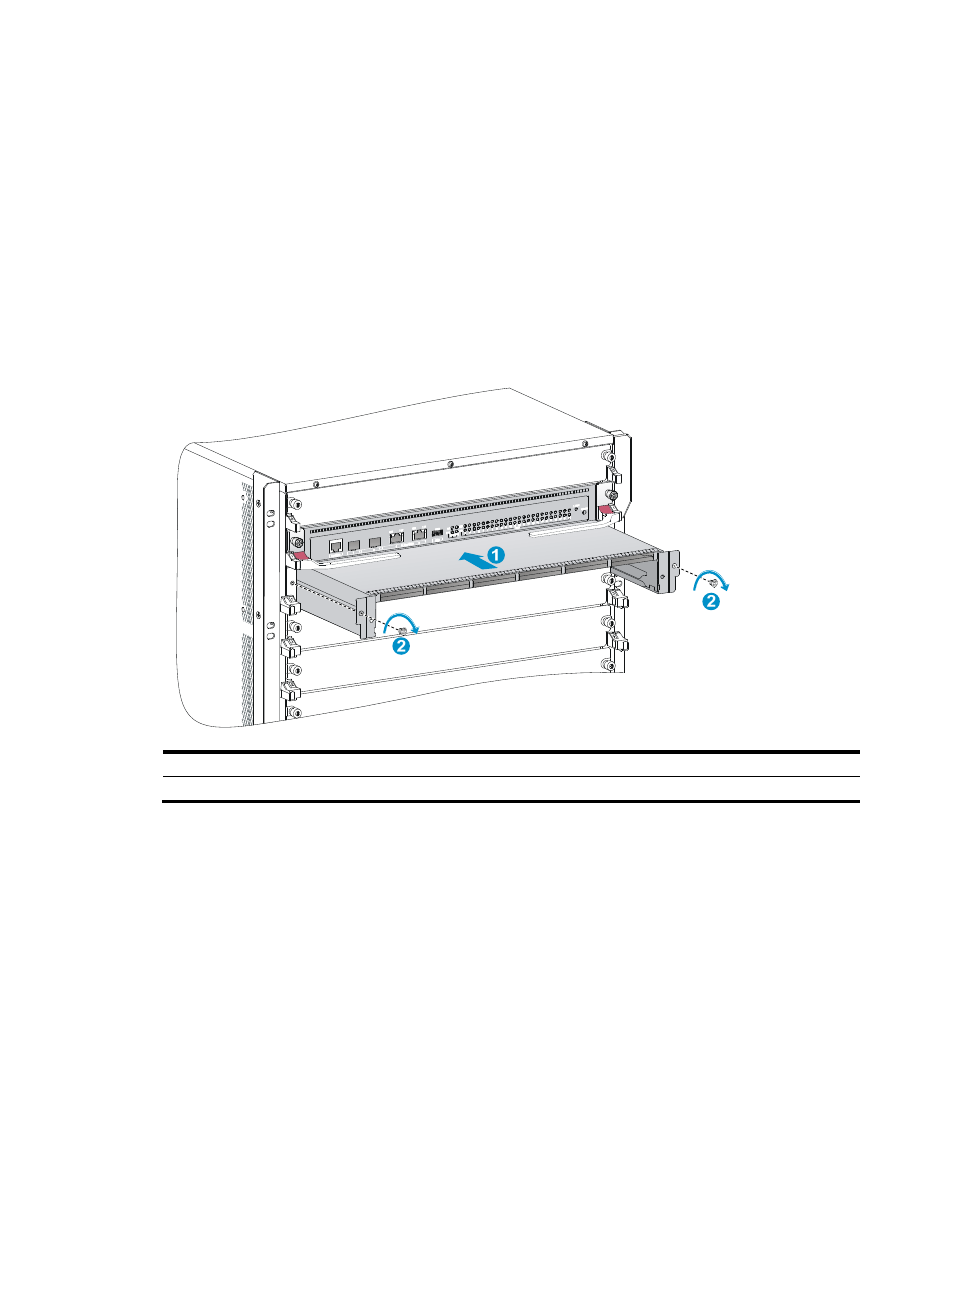
1.
Remove the filler panel from the target slot. See callout 1 in
Keep the removed filler panel secure for future use.
2.
As shown in
, align the adapter rear with the LPU slot and push the adapter slowly
along the guide rails into the slot.
3.
As shown by callout 2 in
, use the screws provided with the interface module adapter to
secure the adapter to the chassis.
Figure 24 Installing an interface module adapter (S12516X-AF switch)
(1) Push the interface module adapter slowly along the guide rails into the slot
(2) Fasten the screws to secure the interface module adapter to the chassis
Installing an S12500-X LPU
The S12500-X LPU edges and the ejector lever seats on the LPU slots have purple marks.
To install an S12500-X LPU:
1.
Loosen the captive screws that secure the LPU to the protection box, pull the ejector levers of the
LPU outward, and pull out the LPU from the protection box. See
.
2.
Hold the LPU by the front panel with one hand and support its bottom with the other. Slide the LPU
steadily into the target slot along the guide rails with the PCB facing up. Do not touch the
components on the PCB. See
Keep the LPU parallel to the slot to avoid touching other components in the chassis.
3.
Pull the ejector levers outward when most of the LPU is inserted into the slot. See callout 2
in
4.
Push the LPU until the brakes on its ejector levers touch the slot edges tightly.
5.
Continue to push the LPU by its middle part on the front panel until you cannot move it.