Installing power modules, Figure 34, Align the positioning pin on the – H3C Technologies H3C S12500X-AF Series Switches User Manual
Page 39: Ut 3 in, Fasten the captive screws on the fan tray
35
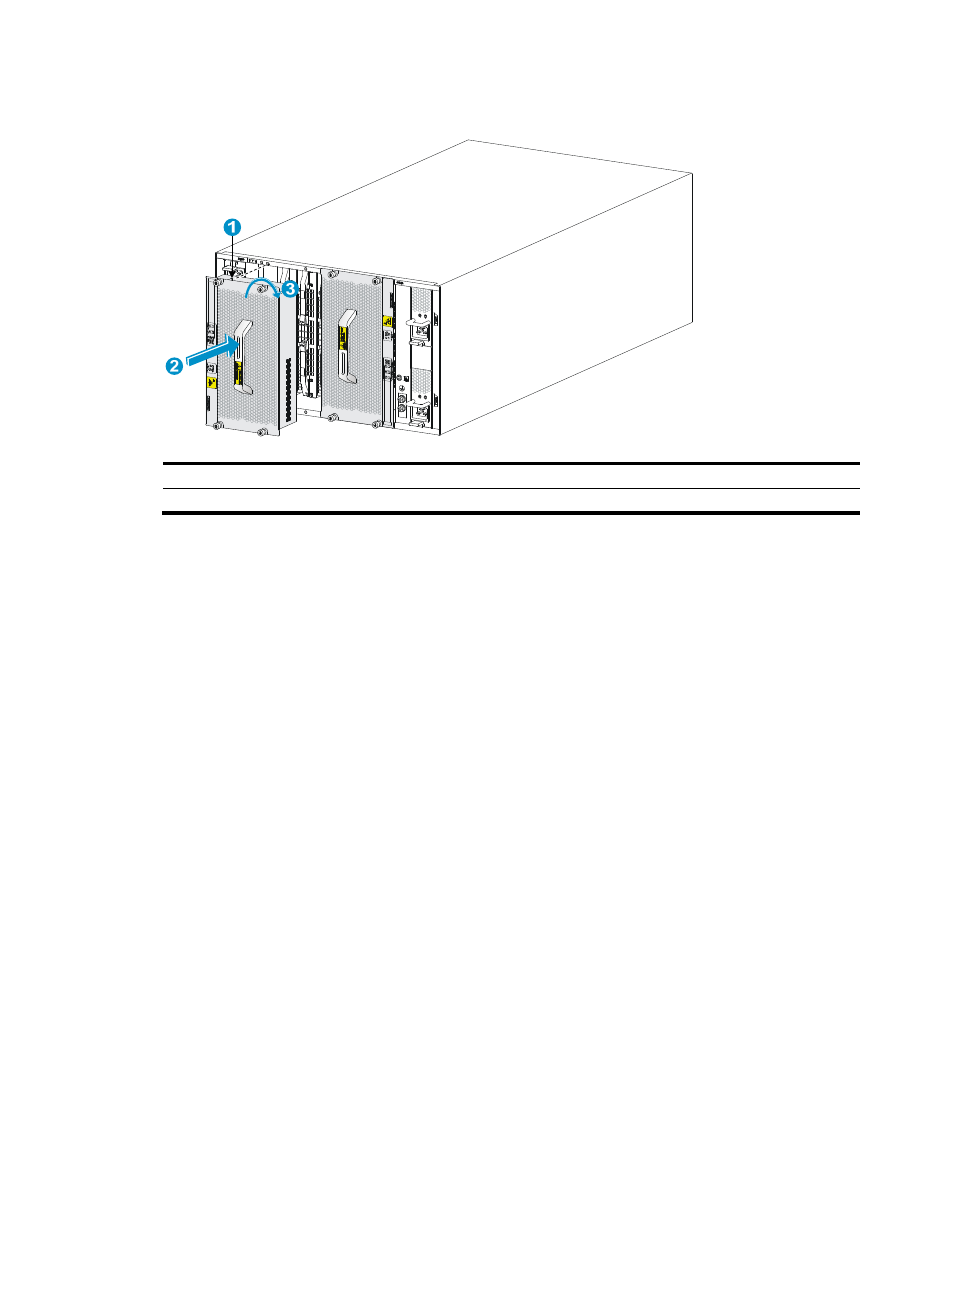
Figure 34 Installing a fan tray for the S12504X-AF switch
(1) Align the positioning pin on the fan tray with the positioning hole in the chassis
(2) Insert the fan tray into the chassis
(3) Fasten the captive screws on the fan tray
Installing power modules
The power module slots are located at the two sides of the rear panel.
To install a power module:
1.
Thread the flat-blade screwdriver through the hole in the handle of the filler panel and pull the
filler panel out. See
.
2.
Correctly orient the power module.
If you install the power module in a left power module slot, make sure the latch is above the
handle. If you install the power module in a right power module slot, make sure the latch is below
the handle.
3.
Holding the handle of the power module with one hand and supporting the bottom of the power
module with the other, slide the power module along the guide rails into the slot until you hear a
click.
The power module is foolproof. If the power module is oriented incorrectly, you cannot install the
power module into the slot. If you encounter a hard resistance while inserting the power module,
pull out the power module, reorient it, and then insert it again.