On-air preview mode and multi-channel mode, Playback operations in the on-air preview mode, On-air preview mode and multi-channel mode" on – Grass Valley K2 Dyno v.1.6 User Manual
Page 73: On-air preview mode and multi-channel
15 April 2010
K2 Dyno Controller User Manual
73
On-air preview mode and multi-channel mode
2. After editing the information by touching each panel, touch
BACK
.
On-air preview mode and multi-channel mode
If two or more channels are assigned as players, you can operate the controller with
the option of the on-air preview and multi-channel modes.
The on-air preview mode is a mode to use one channel as a program channel (a
channel for an on-air broadcast) while using another channel as a preview channel.
While in the multi-channel mode, you can switch operation targets for multiple
channels or synchronize the playback status for multiple channels.
Playback operations in the on-air preview mode
This section describes a flow of playback operations in the on-air preview mode.
NOTE: You must assign channels to be used as program and preview channels to
the
PGM (P1)
and
PVW (P2)
buttons beforehand. For more information, see
"Record train length allocation settings" on page 164
.
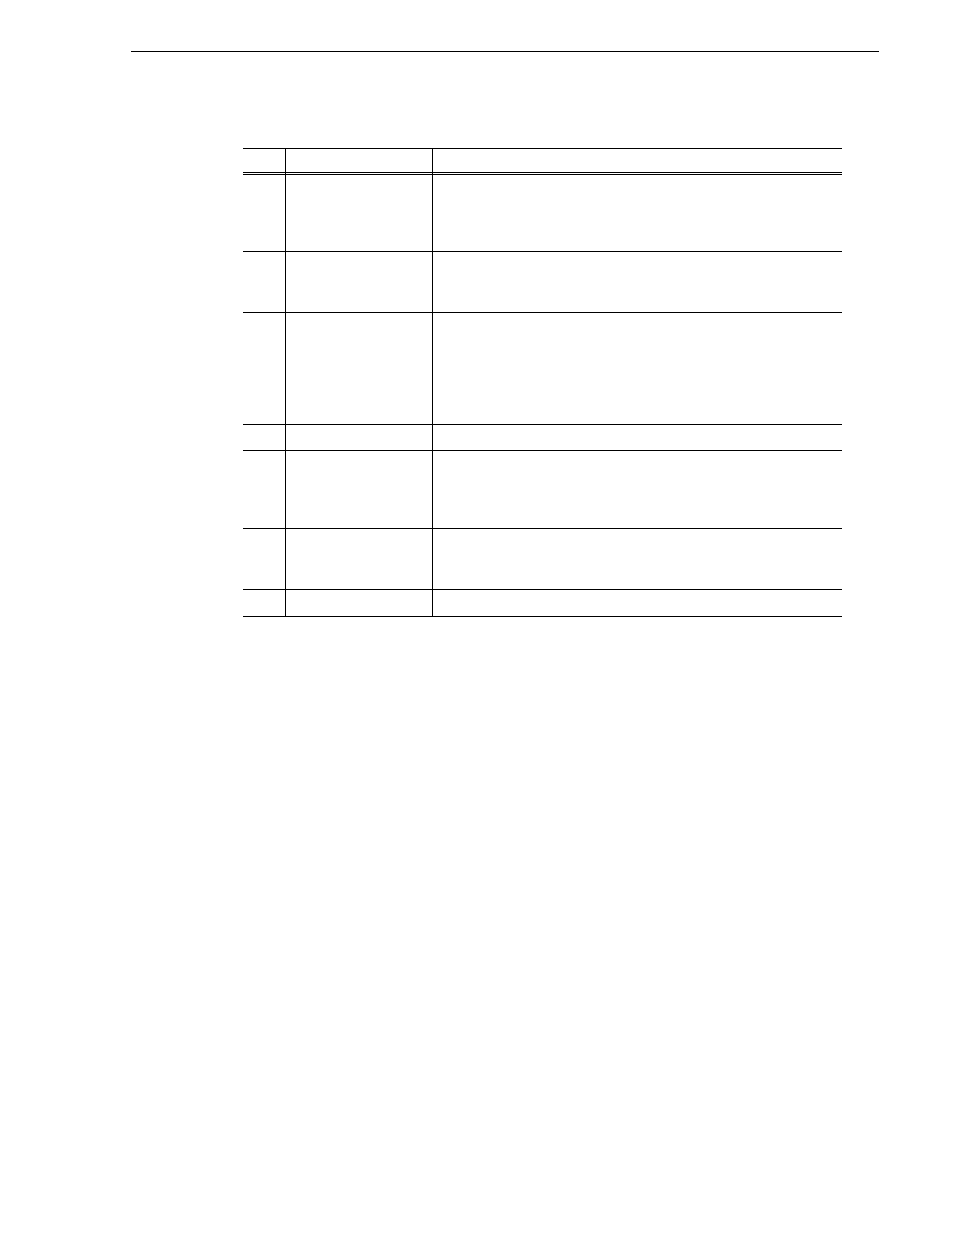
No.
Name
Function
(1)
Channel/Angle
selection
For Recorder channels, select the camera angle for which you are
setting the audio. For Player channels, select the channel for which you
are setting the audio. By default, the player of the operation target
channel is selected.
(2)
Audio track selection
Select the audio track(s) to be set. Touching
ALL
switches between all
selected and all deselected. Multiple selection is also available.
The audio level for each audio track is shown at the bottom.
(3)
Audio level indicator
Shows the audio level and audio track number of the player for the
current playback.
The audio level for the audio track you selected in "PANEL" on the
CONFIG screen is displayed. For information on how to set the audio
track to display, see
"Panel settings (the confirmation dialog setting,
audio level meter setting)" on page 173
(4)
Display All Tracks
Turn this on to display the audio level for all of the audio tracks.
(5)
Level
Set an audio level. Touching up/down
Previous/Next
buttons adjusts
the audio level by 1 dB. You can also enter a value directly by touching
the audio level panel. The value can be set within a range of 20 to -40
dB.
(6)
Mute
Mutes the audio. You can mute the audio without changing the set
values even when the audio levels for the selected channels or audio
tracks are not the same.
(7)
RESET
Restores all the audio levels for the selected audio track(s) to 0 dB.