Attaching and removing the mini-stand – Sony ECM-M1 Compact Camera-Mount Digital Shotgun Microphone User Manual
Page 25
Flash
HVL-F60RM/HVL-F60RM2/HVL-F46RM
Attaching and removing the mini-stand
When you have removed the flash unit from the camera to place and use it alone for wireless flash photography, attach the supplied mini-stand
to the unit.
Note
The illustrations used in this topic are of the HVL-F60RM flash unit.
To attach the mini-stand
To remove the mini-stand
Press and hold the release button, rotate the lock lever away from “LOCK,” and then slide the mini-stand in the opposite direction of the arrow
illustrated in step 3 for attaching the mini-stand.
Hint
HVL-F60RM/HVL-F60RM2:
The mini-stand has 3 shoes on it. By selecting the shoe appropriate for the orientation or tilt angle of the flashlamp, you can still perform bounce flash
photography while the flash unit is attached to the mini-stand.
To attach the mini-stand to this flash unit with the flashlamp tilted sideways to the right, slide the left shoe on the mini-stand onto the Multi Interface foot of
the flash unit as illustrated below. When the flashlamp is tilted sideways to the left, use the right shoe.
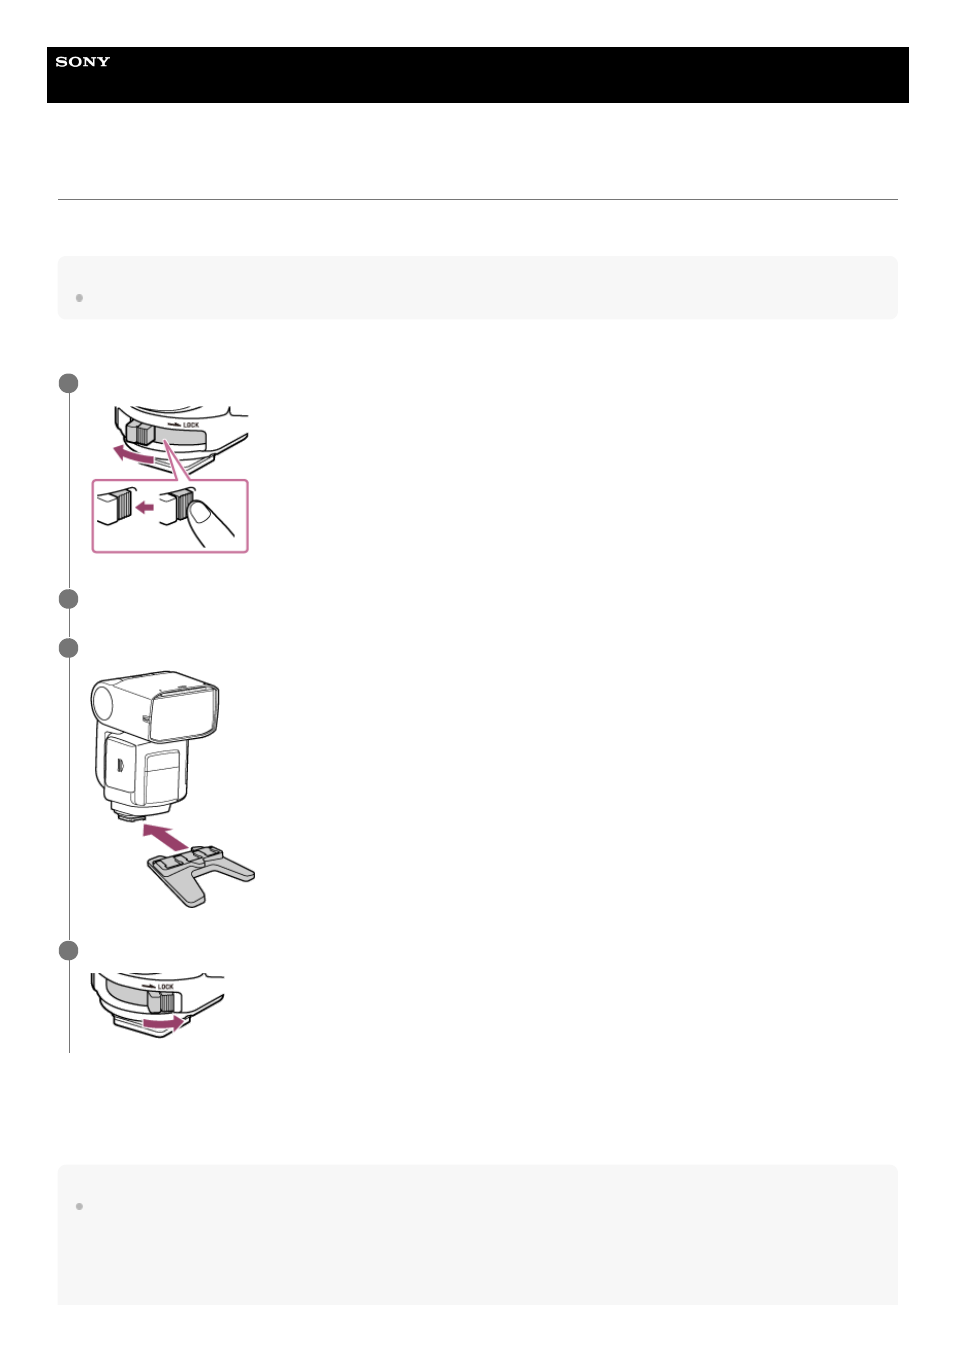
Press and hold the release button and rotate the lock lever away from “LOCK.”
1
Remove the terminal protection cap from the flash unit.
2
Slide the mini-stand onto the Multi Interface foot of the flash unit and push in the stand all the way.
3
Rotate the lock lever toward “LOCK” to secure the flash unit on the camera.
4
25