Rtx220 qr - manual – CRU RTX Secure 610-IR User Manual
Page 15
RTX220 QR - Manual
Page 15
browser. The options for Show on LCM will display the selected
events in the RTX Secure IR’s LCD screen.
Buzzer
To disable the buzzer, place a checkmark next to “Always disable
buzzer,” and click the “Confirm” button at the bottom of the page.
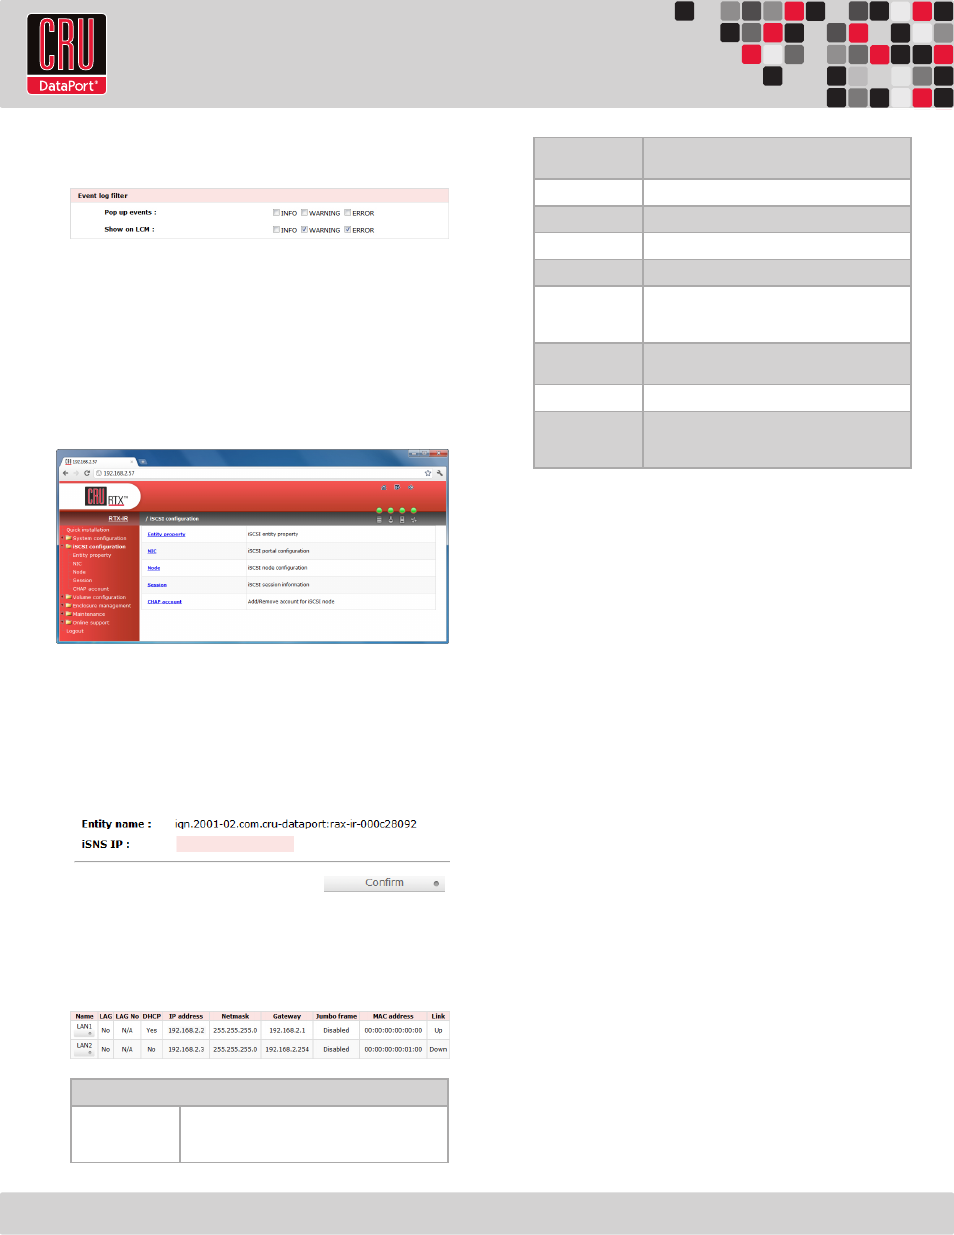
8.6 iSCSI Configuration
The iSCSI configuration menu options are generally used to modify
the connection properties of the RTX Secure. Click on “iSCSI
configuration” to access the following menu options: Entity Property,
NIC, Node, Session, and CHAP Account.
8.6.1 Entity Property
The Entity Property option allows you to add an Internet Storage
Name Service (iSNS) server IP address to the iSNS server group, to
which the iSCSI initiator can send queries. Simply enter the iSNS
IP address in the iSNS IP field and click “Confirm”. Note: Setting an
iSNS is not necessary to use the RTX Secure.
8.6.2 NIC
Click on “NIC” to view the IP settings of the two gigabit Ethernet
data ports. You will see the following information:
NIC Column Descriptions
Name
LAN1 corresponds to the port labeled CH-1 (Channel 1)
on the back of the RTX Secure, while LAN2 corresponds
to the port labeled CH-2 (Channel 2).
LAG
Displays whether Link Aggregation is enabled or
disabled.
LAG NO
Displays the LAG number.
DHCP
Shows whether the channel has DHCP enabled.
IP Address
Displays the IP address currently in use by the channel.
Netmask
Displays the subnet mask being used by the channel.
Gateway
Displays the IP gateway. In a DHCP network, it will
display the IP of the router to which the RTX Secure is
connected.
Jumbo Frame
Displays whether jumbo frames are enabled or dis-
abled. The maximum jumbo frame size is 3900 bytes.
MAC Address
Displays the MAC address of each channel.
Link
Displays the status of each channel. If an Ethernet cable
is connecting the RTX Secure to a network or computer,
the Link will display “Up”.
Hover your mouse cursor over the appropriate button in the
“Name” column to reveal a menu of configurable options.
IP Settings for iSCSI Ports
Click on this option in order to enable DHCP or to manually set
up a channel’s IP Address, Netmask, and Gateway. Fill in the
appropriate information and then click the “Confirm” button.
Set the Default Gateway
Sets the selected channel as the default gateway for the RTX
Secure. To disable the default gateway, hover your mouse cursor
over the appropriate button in the “Name” column again and select
the “Disable default gateway” option. Only one channel can be the
default gateway.
Enable Jumbo Frames
Enables jumbo frames for the associated channel. To disable jumbo
frames, hover your mouse cursor over the appropriate button in
the “Name” column again and select the “Disable jumbo frames”
option. The maximum jumbo frame size is 3900 bytes.
Ping Host
Opens a dialog box in which the user can input the host’s IP
address to initiate a ping test.
8.6.3 Node
The Node option displays the RTX Secure’s entity name, which
will be seen by the iSCSI initiator, and allows you to toggle CHAP
(Challenge Handshake Authorization Protocol) on or off.
CHAP is disabled by default. To turn on CHAP, click the
“Authenticate” button. This will bring up a screen with a dropdown
box. Click the dropdown box and select “CHAP”, then click the
“Confirm” button.