Rtx220 qr - manual – CRU RTX Secure 610-IR User Manual
Page 17
RTX220 QR - Manual
Page 17
Each RAID Group can be divided into several Virtual Disks. The Virtual
Disks in one RAID Group share the same RAID level, but may have
different volume capacity. All Virtual Disks share the Cache Volume
to execute a data transfers. A Logical Unit Number (LUN) is a unique
identifier that the computer uses to distinguish and access SCSI
devices.
8.7.1 Volume Creation Wizard
Click on the “Volume Creation Wizard” option to easily set up your
RTX Secure with a RAID 0, 1, 3, 5, 6, or 0+1 set. For using higher
RAID types or configuring the drives for JBOD access, see Section
8.3.
If any disks are not assigned to a Virtual Disk, it will walk you
through a series of steps to create a RAID set. If there are previous
RAID Group or Virtual Disk configurations present, the wizard may
limit the choices you can select in the following steps.
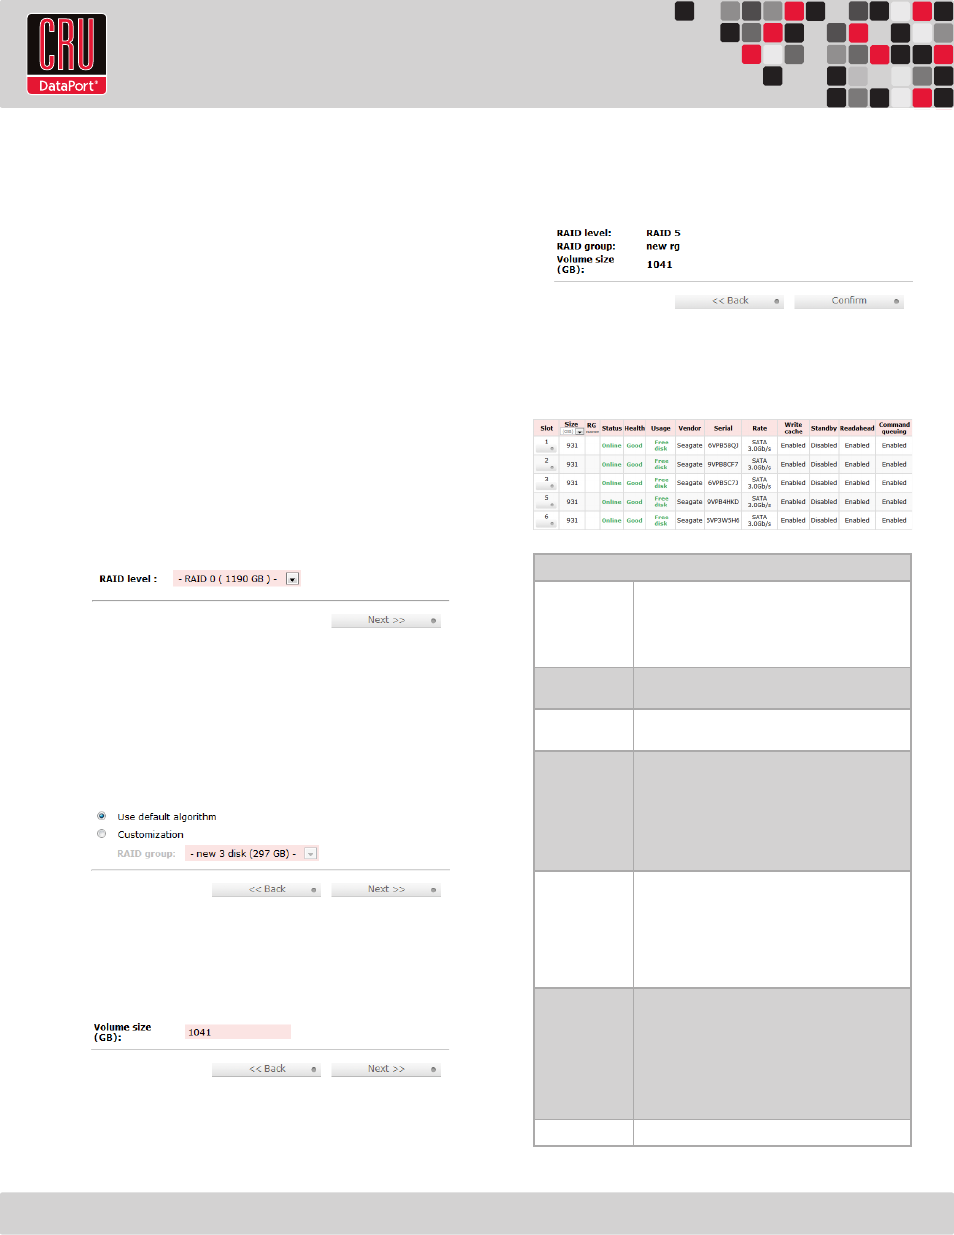
a. Select your desired RAID Level from the drop-down box, then
click the “Next” button. The drop-down box displays the drive
capacity next the RAID Level.
b. Choose how many disks you wish to use in the new RAID
Group. The default algorithm uses all of the disks not already
assigned to a RAID Group. Or you can choose how many
disks you want the new RAID Group to use by selecting the
“Customization” radio button and then using the drop-down box
to select the number of disks. The drop-down box displays the
drive capacity next the number of disks.
c. On the next screen, fill in the size in MB for how large you want
the new RAID Group to be, then click the “Next” button. The
maximum size is filled in by the wizard automatically, so in most
cases you simply need to click the “Next” button.
d. Step 4 summarizes the choices you have made. If anything is
incorrect, select the “Back” button and navigate backwards
through the steps to change your options. If everything looks
fine, click “Confirm.” The GUI will navigate to the Virtual Disk
page which now shows a new Virtual Disk with the name
similar to “QUICK#####”. Your Virtual Disk is now initializing
and may take several hours to complete.
8.7.2 Physical Disk
Click the Physical Disk option to view and modify the status of the
drives installed in the RTX Secure.
Physical Disk Column Descriptions
Slot
The slot number of the hard drive. “1” corresponds to the
top bay of the RTX Secure, “8” to the bottom bay. Hover
your mouse cursor over the button below the slot number
to bring up configuration options for that particular hard
drive, which are detailed below.
Size
The logical capacity of the drive. Can be displayed in
megabytes (MB) or gigabytes (GB).
RG Name
The name of the RAID Group to which the drive is as-
signed, if any.
Status
Displays the operational status of the disk.
•
Online
→
The hard drive is online.
•
Rebuilding
→ The hard drive is being rebuilt.
•
Transitioning
→ The hard drive is being migrated
or is being replaced by another disk during rebuild-
ing.
•
Scrubbing
→ The hard drive is being scrubbed.
Health
Displays general operational health of the disk.
•
Good
→ The hard drive is good.
•
Failed
→ The hard drive has failed.
•
Error Alert
→ The hard drive’s S.M.A.R.T. monitor-
ing system is reporting an error.
•
Read Errors
→ The hard drive has unrecoverable
read errors.
Usage
Displays how the disk is currently being used.
•
RAID Disk (RD)
→ The hard drive has been as-
signed to a RAID Group.
•
Free Disk (FD)
→ The hard drive is free for use.
•
Dedicated Spare (DS)
→ The hard drive has been
set as a dedicated spare of a RAID Group.
•
Global Spare (GS)
→ The hard drive has been set
as a global spare of all RAID Groups.
Vendor
Displays the manufacturer of the hard drive.