3 settings window – Doremi GHX-10 User Manual
Page 25
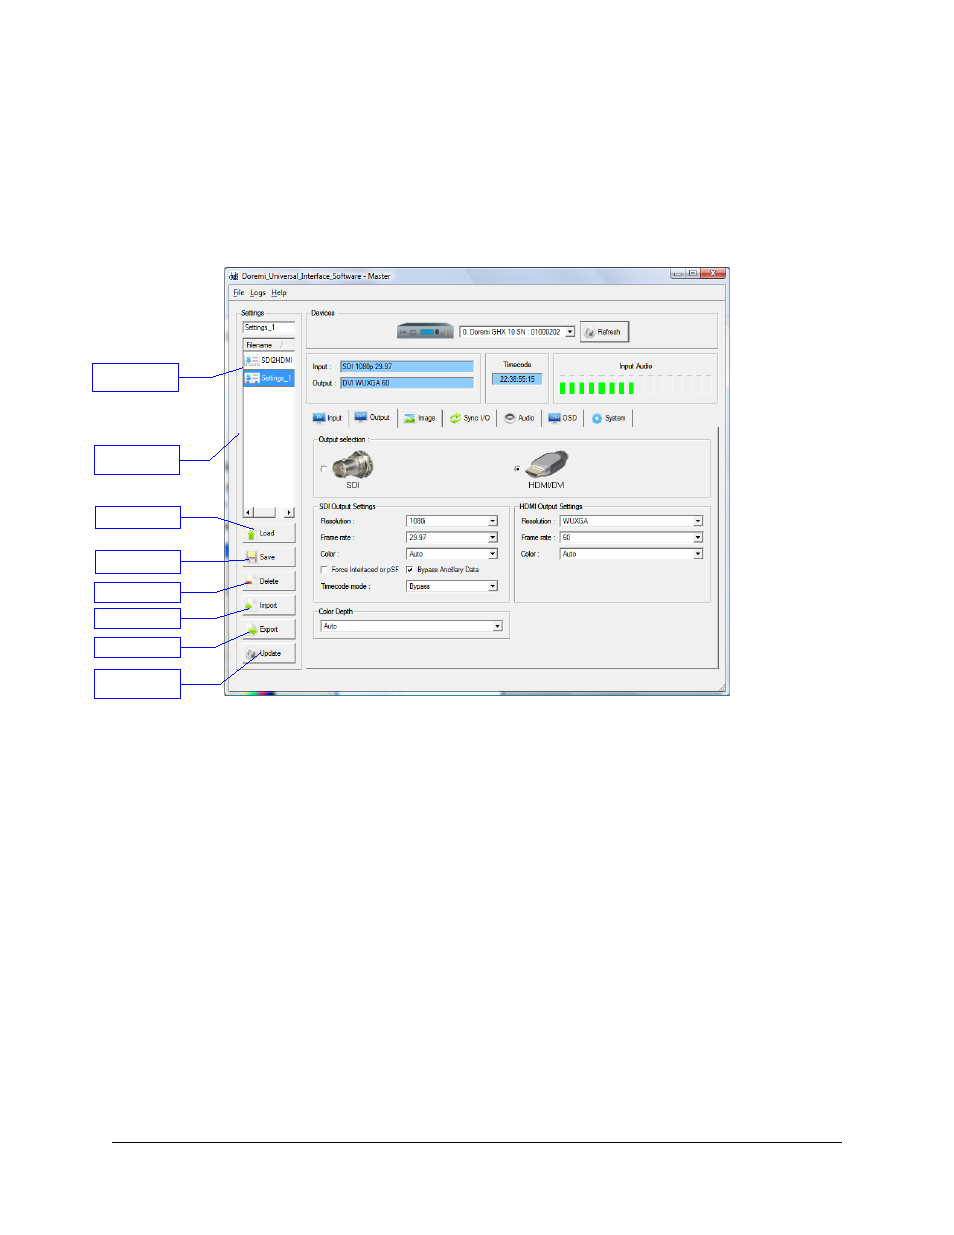
5.3 Settings Window
The “Settings” window can be used to manage settings files
•
To save the current duis settings into a file, enter a settings filename in the top left
corner field as shown in below, then click on “Save”.
The saved settings file should appear in the “Settings” window:
Figure 10: duis – Settings Section
•
To export this saved “settings file” so you can use it for another GHX-10 device, select it
in the “Settings files” area – see figure above – and click on the “Export” button. You
should be asked to confirm where you want to export this file using a standard “Save as”
dialog box.
•
To import an existing “settings file” from a .ghx file to the connected unit click on the
“Import” button. Then browse the files to select the appropriate “settings file” you want to
import. The imported file should appear in the “Settings files” area on the left part of the
GUI. To apply the settings to the connected GHX-10 unit, you need to select this file
then click on the “Load” button. The GHX-10 settings should be updated.
•
To delete a settings file present in the “Settings files” area – see figure above – select it
and click on the “Delete” button.
•
Click on the “Update” button to update the “Settings” window to reflect the content of the
“User Settings” folder of the duis (folder where all the settings files are stored).
GHX.OM.000510.DRM
Page 25
Version 2.2
Doremi Labs
“Settings file”
saved
“Settings files”
area
“Load” button
“Save” button
“Delete” button
“Import” button
“Export” button
“Update”
button