Digi-Star Diet Manager Set-up & User Guide User Manual
Page 15
Diet Manager
D3651US-D
11
Receive Data Options
Use Defualt File Name – When this option is checked, the file name will be saved using that days date.
When it is not check, you may enter a name for the file.
Verify Date of Feed Data – When the option is checked, the date of the feed data coming back from the
EZ3500/EZ4300 will be compaired to the computers date. If the date does not match, you are given the
option to change the date of the feed data.
Notify of Feed Call Change – When this option is checked, a warning window will appear showing you
that the operator made a change to the planed weight to be feed to that corral.
Display Data After Received – When this option is checked, a text file will appear of the raw feed data
from the Datakey.
Create Backup Copy – When this option is checked, Diet Manager will create a backup file in the History
folder in the Diet Manager folder: C:\Diet_Manager\History*
Verify Operator ID – When this option is checked, if an operator ID number is not entered correctly at the
EZ3500\EZ4300 an warning window will appear notifying you of the error.
When done, click Save Settings to save your entries.
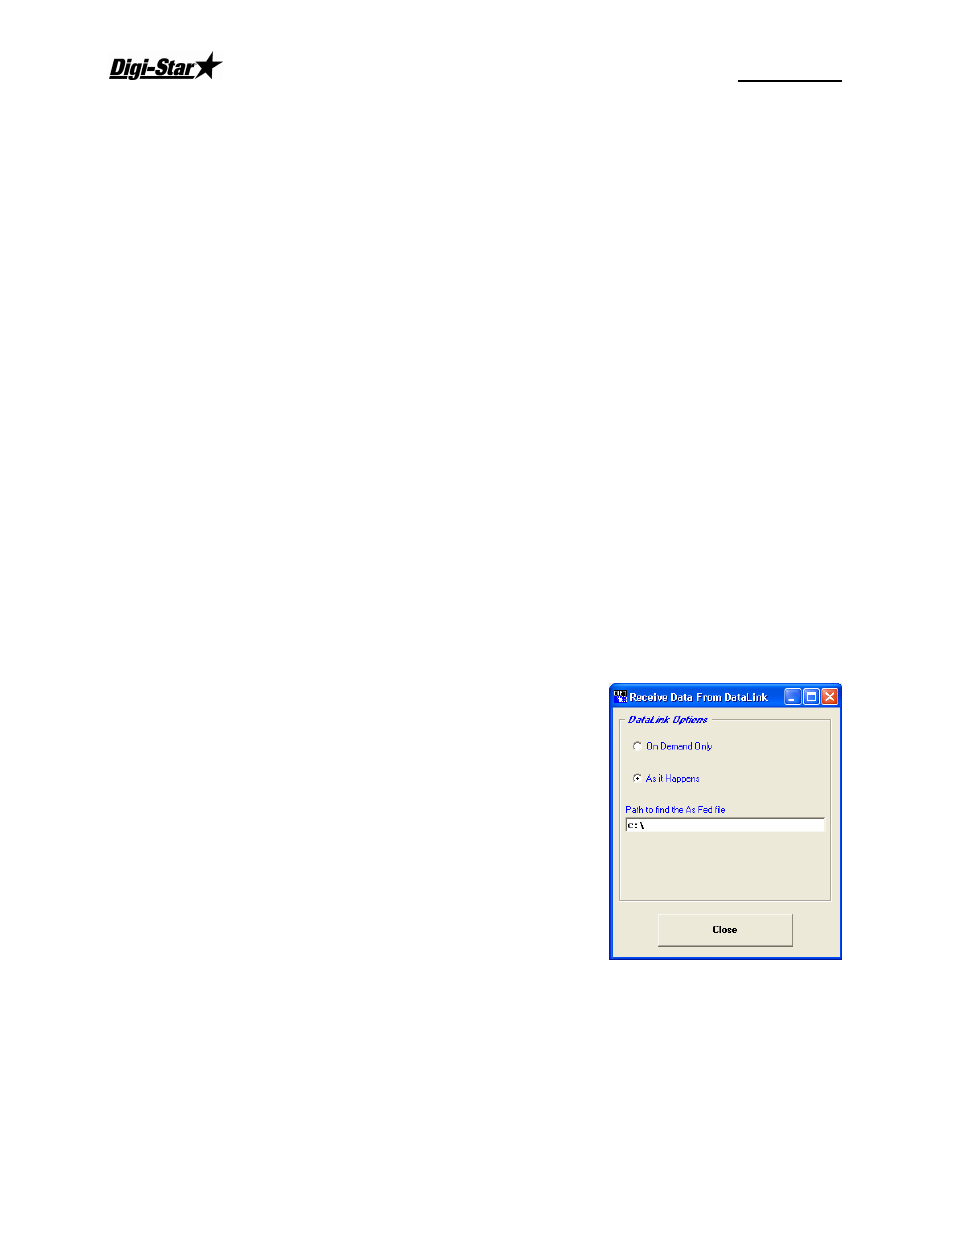
Receive Data from RF Datalink
To access the Receive Data screen, select the Receive Data screen.
Enter the file path to receive the data from RF Datalink. Normally set to C:\
Select how the data needs to be received.
On Demand - By clicking on receive data.
As it Happens - Whenever new data is available, Diet manager will
upload into the databases.