DR Power 30 Snow Thrower User Manual
Page 14
10 DR
®
SNOW THROWER ATTACHMENT
•
WEAR EYE PROTECTION WHEN CUTTING THE BANDING. THE BANDING IS UNDER HIGH TENSION
AND MAY SNAP AND STRIKE YOU WHEN CUT. STAND TO ONE SIDE WHEN CUTTING THE
BANDING.
•
STABILIZE THE SHIPPING CONTAINER ON CLEAN FLAT TERRAIN BEFORE ATTEMPTING TO UNPACK
AND ASSEMBLE THE MACHINE.
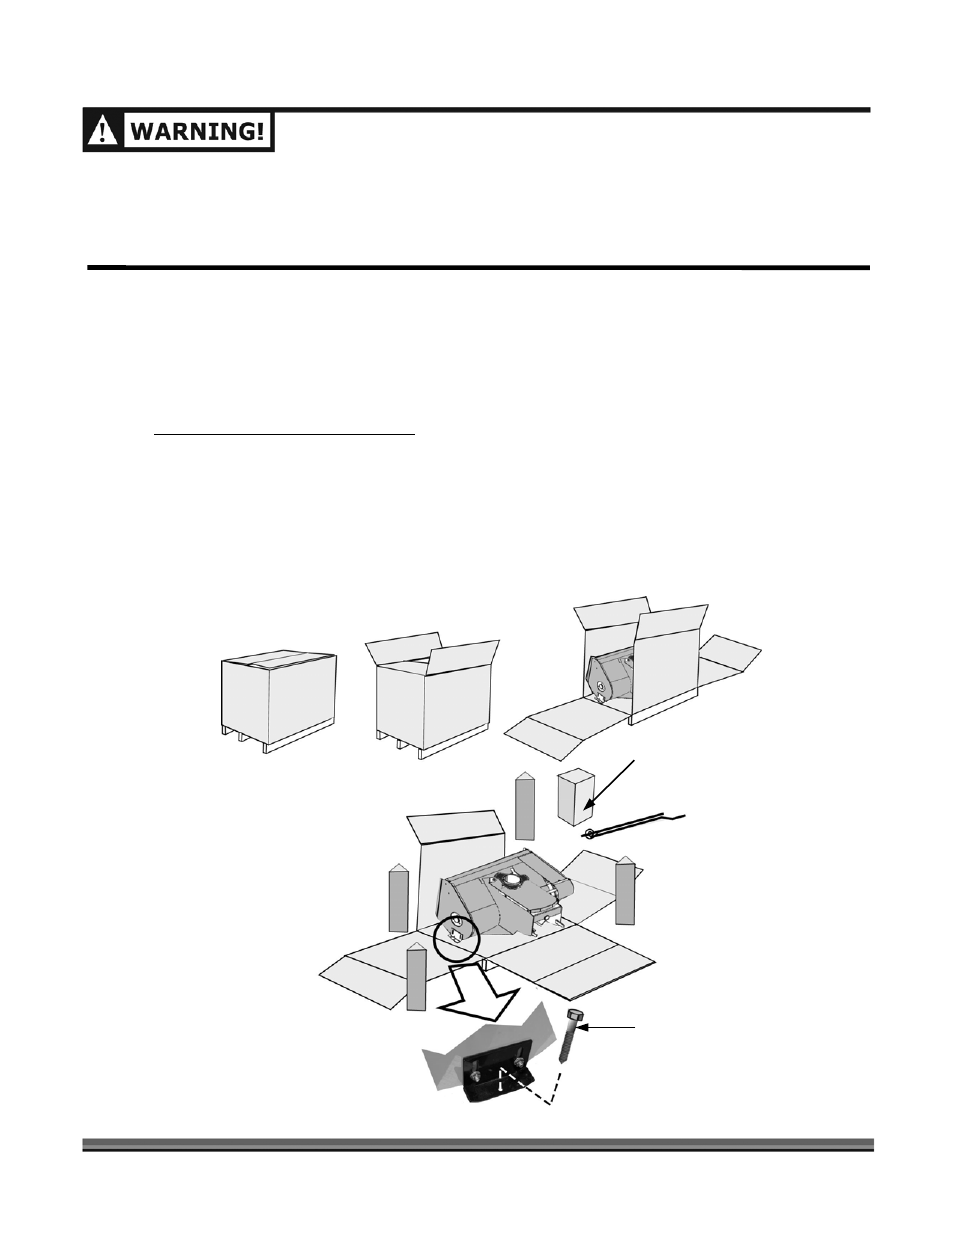
1. Stand to one side and cut the banding around the carton.
2. Open the top of the stapled cardboard carton (Figure 1) and fold the sides down. The staples are
sharp so be careful.
3. Remove the Parts Box containing the Chute and assorted hardware (Figure 1).
4. Stand to one side and cut the banding holding the machine to the pallet.
Be careful when cutting the banding.
5. Using a 7/16" Wrench or Socket, remove the two (2) Lag Bolts (one on each side) that retain the
Housing on the pallet (Figure 1).
6. With the help of another person, lift the snow thrower from the pallet.
7. Compare the contents of the shipping container and Parts Box with the Parts Supplied list on the
previous page. If any of the parts are missing, contact 1-800-DR-OWNER (376-9637). Do not
discard your packaging material until you are fully satisfied with your new DR SNOW THROWER
ATTACHMENT.
Figure 1
Parts Box
Lag Bolt, 1 each side