Adjusting the skid shoes – DR Power 30 Snow Thrower User Manual
Page 24
20 DR
®
SNOW THROWER ATTACHMENT
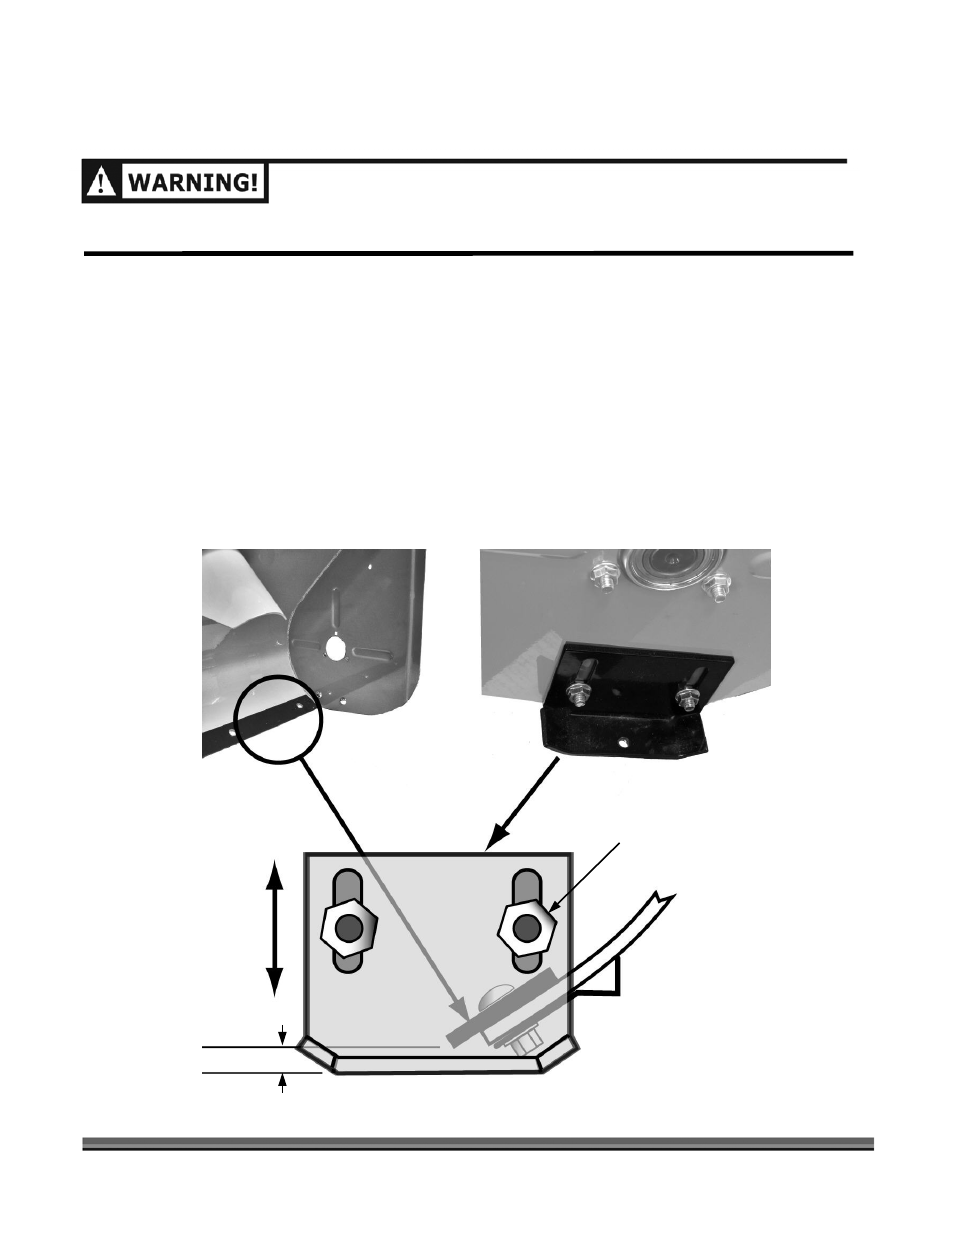
Adjusting the Skid Shoes
BEFORE ADJUSTING THE SKID SHOES, ALWAYS STOP THE ENGINE, SET THE PARKING BRAKE, AND
REMOVE THE SPARK PLUG WIRE(S), KEEPING IT AWAY FROM THE SPARK PLUG(S).
Adjust the Skid Shoes in order to allow the required clearance (H) between the Cutting Edge of the Snow
Thrower and the surface that you are cleaning (Figure 14). For a level paved or cement surface, the
clearance (H) should be 1/16" to 1/8". For a gravel or uneven surface, depending the gravel size, the
clearance (H) should be 1/2" to 5/8".
Tool Needed:
•
1/2" Wrench or Socket
1. Using a 1/2" Wrench or Socket, loosen the two (2) Nuts on the 5/16" x 5/8" Carriage Bolts that
retain the Skid Shoe (Figure 14). For ease of adjustment, loosen only one side at a time.
2. Adjust the Skid Shoe to the required height (H) and tighten the Nuts (Figure 14).
3. Repeat steps 1 and 2 for the Skid Shoe on the other side of the Snow Thrower.
Skid Shoe
Cutting Edge
Ground Surface
Figure 14
Cutting Edge
Skid Shoe
5/16" Carriage Bolt and Nut
(2 places)
Snow Thrower
Housing
(inside)
Snow Thrower
Housing
(outside)
H