Attaching the discharge chute – DR Power 30 Snow Thrower User Manual
Page 15
CALL
TOLL
FREE
1-800-DR-OWNER 11
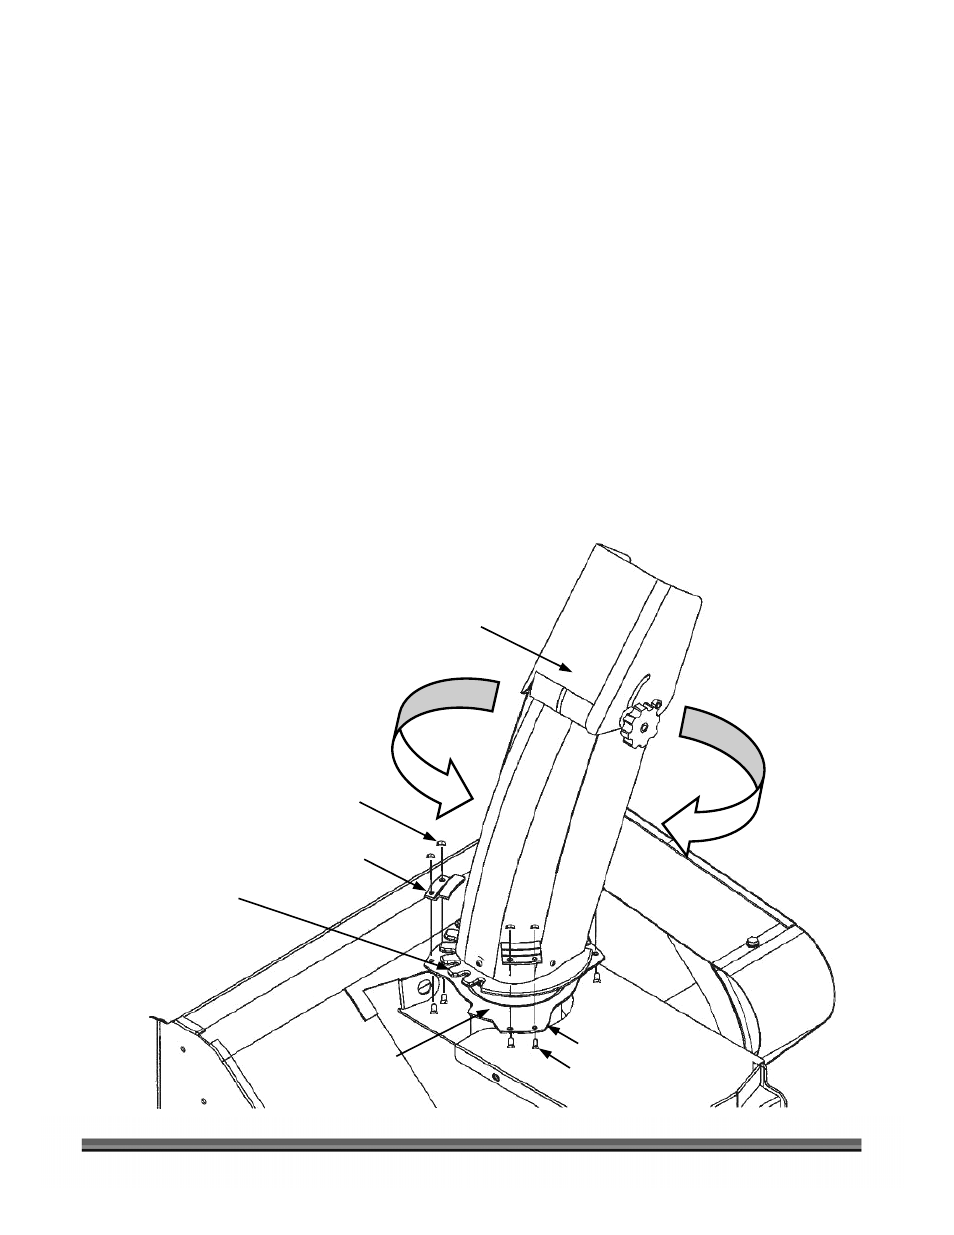
Attaching the Discharge Chute
For assembly, place the DR SNOW THROWER ATTACHMENT on a flat and level surface.
Tools and Supplies Needed:
•
(2) 7/16" Wrench or Socket
•
General Purpose Petroleum Based Grease
1. Place the Chute Base Washer over the Discharge Hole.
2. Apply a thin film of
General Purpose Petroleum Based Grease to both sides (top and bottom)
of the Chute Gear
(Figure 2).
3. Then place the Discharge Chute, with the Chute Base Washer around the Discharge Hole under the
Chute Base, on top of the DR SNOW THROWER ATTACHMENT Housing (Figure 2).
4. Align the two (2) holes in the Retaining Plate with the holes in the top of the Housing and secure in
place using two (2) 1/4" x 1/2" Bolts and Flange Nuts (Figure 2).
5. Repeat Step 3 for the remaining two (2) Retaining Plates (Figure 2).
6. Tighten the Bolts and Nuts using two (2) 7/16" Wrenches.
7. Verify that the Discharge Chute will rotate freely (Figure 2).
Figure 2
Discharge Chute
Nut (6 pls.)
Retaining Plate (3 pls.)
Bolt (6 pls.)
Housing
Rotates Freely
Chute Base Washer here
(not shown)
Chute Gear
(Grease on
both sides)