Snow removal methods, Cold weather operation – DR Power 30 Snow Thrower User Manual
Page 27
CALL
TOLL
FREE
1-800-DR-OWNER 23
Snow Removal Methods
A definite pattern of operation is required to thoroughly clean an area of snow. These patterns will avoid
throwing snow in unwanted places as well as eliminating a second removal of snow.
RUN THE DR SNOW THROWER ATTACHMENT A FEW MINUTES AFTER THROWING SNOW TO PREVENT
THE AUGER FROM FREEZING UP.
Cold Weather Operation
At temperatures below 30°F and a high dew point, your DR FIELD and BRUSH MOWER engine may
experience icing of the carburetor and/or the crankcase breather system. Country Home Products, Inc.
offers an optional engine cover to prevent icing in these weather conditions. You can purchase the cover
through Country Home Products, Inc. by calling 1-800-DR-OWNER (376-9637). Please have your DR
FIELD and BRUSH MOWER Model# and Serial# on hand when the call is placed.
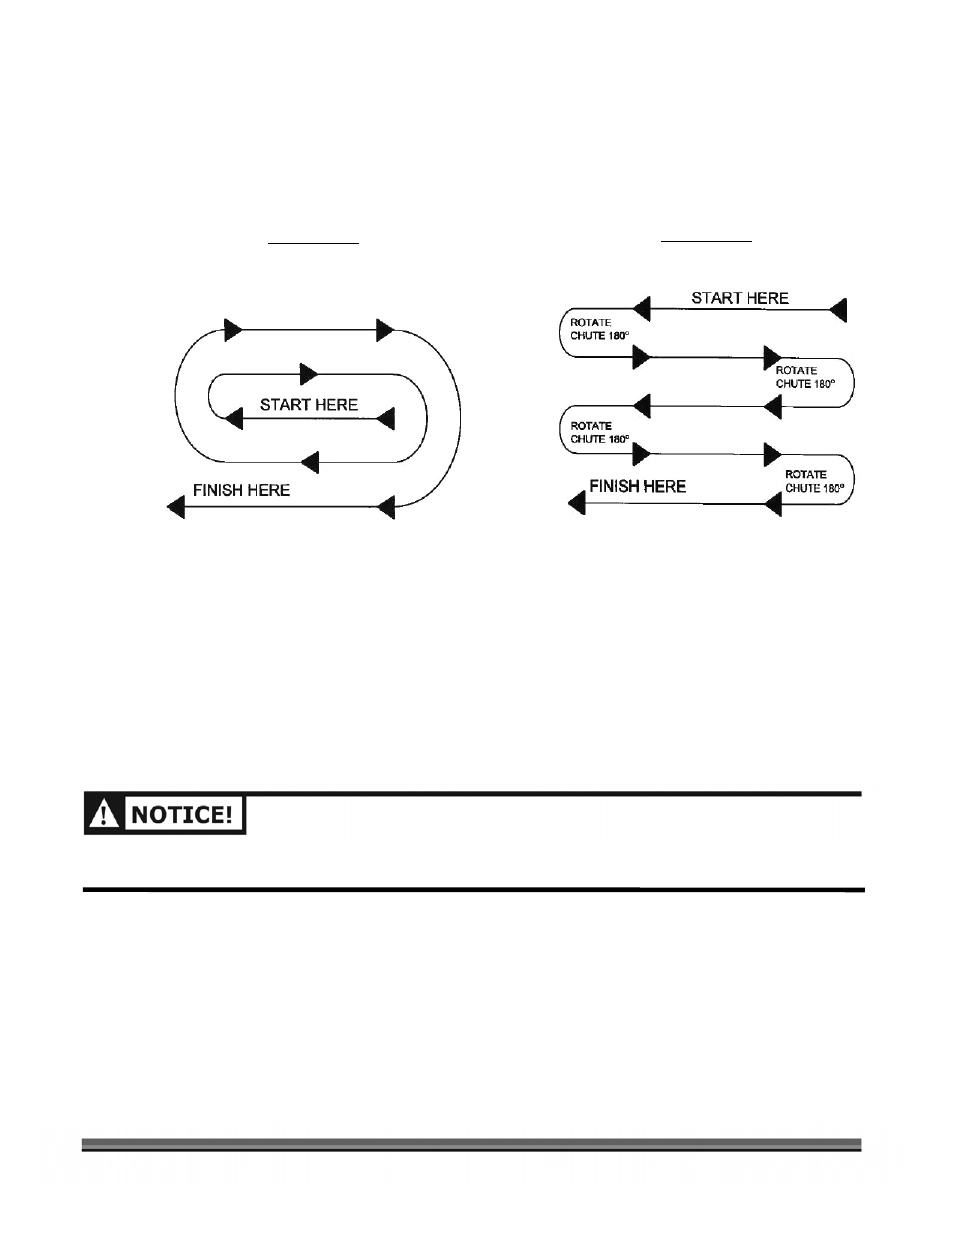
PATTERN 1
DISCHARGE SNOW TO BOTH SIDES
DISCHARGE SNOW TO BOTH SIDES
Where it is possible to throw the snow to the left
and right (above), as on a long driveway, it is
advantageous to start in the middle, working from
one end of the driveway to the other. This allows
you to throw the snow to both sides of the driveway
without changing the direction of the Discharge
Chute. In the example above, the Discharge Chute
will be pointing to the left.
PATTERN 2
DISCHARGE SNOW THIS SIDE ONLY
If you can only throw the snow to one side of the
driveway or sidewalk (above), start on the opposite
side. At the end of the first pass, rotate the
Discharge Chute 180 degrees for the return pass.
At the end of each succeeding pass, rotate the
Discharge Chute 180 degrees to maintain the
direction of the throw in the same area.