Unpacking the mower – DR Power Walk-behind 12.5 HP Tecumseh with 42 Lawn Deck User Manual
Page 17
CONTACT US AT
www.DRPower.com
or CALL TOLL FREE 1-800-DR-OWNER 13
Unpacking the Mower
Tools & Supplies Needed:
•
Eye Protection
•
Side Cutters & Box Cutter
•
Hammer
•
Gloves
•
THE BANDING IS UNDER TENSION AND MAY SNAP
AND CUT YOU. ALWAYS STAND TO ONE SIDE
WHEN CUTTING THE BAND.
•
WEAR GLOVES AT ALL TIMES. BE VERY CAREFUL OF
THE STAPLES. ALSO, BE VERY CAREFUL WHEN
HANDLING THE DECK. THE BLADES ARE VERY SHARP,
AND MAY SPIN AS YOU MANEUVER THE DECK.
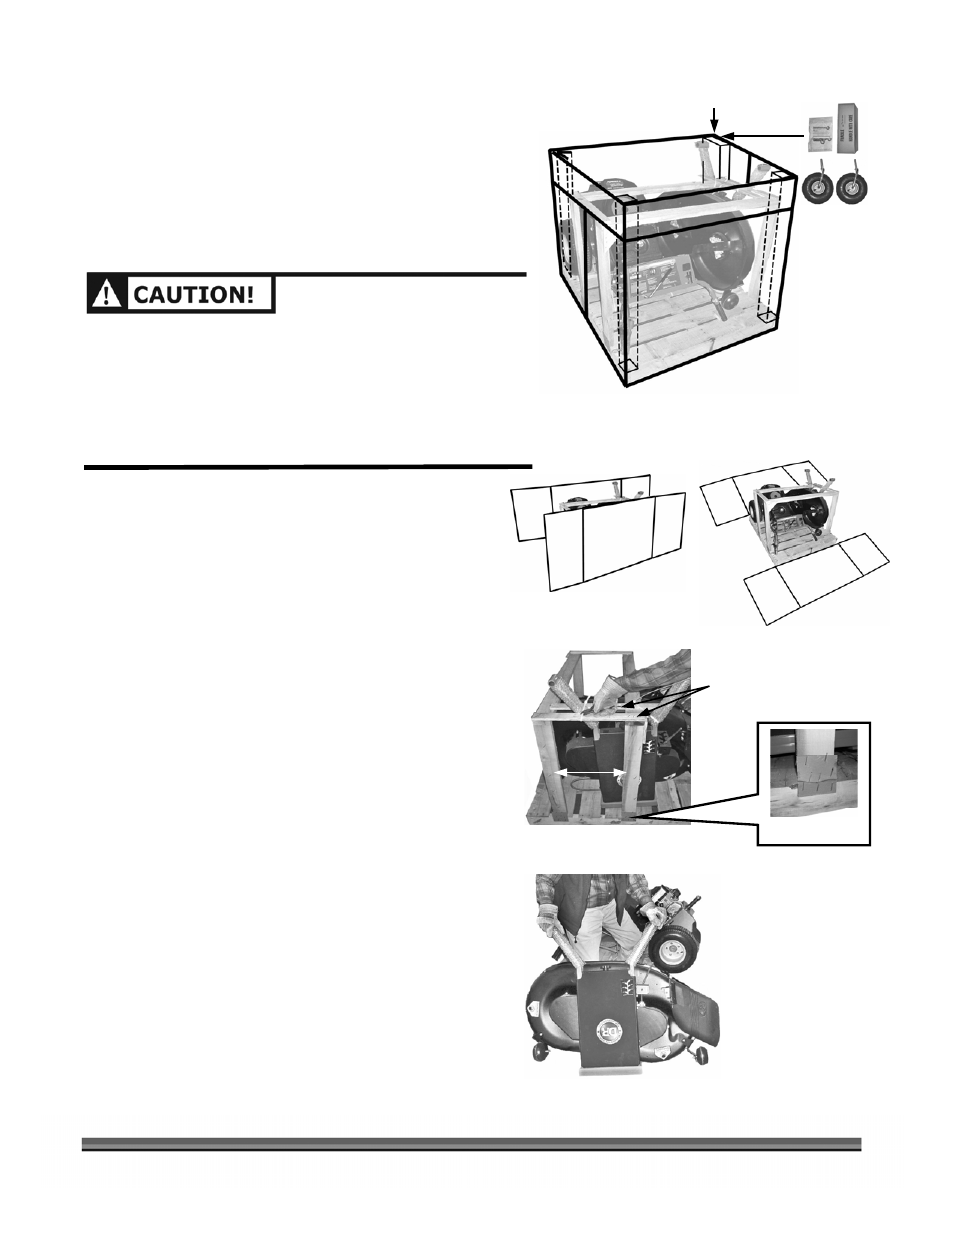
1. Stand to one side, cut the carton banding, and
remove the top of the carton.
2. Remove the Small Parts/Product Package, Caster
Wheels, and Mulching Kit from the Right Front
Corner Support (Figure 2a).
3. Pry open the Left Seam and pull the Panels
outward as shown (Figure 2b). Repeat for the
Right Seam and pull the Sides down.
4. Cut the Ties holding the Lawn Deck to the Pallet
and Wood Supports (Figure 2c) and remove the
two (2) Wood Cross Pieces that retain the Lawn
Deck Caster Arms.
5. Cut the Right Cardboard Connectors at the base
of the Wood Supports (Figure 2c) and tip the
Supports up and over to the Left side of the Pallet.
6. Cut the Left Cardboard Connectors and remove
the Supports from the Pallet.
7. Carefully move the Lawn Deck off the Pallet and
rest it on the Rear Casters. Move behind the
Deck and, using the Caster Arms, roll the Deck
away (Figure 2d).
8. Cut the Ties holding the Machine to the Pallet,
move the Shift Lever to Neutral, release the
Parking Brake (Figure 1 on page 11) and roll the
Machine off the Pallet. Do not discard the
Cardboard and Pallet until you are fully satisfied
with your new DR WIDE-CUT LAWN MOWER.
Rear
Left
Right
Front
Figure 2a
Figure 2b
Figure 2c
Cross Pieces
Connector
Supports
Figure 2d
Left Right
Corner Support