DR Power Walk-behind 12.5 HP Tecumseh with 42 Lawn Deck User Manual
Page 35
CONTACT US AT
www.DRPower.com
or CALL TOLL FREE 1-800-DR-OWNER 31
To Replace the Drive Belt
BEFORE PERFORMING ANY MAINTENANCE PROCEDURE OR INSPECTION, STOP THE ENGINE AND WAIT
FIVE (5) MINUTES TO ALLOW ALL PARTS TO COOL. DISCONNECT THE SPARK PLUG WIRE, KEEPING IT
AWAY FROM THE SPARK PLUG.
USE ONLY DR BELTS ON YOUR MACHINE. THEY HAVE BEEN THOROUGHLY TESTED AND PROVEN FOR
MANY HOURS OF USE.
Tools Needed:
•
7/16" Socket
•
(2) 1/2" Wrenches
•
9/16" Wrench
•
Gloves
1. Drain the gas and oil.
2. Remove the Deck Belt following the instructions as outlined on
the previous page.
3. Remove the Retaining Pin and Collar (Figure 6 on page 15), and
then pull the machine away from the Deck.
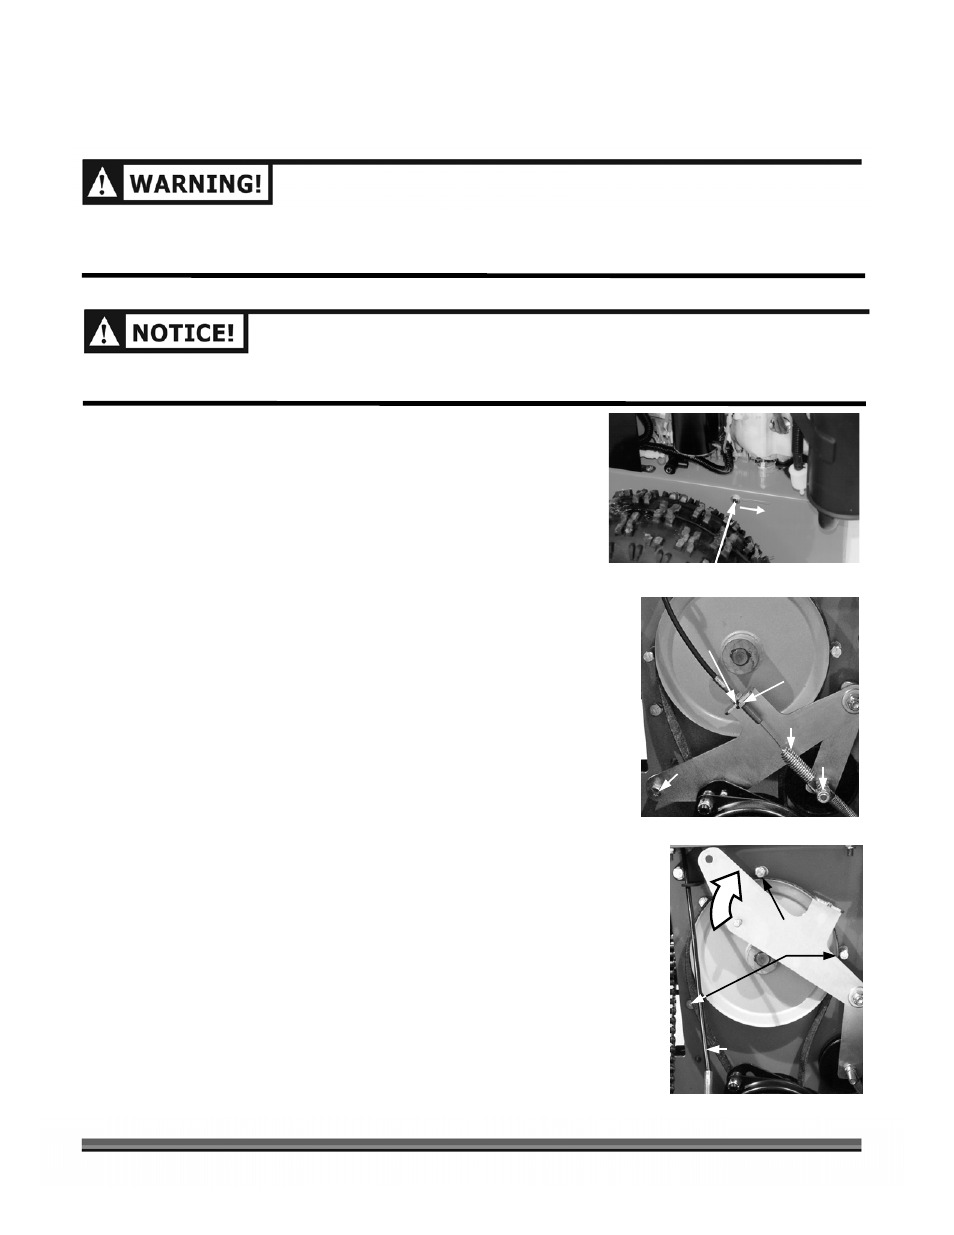
4. Loosen the Belt Retainer Bolts on the outside of the Frame (one
on each side), slide the Retainer back (Figure 19),
5. Gently tilt the machine forward onto the Attachment Pin.
6. Remove the Bolt on the Bracket (Figure 20). Also, remove the
Bushing on that Bolt and the Nut (Top Side of the Frame).
7. Remove the Top Spring Retainer Nut and then lift the Spring off
the Bolt (Figure 20).
8. Using two (2) 1/2" Wrenches, remove the lower Cable Adjuster
Nut and slide the Adjuster out of the Bracket removing the Cable
out through the Slot in the Bracket (Figure 20).
9. The Bracket is now loose. Tilt it to swing it up out of the way
(Figure 21).
10. Remove the three (3) Belt Guides (Figure 21) and remove the
Belt.
11. To mount the new Belt, reverse the above procedure.
NOTE: Attempt to re-install the Cable Adjuster in the same location. See
“Checking the Wheel Clutch engagement” on page 20.
Figure 19
Figure 20
Remove Belt
Guides
Bracket
Slot
Spring
Loosen Bolt and Slide Back
Figure 21
Bolt
& Bushing
Top
Nut
Cable
Adjuster
Nut
Cable Removed