Regular maintenance checklist, Replacing the mow-ball, Or line plates – DR Power Self-Propelled Pro-XL Self-Propelled 8.26fpt Subaru User Manual
Page 17
CONTACT US AT www.DRpower.com 17
Chapter 4: Maintaining The DR TRIMMER/MOWER
Regular maintenance is the way to ensure the best performance and long life of your machine. Please refer to this manual and the
engine manufacturer's owner's manual for maintenance procedures. Service intervals listed in the checklist below supersede
those listed in the engine manufacturer's owner's manual.
Regular Maintenance Checklist
Note: Consider that the service intervals shown are the maximum under normal operating conditions. Increase frequencies under
extremely dirty or dusty conditions.
P
ROCEDURE
B
EFORE
E
ACH
U
SE
E
VERY
25
H
OURS
E
VERY
50
H
OURS
E
VERY
100
H
OURS
Check Engine Oil Level.
Clean Engine Exterior, Cooling Fins and remove collected grass trimmings.*
Check General Equipment Condition, e.g. Nuts, Bolts, Welds, etc.
Replace broken or frayed Cutting Cords.
Check the Mow-Ball
®
Line Plates for excessive wear.
Check the Trimmer Belt for stretching. Adjust the Drive Cable if necessary per
“Adjusting the Trimmer Belt Tension through the Trimmer Control Cable” in
this Chapter.
1
st
time 2
hours
Lubricate Throttle Cable, Self Propel Cable and Trimmer Control Cable with
SAE 30 Oil.
Change the Engine Oil
1
st
time 5
Replace the Engine Air Filter Cartridge and foam Pre Filter if equipped.
Remove the Trimmer Guard and clean out any collected debris
Check the Battery Voltage (Electric-Starting models)
Lubricate Chains (Self Propelled models)
Replace the Trimmer Belt
Replace the Self Propel Belt (Self Propelled models)
Replace the Spark Plug.
* Cleaning the top of the Engine during use is critical for proper air flow. Keeping the Engine clear of debris is necessary for optimum performance.
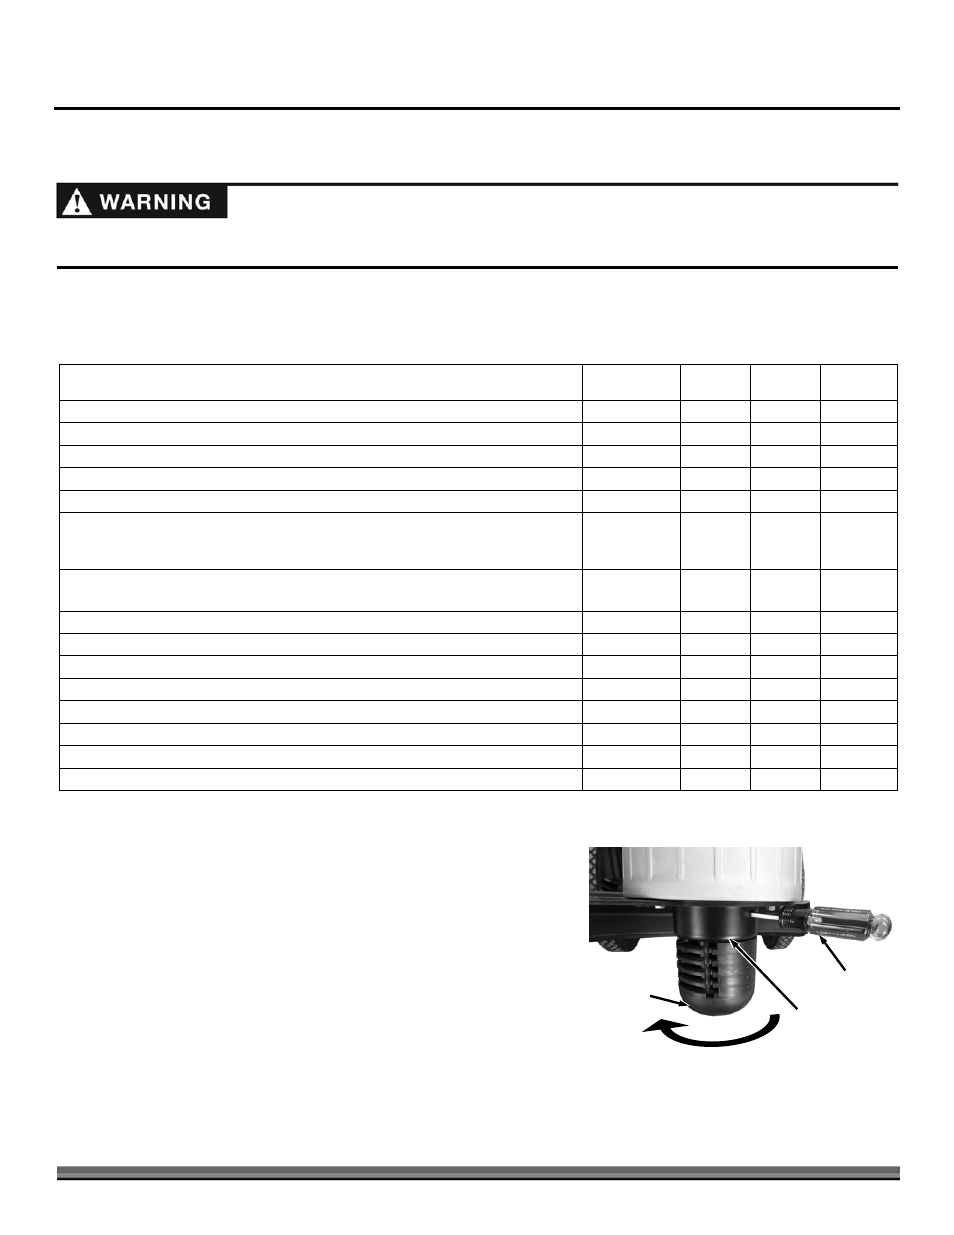
Replacing the Mow-Ball
®
or Line Plates
Tools and Supplies Needed:
Phillips head Screwdriver with at least a 6" shank
Gloves
1. Align the hole in the Anti Wrap Canister with the hole in the internal housing
at the location shown (Figure 23).
2. Insert a Philips Head Screwdriver into the hole in the Anti Wrap Canister and
the hole in the internal Housing.
3. Rotate the Mow-Ball
®
Assembly until the Screw Driver slides into a hole in
the shaft, locking it into place.
Figure 23
Loosen
Screw Driver
Anti Wrap
Canister
Mow-Ball
®
Before performing any maintenance procedure or inspection, stop the engine, wait five (5) minutes to allow all parts to cool.
Disconnect the spark plug wire, keeping it away from the spark plug.