Installing the cutting cords, Extending cutting cord life – DR Power Self-Propelled Pro-XL Self-Propelled 8.26fpt Subaru User Manual
Page 9
CONTACT US AT www.DRpower.com 9
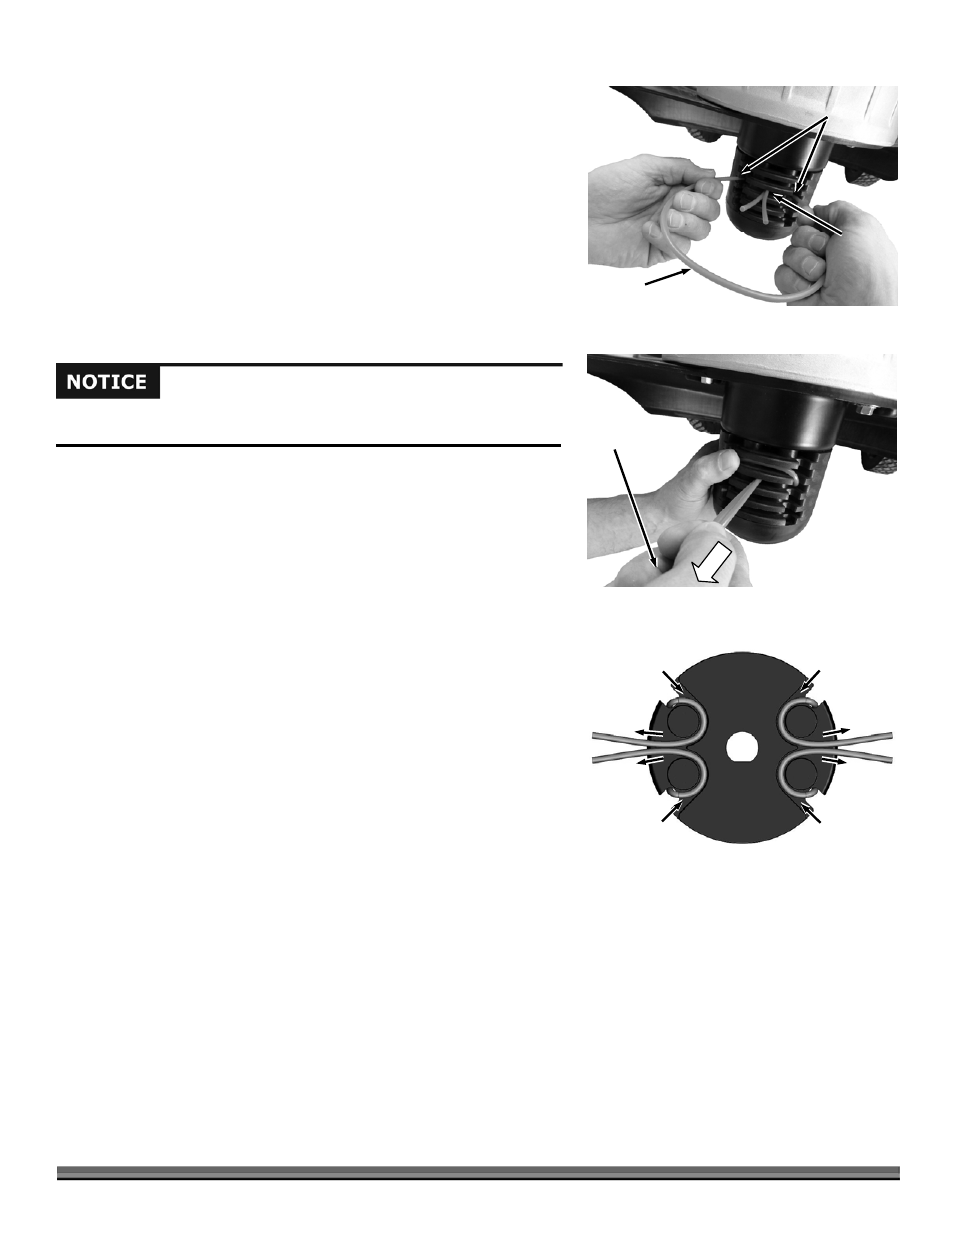
Installing the Cutting Cords
There are two installation points on each Line Plate. Each point is 180 degrees
apart. Always install two Cords, one opposite the other at the same height.
Note: Soaking the Cutting Cords and trimming the ends at an angle will make
installation easier.
1. Insert the ends of the Cords into the side openings in the Line Plate
(Figure 5).
2. Push the Cord through until the ends come out the center hole in the Line
Plate. Adjust the Cords so the tips are even.
3. Pull the Cords under the loop and push the loop up into the Line Plate
groove above them (Figure 6) and then pull the Cords tight.
Figure 7 illustrates the Cords installation on the Line Plates. It shows the Line
Plate from a top view. It may look complicated, but once you have done it a
couple of times, it’s easy. There are two installation points on each Line Plate.
Each point is 180 degrees apart. Always install two Cords, one opposite the
other.
Extending Cutting Cord Life
STORE YOUR CORD OUT OF THE SUN. UV can damage your cord causing
premature wear.
KEEP YOUR CORD HYDRATED. Soak your cord in water for at least 3 days
before using.
Side
Openings
Center
Opening
Figure 5
Cord
Cord Ends
Figure 6
If the tips of the cords are not even, it can cause unbalance of the trimmer
and will result in increased vibration.
Top View
Figure 7
In Here
Out Here
In Here
Out Here
Out Here
Out Here
In Here
In Here