Installing the wheels (self propelled models only), Adjusting the dr trimmer/mower handlebar – DR Power Self-Propelled Pro-XL Self-Propelled 8.26fpt Subaru User Manual
Page 8
8
DR
®
TRIMMER/MOWER
FOR PROPER SETUP OF YOUR NEW DR TRIMMER/MOWER PERFORM ALL
THE FOLLOWING STEPS IN THIS CHAPTER.
Installing the Wheels (Self Propelled Models Only)
Tool needed:
9/16" Wrench
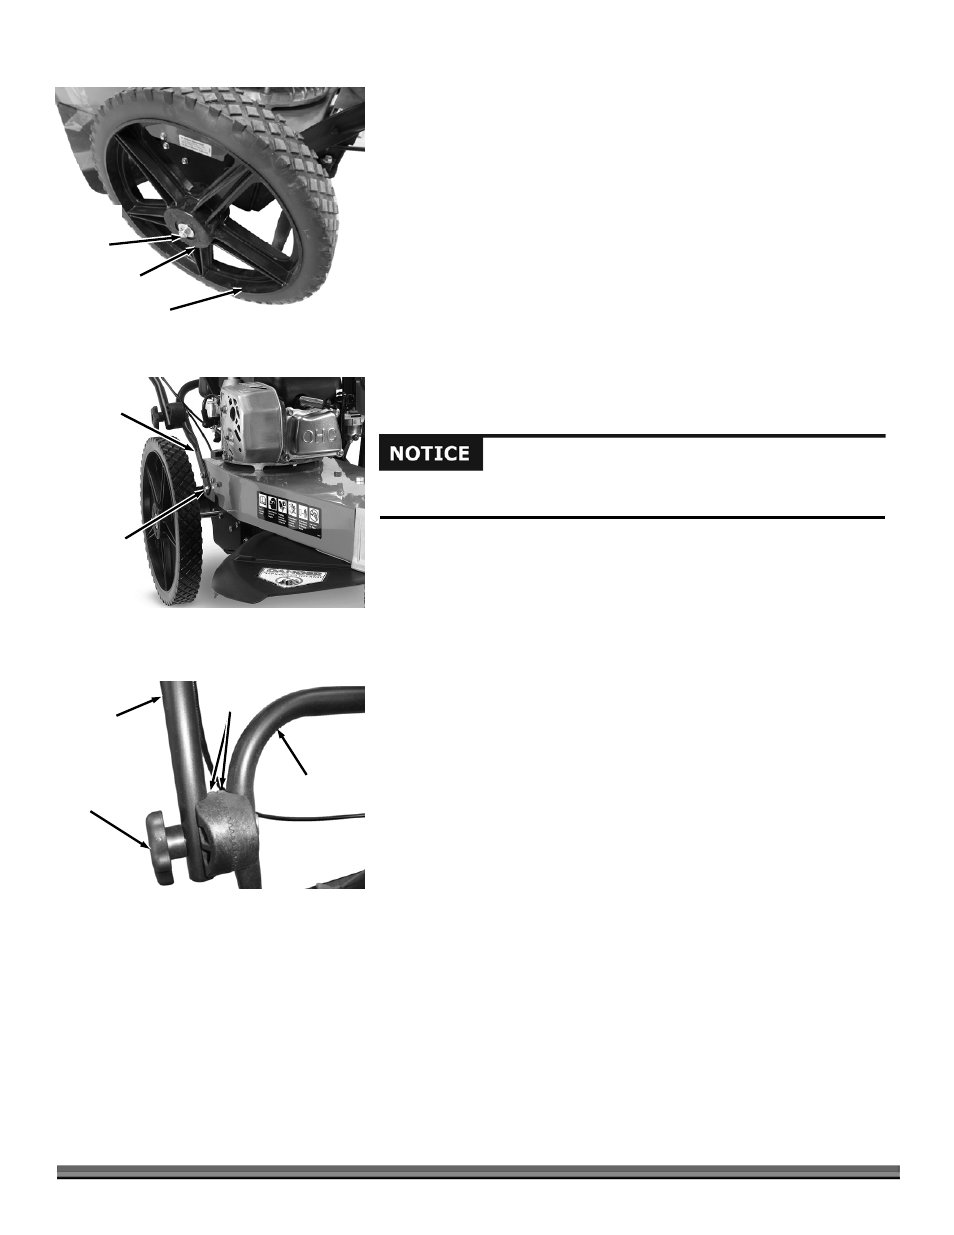
1. Remove the 3/8-16 Locknut and washer from the end of the axle with a 9/16"
Wrench (Figure 2).
Note: There is also a 1/2" Washer on the Axle. Keep this Washer on the Axle when
you install the Wheel. It is a spacer between the Wheel and the machine.
2. Slide the wheel onto the axle with the plastic hub facing out.
3. Reattach the washer and nut with a 9/16" Wrench.
4. Repeat for the other wheel.
Adjusting the DR TRIMMER/MOWER Handlebar
Tool needed:
1/2" Wrench
Check the tightness of the four Bolts that secure the Lower Handlebar to the
Frame using a 1/2" Wrench (Figure 3).
The Handlebar folds down for easy storage and the DR Trimmer/Mower is
shipped to you with them folded.
Note: Ensure that the teeth of the Handlebar Adjusters mesh correctly as you tighten
the Knobs in the following step.
1. Loosen both the Adjustment Knobs and move the Handlebar up or down
until the Notches on the Adjusters are aligned on both sides and tighten the
Knobs (Figure 4). This puts the Handlebar at a comfortable operating
position for many people.
It is important to find a Handlebar height that allows the Mow-Ball
®
to
comfortably hover just above the ground. When in use, proper adjustment is
critical to best performance. You may find you like different Handlebar heights
for different mowing conditions.
2. For other Handlebar height settings, loosen the Knobs, move the Handlebar
up or down until you are comfortable, and then tighten the Adjustment
Knobs securely. Take note of how many teeth you have moved away from the
aligned notches to align both sides.
Locknut
and
Washer
Figure 2
Wheel
Plastic Hub
Figure 4
Notches
Lined Up
Adjustment
Knob
Lower
Handlebar
Upper
Handlebar
The Lower Handlebar may have been loosened during shipping. Make sure
that the Bolts attaching the Lower Handlebar to the Frame are tight.
Lower
Handlebar
Figure 3
Handlebar
Hardware