Replacing the wheels, Changing the engine oil – DR Power Self-Propelled Pro-XL Self-Propelled 8.26fpt Subaru User Manual
Page 23
CONTACT US AT www.DRpower.com 23
13. Rotate the Belt Guide into position centered behind the Engine Pulley and tighten the Locknut with a 7/16" Wrench (Figure
36).
14. Reconnect the Z-bend end of the Drive Cable into the Bracket hole (Figure 35).
15. Install the Transmission Cover and secure with the four Bolts and Flat Washers using a 3/8" Wrench (Figure 34).
16. Position the Trimmer Guard and secure with the four Bolts and Flat Washers using the 3/8" Wrench (Figure 33).
17. Install the Trimmer Cord and tip the Trimmer down on the Head Assembly.
18. After installing the new Belt, be sure to adjust the Cable tension properly by adjusting the Jam Nuts (refer to page 22). Proper
tension will extend the life of the Belt.
Replacing the Wheels
Tool needed:
5/8" Wrench (non Self Propelled model)
9/16" Wrench (Self Propelled model)
1. Block and stabilize the machine so that the Wheels are off the ground.
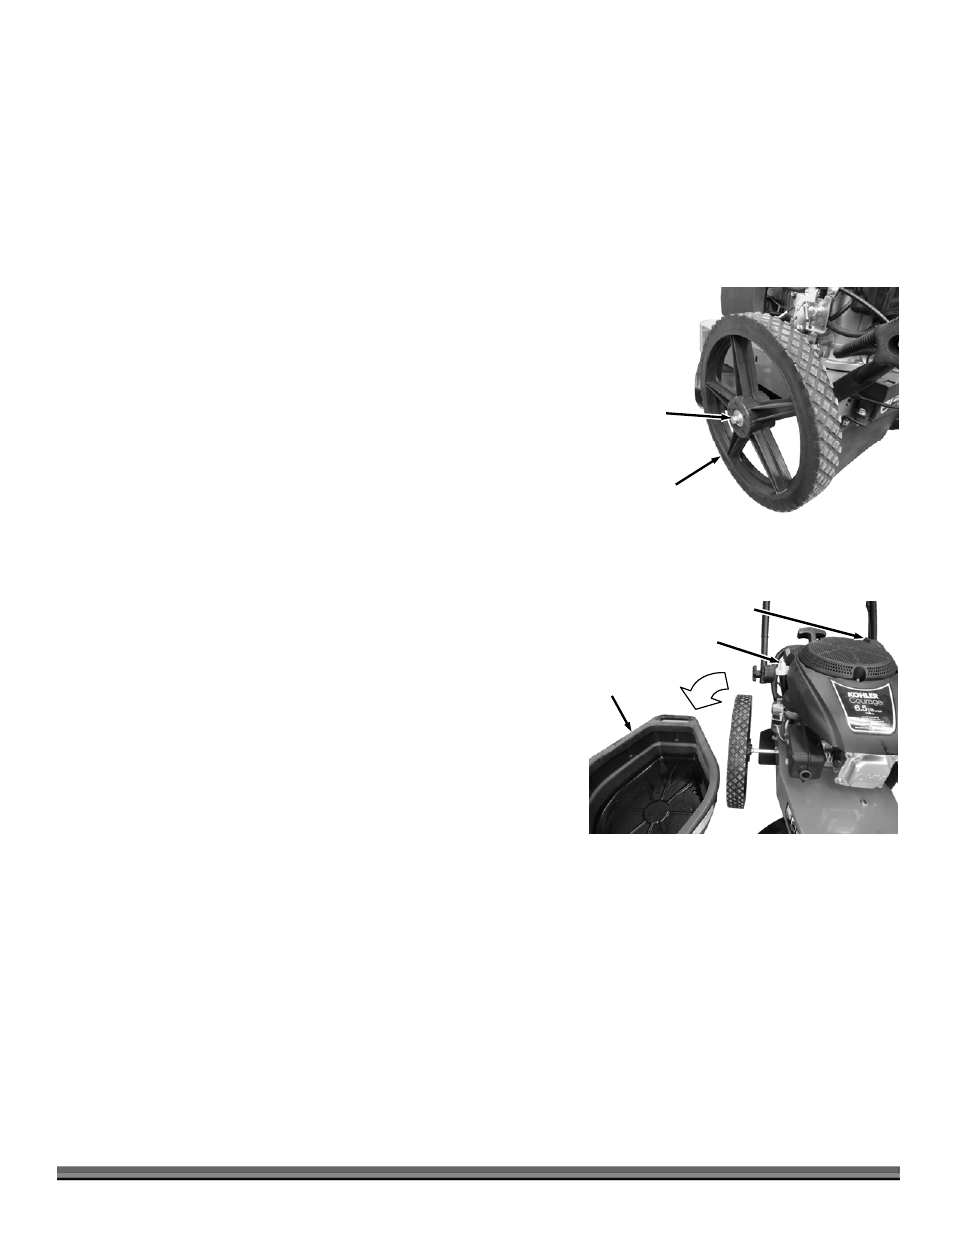
2. Loosen and remove the Locknut with the required Wrench (Figure 38).
Note: The self propelled Wheel has a Flat Washer under the Locknut.
3. Slide the Wheel off the Axle.
4. Reverse the steps to install the new Wheel.
Changing The Engine Oil
Tools and Supplies needed:
SAE 30 HD Oil (refer to your Engine Owner’s Manual for quantity required)
Suitable container for used oil
Rags
Wooden pallet or workbench
Note: Drain the oil when the Engine is warm. Warm oil drains quickly and
completely.
1. For convenience, place the machine up on a wooden pallet or workbench.
2. Remove the Oil Cap/Dipstick and position a suitable oil receptacle beside
the Oil Fill Tube.
Note: The Subaru Pro-XL engine has an oil drain fitting you can use instead of the
oil filler tube.
3. Make sure to securely tighten the Gas Fill Cap.
4. Using the handle of the DR TRIMMER/MOWER, tip the machine to drain
the oil out through the Oil Filler Tube into a suitable receptacle (Figure 39).
5. Refill the Engine using SAE 30 HD oil to the level indicated on the Dipstick.
Note: Be sure to use environmentally safe disposal procedures in the disposing of the
used oil.
Approved
Container
Figure 39
Oil Cap/Dipstick
Fuel Fill Cap
Locknut
Figure 38
Wheel