Removing and replacing the blower exit elbow – DR Power Tow-Behind 8.00 Premier (Pre-August 2010) User Manual
Page 44
40 DR
®
PREMIER LEAF and LAWN VACUUM
WHEN PERFORMING ANY MAINTENANCE, YOU MUST FIRST SHUT OFF THE ENGINE, WAIT FIVE (5)
MINUTES FOR PARTS TO COOL AND DISCONNECT THE SPARK PLUG WIRE.
BLOWER INLET HOSE:
Tool Needed:
•
Screwdriver or Nut Driver
1. Loosen the Hose Clamps retaining the Inlet Hose at the Inlet Hose Adapter and the Connector Fitting
at the opposite end of the Hose, then slip the Hose off the Adapter and Fitting (Figure 35 on page 41).
2. Install the new Hose in the reverse order making sure that the Clamps are positioned on the Blower
side of the raised Rivet in the Inlet Hose Adapter and on the Fitting side of the raised Rivet in the
Connector Fitting to prevent the Hose from slipping off after the Clamps are tightened.
3. Check the Safety Interlock Switch to be sure that it is engaged.
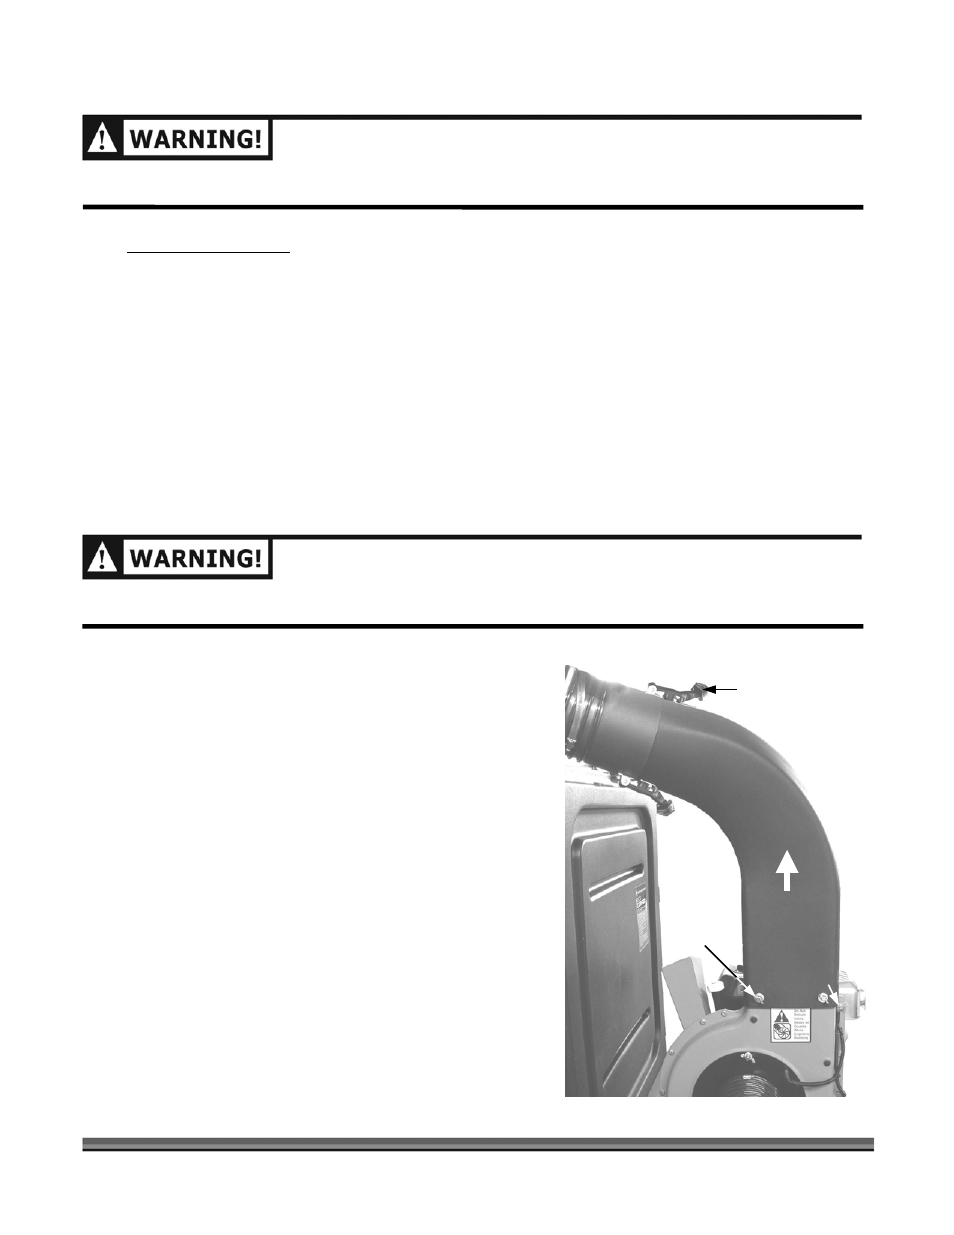
Removing and Replacing the Blower Exit Elbow
WHEN PERFORMING ANY MAINTENANCE, YOU MUST FIRST SHUT OFF THE ENGINE, WAIT FIVE (5)
MINUTES FOR PARTS TO COOL AND DISCONNECT THE SPARK PLUG WIRE.
Figure 34
Wing Screw
4-pls.
Collector
Box
Hose
Blower Exit
Elbow Assy
Flexible Latch
Lift
Safety
Interlock
Switch
1. Disconnect the Blower Exit Elbow to the Collector
Box Hose by releasing the two (2) Flexible Latches
(Figure 34) and separate the Hose.
2. Remove the four (4) Wing Screws from the Blower
Exit Elbow Assembly (Figure 34).
3. Lift the Blower Exit Elbow Assembly from the top of
the Blower and install a new assembly in the reverse
order (Figure 34).
4. Check the Safety Interlock Switch to be sure that it is
engaged.
NOTE: If the Safety Interlock Switch is not engaged, the
Engine will not start. See page 18.