Chipper knife sharpening – DR Power Tow-Behind 8.00 Premier (Pre-August 2010) User Manual
Page 46
42 DR
®
PREMIER LEAF and LAWN VACUUM
BEFORE PERFORMING ANY MAINTENANCE PROCEDURE OR INSPECTION, STOP THE ENGINE, WAIT FIVE
(5) MINUTES TO ALLOW ALL MOVING PARTS TO COME TO A COMPLETE STOP AND COOL. DISCONNECT
THE SPARK PLUG WIRE, KEEPING IT AWAY FROM THE SPARK PLUG.
Chipper Knife Sharpening
•
Remove and replace the Impeller and Chipper Knife in accordance with the procedure on page 41.
•
You should never attempt to sharpen the Chipper Knife freehand.
•
It is extremely important to consistently maintain the 45-degree angle for proper performance.
•
Excessive heat generated during the sharpening process will damage Knives and weaken the metal.
Be sure not to overheat the Knife during sharpening because it will shorten the life of the Knife.
•
Take the Chipper Knife to a machine shop for proper sharpening.
•
How many times a Knife can be sharpened is determined by how much material needs to be taken
off to sharpen or to compensate for dents or gouges.
•
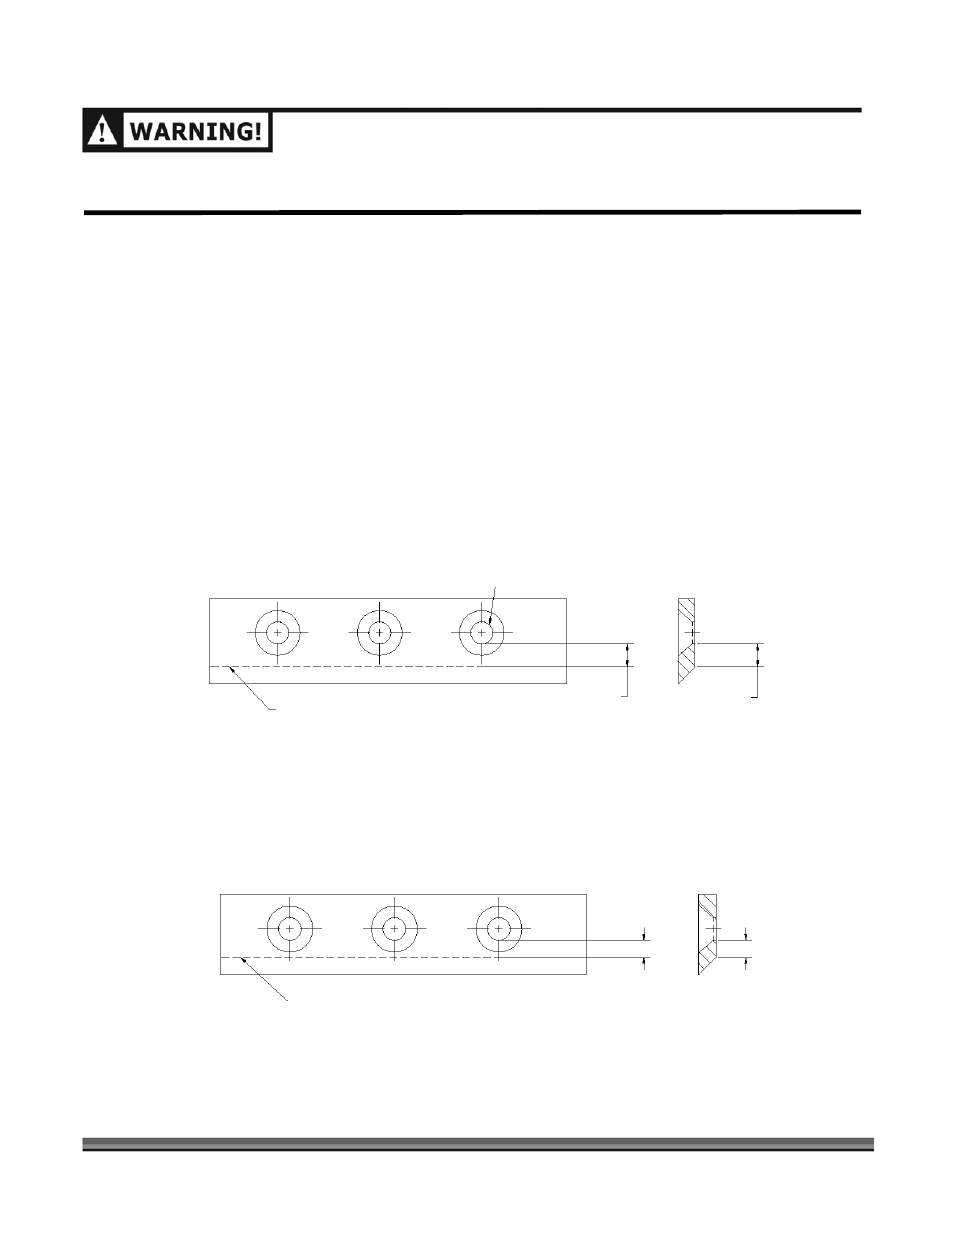
A new Chipper Knife has a 5/16" measurement between the Short Side Bevel Edge and the Knife
Mounting Holes (Figure 37).
•
The knife should never be sharpened to the extent that more than 1/16" is taken off this
measurement.
•
Once this measurement is below 1/4" (see Figure 38), or if you are unable to remove dents or
gouges with these guidelines, replace the Knife.
Knife Mounting Hole
Short Side Beveled Edge
5/16"
5/16"
Figure 37
New Knife
Short Side Beveled Edge
1/4"
1/4"
Sharpened Knife
Figure 38