Removing the blower/chipper engine unit – DR Power Tow-Behind 8.00 Premier (Pre-August 2010) User Manual
Page 47
CONTACT US AT
www.DRPower.com
or CALL TOLL FREE 1-800-DR-OWNER 43
Removing the Blower/Chipper Engine Unit
•
WHEN PERFORMING ANY MAINTENANCE, YOU MUST FIRST SHUT OFF THE ENGINE, WAIT FIVE
(5) MINUTES FOR PARTS TO COOL AND DISCONNECT THE SPARK PLUG WIRE.
•
BEFORE PERFORMING THIS PROCEDURE, ASSURE THAT YOUR DR LEAF AND LAWN VACUUM IS
ON LEVEL TERRAIN AND THE BRAKE IS SET ON YOUR LAWN TRACTOR.
•
DO NOT USE CHIPPER OR VACUUM FEATURES WITHOUT FIRST SECURING THE ENGINE TO THE
FRAME AND SECURING THE HOSES.
1. Disconnect Collector Box Hose from the Blower Exit Elbow (Figure 34
on page 40).
2. Remove the Inlet Hose by loosening the Hose Clamp (Figure 35
on page 41).
3. Remove the Hitch Clips from the Clevis Pins and remove the Pins (Figure 13
on page 20). Move
the Trailer Hitch from the Tractor Hitch Plate and set it on level ground.
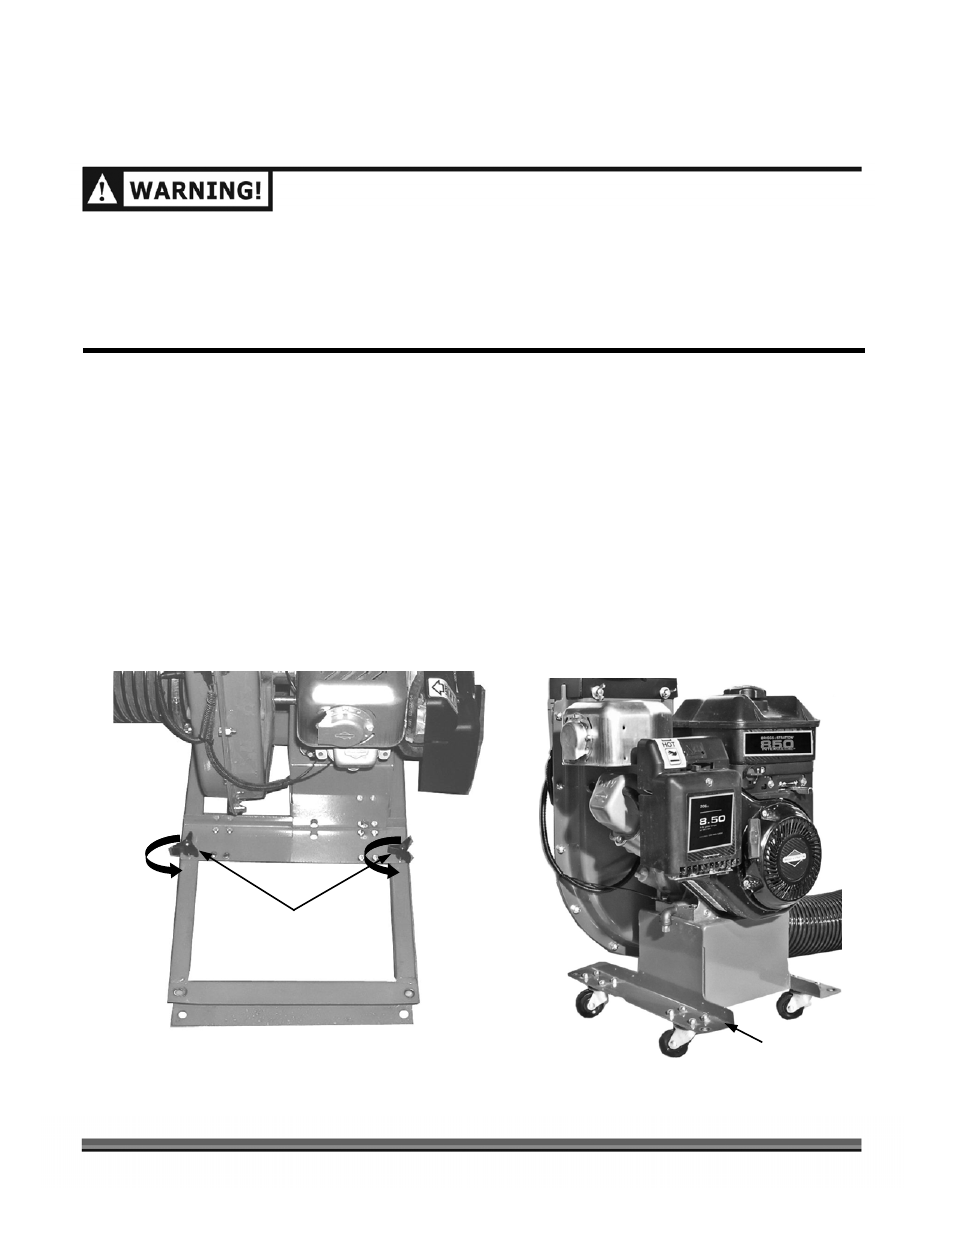
4. Remove (turn counterclockwise) the four (4) Retaining Knobs holding the engine plate to the
Trailer Frame (Figure 39).
5. With the help of another person, carefully lift the engine off the mounting studs and set it on the
attached engine Dolly Wheels (Figure 40).
6. Store the engine assembly in a dry location.
7. Reverse this procedure to re-install the engine unit then refer to page 20, “Connecting the DR LEAF
and LAWN VACUUM to your Lawn Tractor”.
8. Check the Safety Interlock Switch. See page 18.
Figure 39
Retaining Knobs - 4 places
Built-In Dolly
Figure 40