Removing and replacing the belt – DR Power 8.25 Pro Power Wagon (February 2007 - February 2009) User Manual
Page 28
24 DR
®
POWERWAGON-PRO
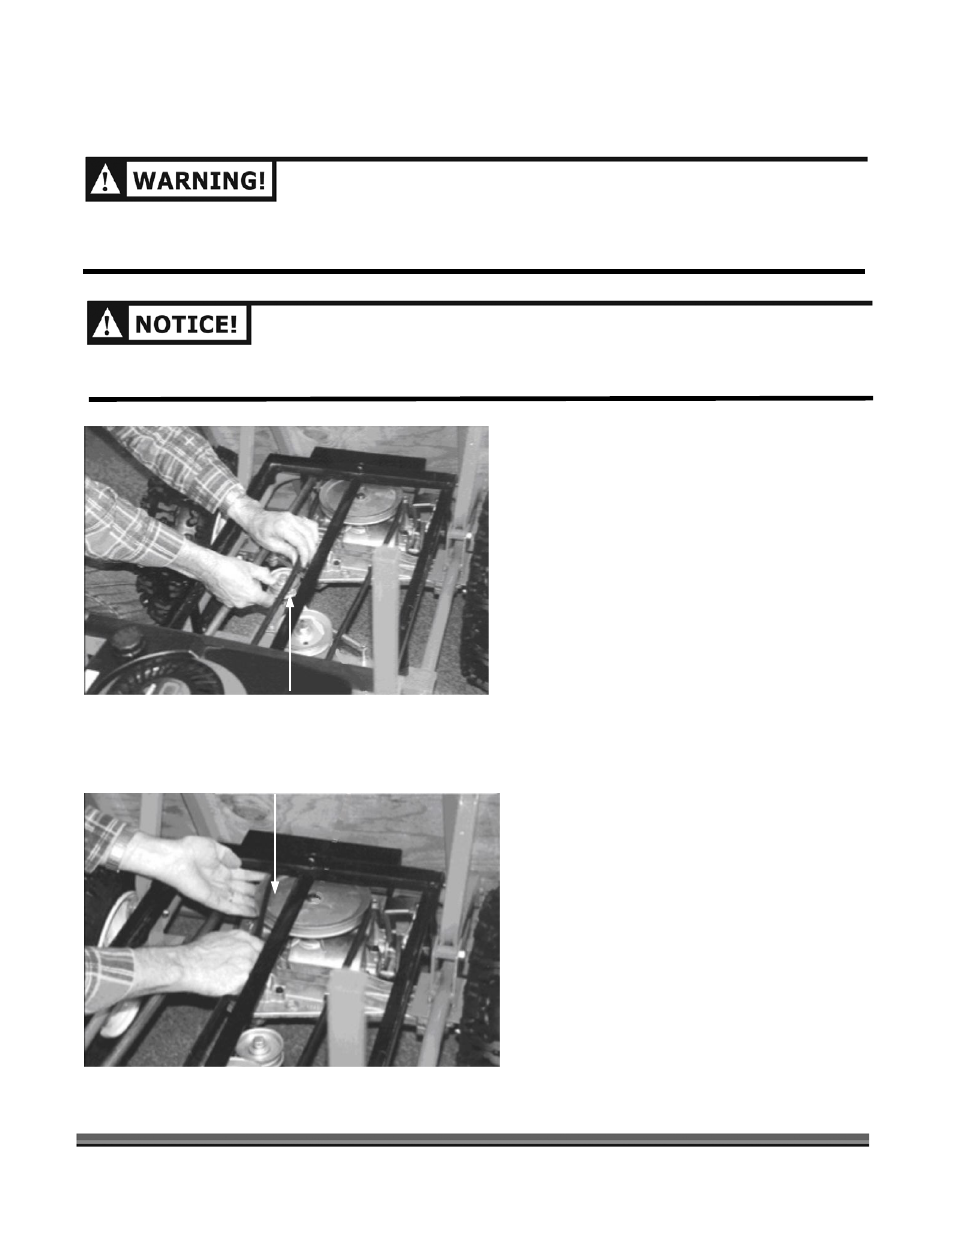
Figure 15
Removing and Replacing the Belt
WHEN PERFORMING ANY MAINTENANCE, YOU MUST FIRST SHUT OFF THE ENGINE, SET THE
PARKING BRAKE, WAIT FIVE (5) MINUTES TO ALLOW PARTS TO COOL AND DISCONNECT THE SPARK
PLUG WIRE, KEEPING IT AWAY FROM THE SPARK PLUG.
Tools Needed:
•
7/16" Socket and extension
•
9/16" Socket
•
3/8" Wrench
1. Position the machine on a level surface and
set the Parking brake.
2. Tip the Bed forward (Figure 10 on page 17).
3. Remove the Cinder Blocks (see page 33).
4. Pull on the Idler Pulley to lessen the tension
on the Belt and slide the Belt from the Idler
Pulley (Figure 15).
5. Remove the Belt from the Transmission
Pulley at the front of the machine (Figure 16)
.
6. Remove the Belt from the Clutch Pulley
under the Engine (Figure 14 on page 23)
.
7. Install the new Belt on the Clutch Pulley
first, then the Transmission Pulley and then
the Idler Pulley. Make sure the new Belt is
INSIDE the Belt Guide near the Clutch
Pulley
(Figure 14 on page 23)
.
8. Reinstall the Cinder Blocks and the Weight
Rack Block Strap to secure them.
USE ONLY DR BELTS ON YOUR MACHINE. THEY HAVE BEEN THOROUGHLY TESTED AND PROVEN
FOR MANY HOURS OF USE.
Sliding Belt from Idler Pulley
Removing Belt from Transmission Pulley
Figure 16