Installation (cont.) – Fire Magic 3049 Aurora Infrared Burner Kit Installation User Manual
Page 4
REV 3 - 1302260945
L-C2-280
4
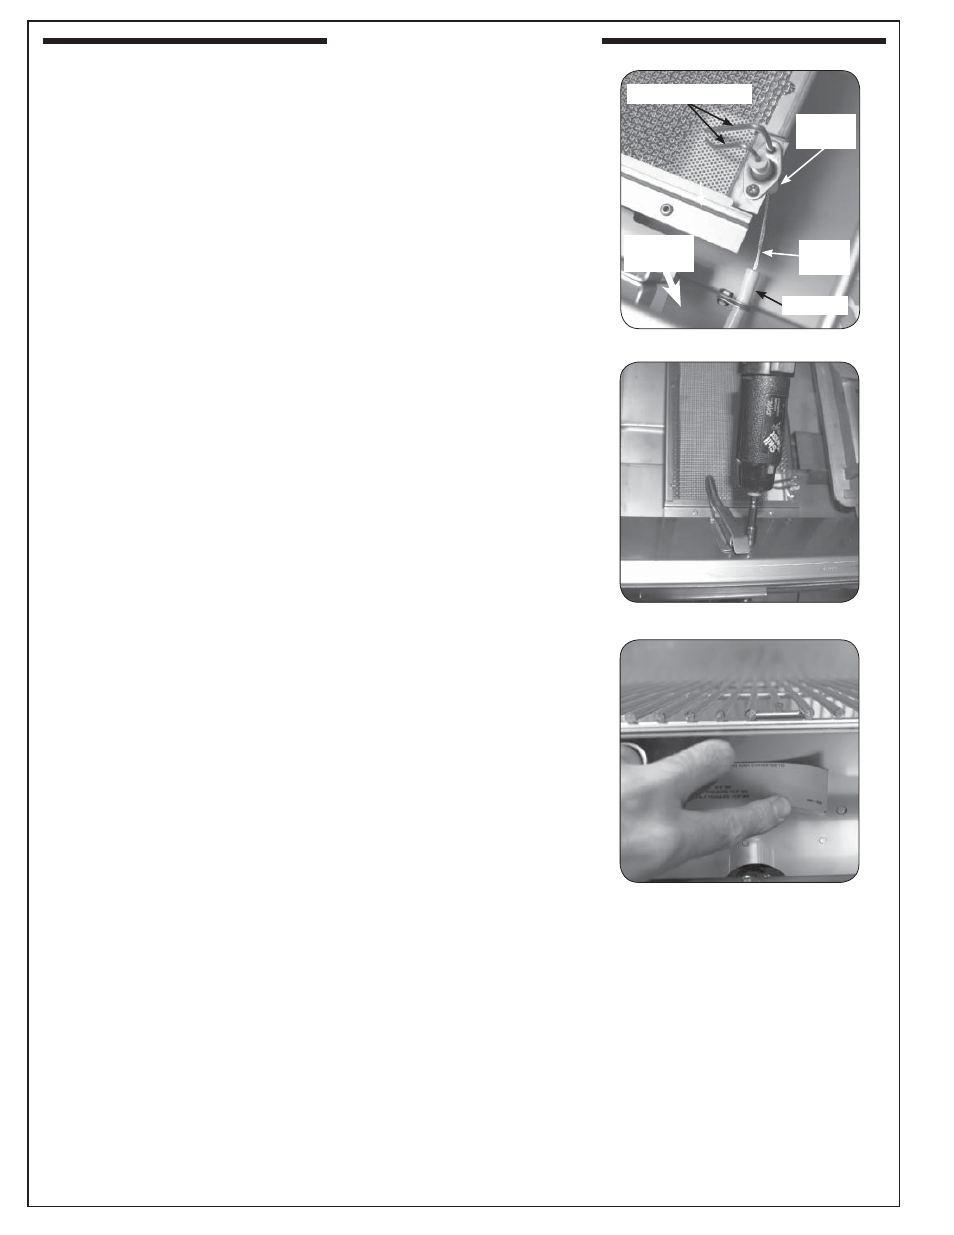
5. Connect the non-insulated metal end of the ignitor wire to the
bottom of the ignitor electrode assembly at the forward right of the
infrared burner (see Fig. 4-1).
6. Attach the new lighting tube (Fig.4-2) in place of the old one
securing it with the old screws.
7. Apply the conversion label supplied with this kit to the inside of the
fi re wall behind the control panel so that it does not obscure any
other labels (Fig. 4-3).
8. Reposition the heat shield by hooking the diagonal slots back over
the sheet metal of the manifold fi re wall.
9. Replace the control panel on the frame so the front lip of the
control panel hangs from the forward lip of the frame. Re-secure
the control panel with the fastener screws.
10. Replace the control knobs.
11. Replace the drip tray.
12. Replace the cooking grid. (DO NOT place the fl avor grid on the
infrared burner. It is not designed for use on an infrared burner,and
should be stored away.)
Fig. 4-1 Connect wire to electrode assy.
Front fi re
wall
Ignitor
wire
Connect
here
Insulator
Fig. 4-2 Install new lighting tube
Fig. 4-3 Apply the conversion label
Ignitor electrodes
INSTALLATION (cont.)