Loft – Highgear Loft User Manual
Page 12
19
ALTIWARE SERIES
english
20
LOFT
english
CHRONOGRAPH/HEART RATE MONITOR FUNCTIONS
ALTIMETER FUNCTIONS
STORING DATA POINTS
At any time in the Altitude display, PRESS AND HOLD the S1 key for a period of approxi-
mately 3-seconds. During this time the top line of the display will show the word STORE,
and DATA will flash in the middle line with the number of the Data Point appearing in the
lower display line.
When the Data has been stored in memory, the top line will change from STORE to
STORED. Release the S1 key and the unit will return to the altitude display after approxi-
mately 2-seconds.
RETRIEVING DATA INFORMATION
Advance to the ALTITUDE DATA (Alti DATA) using QUICK PRESSES of the S4 key.
The top line of the display will show the file number, the middle and bottom lines will
show the time and date the file was captured. Every 3 seconds the display will change to
show the Altitude of the file in the middle line and Alti in the lower line. The user may also
manually advance the display using the S3 key.
Use a QUICK PRESS of the S1 or S2 keys to move through multiple captured files. The
number of the file will always be shown in the upper line of the display. The file system
works on a First-In Last–Out system, were the newest files are the ones with the highest
file numbers.
CLEARING DATA INFORMATION
To Clear the information in the Altitude Data memory, PRESS & HOLD the S5 key.
The display will show the word HOLD flashing in the center line of the display with the
words CLEAR – ALL in the top and bottom lines respectively. Continue to hold the S5 key
until DATA 01 appears in the top line along with 4-dashes in the middle line indicating all
data has been cleared from memory.
The Loft is equipped with an Altitude Data Point memory system. This system allows you to capture to memory the
altitude of a particular location along with the date and time of the capture. The Loft unit is capable of storing up to 20
individual Altitude Data Points.
DATA SCREEN 1
DATA SCREEN 2
1. Advance to the CHRONOGRAPH (CHRO) screen using quick presses of the S4
key.
2. PRESS AND HOLD the S5 key to enter the setting sequence.
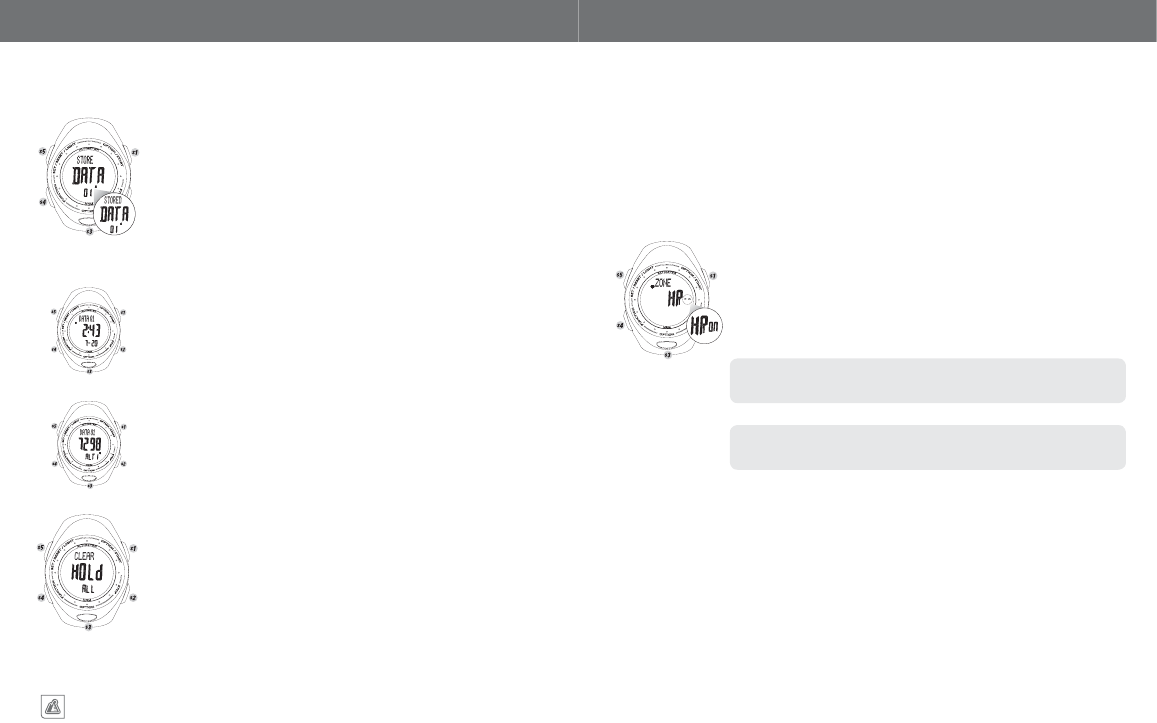
3. The first screen that appears allows you to turn the heart rate zone system of
the watch on and off. For the initial programming of the heart rate system use
the S1 or S2 key to select ON
4. QUICK PRESS the S4 key to advance to Setting the Heart Rate Zones.
The Heart Rate Zone system should normally be left set to ON. Turning the Heart
Rate Zone System OFF will disable the Audible and Visual Target Zone alarm as well
as disabling your ability to program a target zone.
To be able to enter the Heart Rate Monitor Setup sequence, the Chronograph must be
cleared to zero. If necessary, this is accomplished by Pressing and Holding the S5 key
for approximately 3-seconds.
HEART RATE ZONE SETTINGS
STEP 1–TURN HEART RATE ZONE ON/OFF
HEART RATE MONITOR SETUP
The Loft features an ECG accurate telemetric heart rate monitor system integrated with the units Chronograph.
The LOFT’s heart rate monitor is accurate to one beat per minute and is capable of displaying your heart rate in beats per
minute (BPM) or as a percentage of your maximum heart rate (% Max). The LOFT’s chronograph is accurate to 1/100th
of a second.
For the heart rate monitor system to function properly you must program a number of different variables into the unit.
Follow the subsequent steps carefully, improper programming may effect the accuracy of the unit.
NOTE
NOTE