Hypertherm Duramax Hyamp Robotic Torch User Manual
Page 25
Duramax/Duramax Hyamp Robotic Torches Service Manual 807460
25
2 – Torch Setup
1. Disconnect the torch lead from the power supply.
While disconnecting and reconnecting the torch parts, maintain the same orientation
between the torch body and torch lead. Twisting the torch body in relation to the torch
lead can cause damage.
2. Remove the consumables.
3. Place the torch on a flat surface with the left half of the positioning barrel facing up.
The left half of the positioning barrel is the side with the screws.
It may be helpful to clamp the lead in place to keep it from moving.
4. Remove the screws from the left half of the positioning barrel.
5. Lift the left half of the positioning barrel away from the torch.
6. The torch body fits snugly into the right half of the positioning barrel. While holding the torch body, gently press the
right half of the positioning barrel away from the torch body to remove it.
7. Slide the cap-sensor switch off its mounting post.
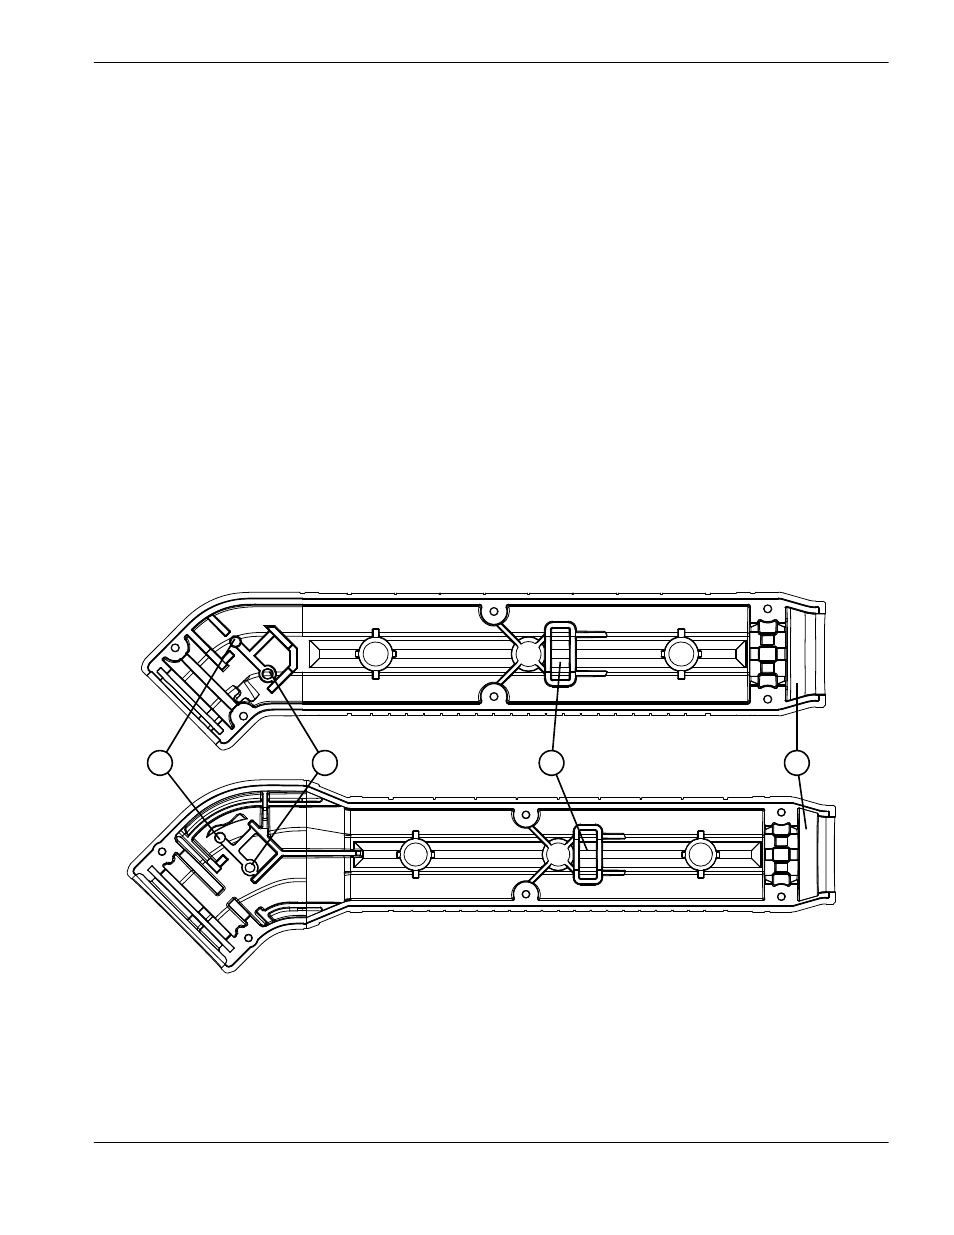
Figure 6 – Duramax 45° (top) and Duramax Hyamp 45° (bottom)
8. Remove the pilot terminal screw.
2
3
4
1
1
Cap-sensor switch mounting post
2
Cap-sensor switch post hole
3
Gas fitting flange slot
4
Strain relief slot