Hypertherm Duramax Hyamp Robotic Torch User Manual
Page 60
60
Duramax/Duramax Hyamp Robotic Torches Service Manual 807460
4 – Component Replacement
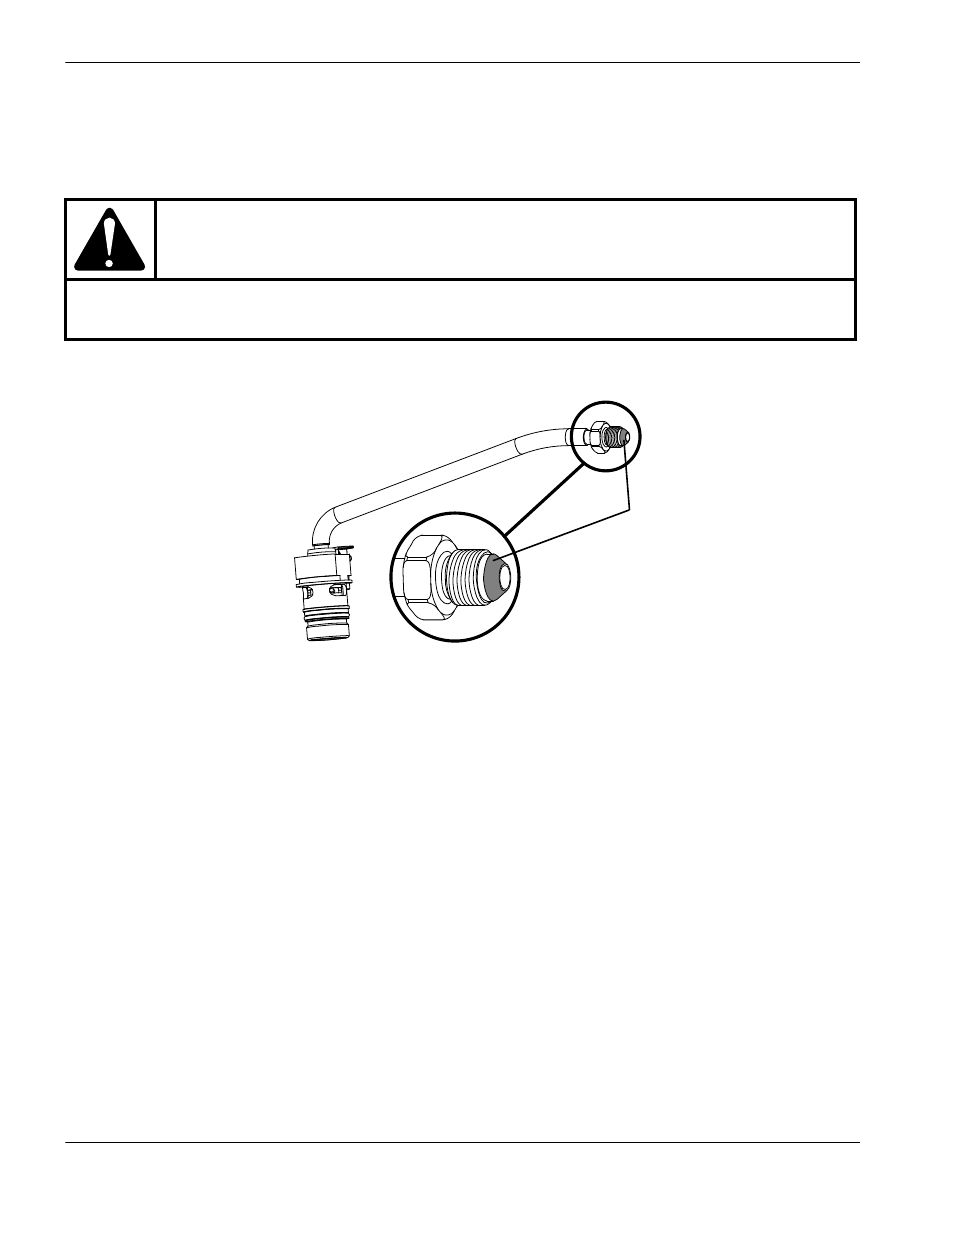
4. Being careful not to get any threadlocker on the conical surface of the gas tube fitting, apply a drop of threadlocker,
included in the kit, to the threads of the gas tube fitting on the torch body.
The drop should not be wider than 2 threads in diameter.
Figure 27
5. Thread the torch body into the torch lead until snug.
The white wires of the lead should be facing up.
6. Use 2 wrenches to tighten the gas fitting that secures the torch body to the torch lead to 69.1 kg∙cm
(60 inch∙pounds).
7. Route the pilot arc wire under the gas tube and above the slot for the gas hose fitting’s flange. (See Figure 25 and
8. Tighten the pilot terminal screw to 17.3 kg∙cm (15 inch∙pounds).
The wire should go slightly down into the positioning barrel.
9. Complete the following procedures:
a. Install all of the torch components that you removed. See Install the positioning barrel on page 57.
b. Reconnect the torch and gas supply, and turn ON (I) the power.
CAUTION!
Do not get any threadlocker on the conical surface of the gas tube fitting to avoid causing damage
to the torch. If any threadlocker does get on this surface, clean it off immediately.
Conical surface of the gas tube
fitting