Assembly – Kreg Precision Band Saw Fence User Manual
Page 5
Assembly
4.
For band saws with a left-hand table hole that does not align with
a left-hand slot in the mounting rail, mark the left-hand table hole
centerline on the saw table with a pencil. Mount the rail by inserting a
mounting bolt through the right-hand rail slot and threading it into the
right-hand saw-table hole. Snug, but do not tighten the bolt. Mark the
left-hand slot centerline on the rail.
Remove the mounting rail from the saw table and transfer the
centerline onto the back of the mounting rail. Mark hole centers on the
rail with a center punch. Drill overlapping
11
⁄
32
" holes and use a fi le to
fi nish forming the slot.
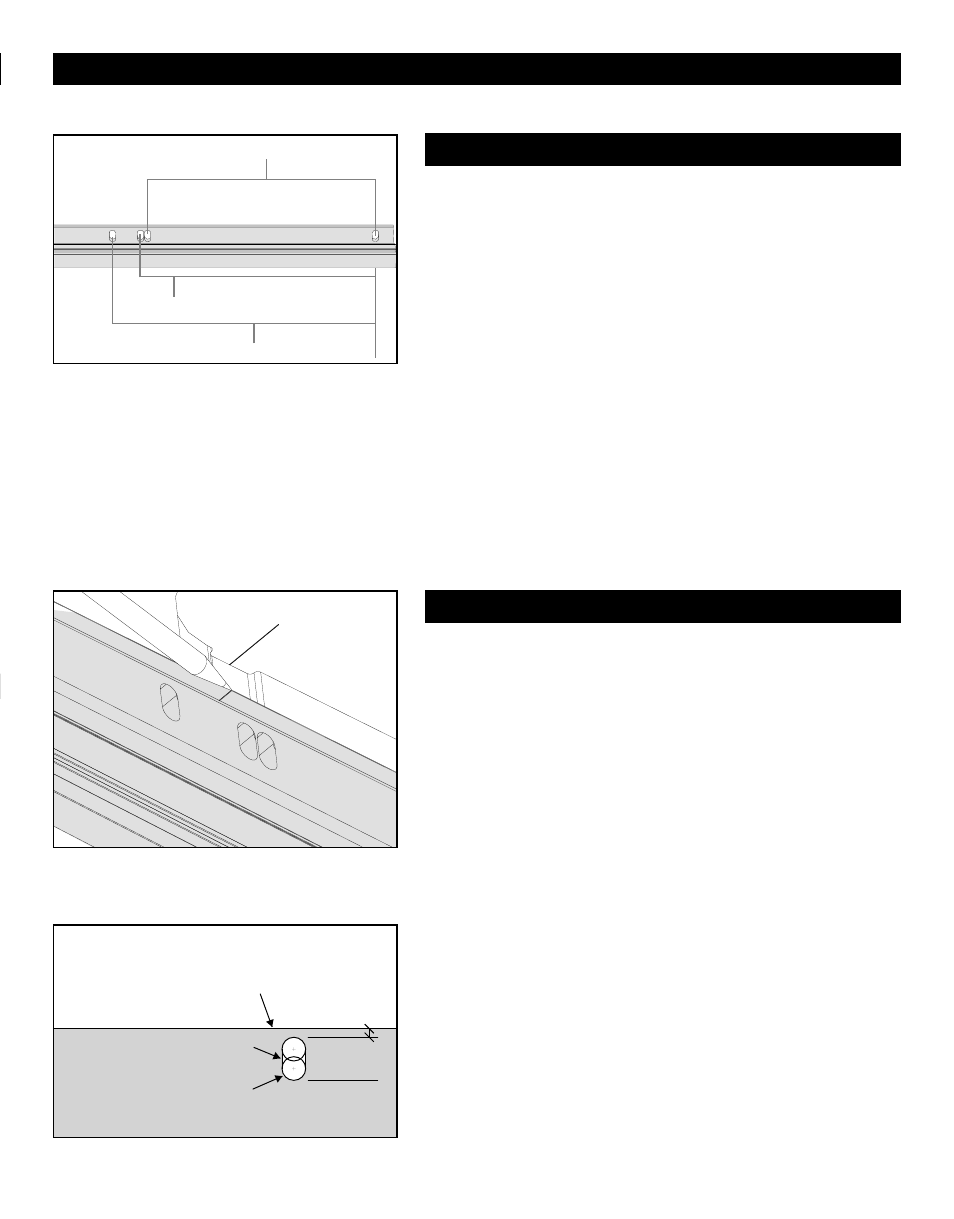
The positions of the slots in the mounting rail match the threaded holes in
the front edge of the tables of most band saws. The drawing shows slot
locations that match several popular brands. Other manufacturers use the
same locations. For brands not shown, align the right-hand mounting-rail
slot with the right-hand saw-table hole to see which left-hand rail slot aligns
with the left-hand table hole. If a left-hand slot does not align with the table
hole, see the section, Drill the Mounting Rail.
Two sets of mounting bolts are included with the Precision Band Saw
Fence:
1
⁄
4
"-28 x 1
1
⁄
4
" hex head bolts for some Delta saws and M6-1 x 30mm
hex head bolts for Jet, Craftsman, Ridgid, and others. You’ll need a 7/16"
wrench for the
1
⁄
4
"-28 bolts and a 10mm wrench for the M6-1 bolts. Test-fi t
the bolts in the saw-table holes to determine which ones to use.
Tip
The threaded mounting holes in your band saw table may contain debris
that make it diffi cult to drive the mounting bolts. To clear the debris,
thread-in and back-out the bolts several times, clearing loosened debris
with compressed air or a shop vacuum. If the bolts do not thread fully, you
may need to clean the threads with a tap. Consult your band-saw owner’s
manual or contact the saw manufacturer for the correct thread size.
Hold the left-hand end of the mounting rail in position
and transfer the saw-table hole centerline onto the rail.
Check the Rail Slots and Mounting Bolts
Drill the Mounting Rail
(when necessary)
Disconnect the band saw from the power supply when installing the Precision Band Saw Fence.
Jet, Ridgid
Delta
Craftsman
top edge of mounting rail
remove area with fi le
11/32” hole
5/8" 1/8"