Assembly – Kreg Precision Band Saw Fence User Manual
Page 8
Assembly
7.
Position the fence extrusion against, but not defl ecting, the blade and
tighten the lock knob. With a pencil, mark a line on the mounting rail in
front of and behind the red line on the lens cursor. Loosen the lock knob
and remove the fence from the mounting rail.
Peel the backing from the zero end of the self-adhesive measuring
tape, exposing about one inch of the adhesive. Align the tape zero mark
with the pencil lines on the mounting rail and press the tape into the
shallow groove in the rail. With the fi rst inch of tape adhered, pull the
remaining backing from under the tape, fi rmly pressing the tape into the
groove as you proceed.
Reinstall the fence assembly on the mounting rail and check the
position of the red cursor line against the zero mark on the measuring
tape. Re-zero the red line as necessary by loosening the screw that
holds the lens cursor in place, readjusting the cursor position, and
retightening the screw.
Tip
To make the measuring-tape backing easy to remove, fold the fi rst inch
of backing so it protrudes from the tape at an angle. With the fi rst inch
of tape adhered, pull the backing from under the tape, pressing the tape
into the mounting rail groove as you continue to remove the backing.
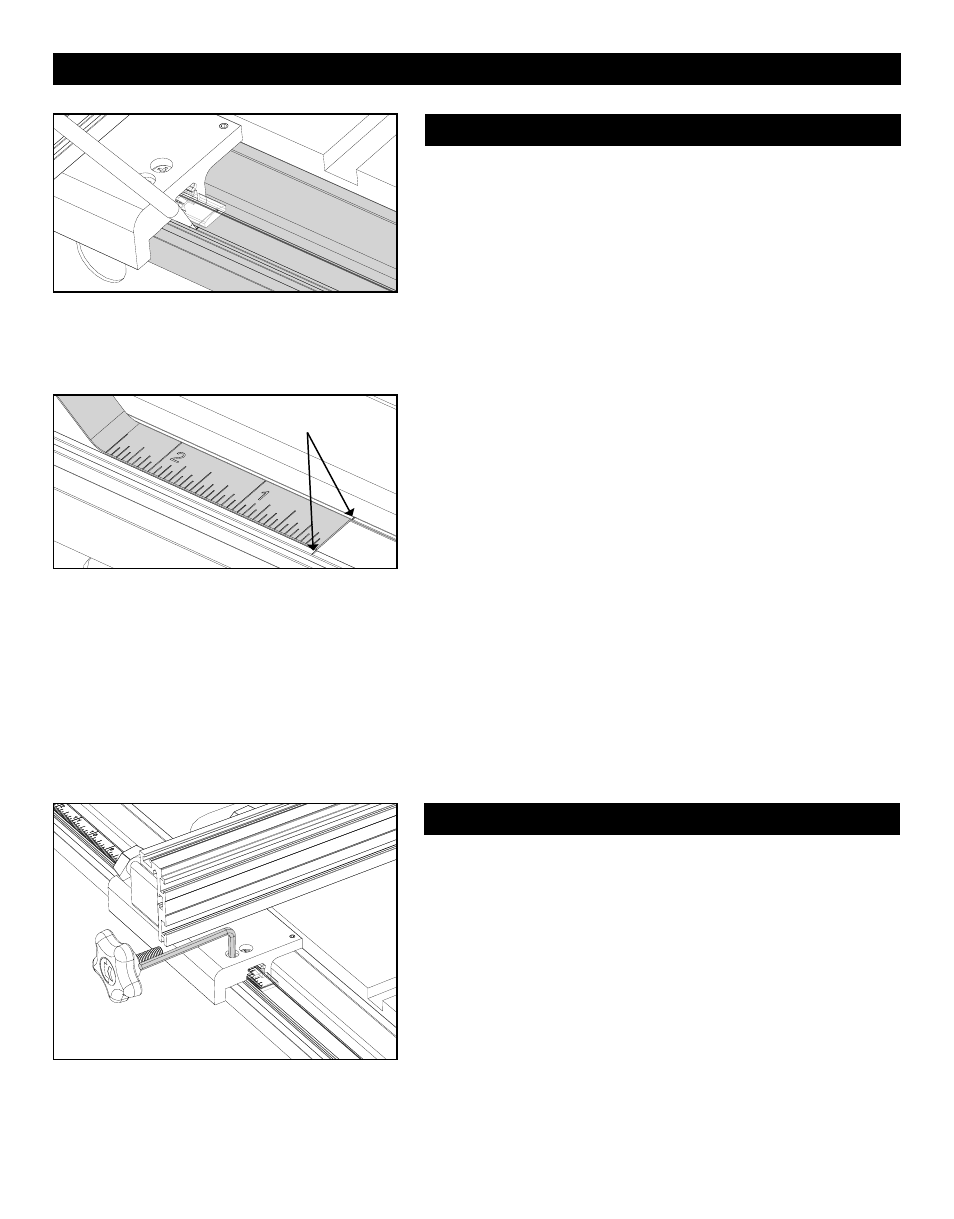
Adhere the Measuring Tape
Mark the position of the red cursor line on the mounting rail.
Align the measuring tape zero mark with the pencil
marks, peel away the backing, and adhere the tape.
To ensure that the face of the fence extrusion is parallel to the blade, fi rst
make sure your band saw table is perpendicular to the blade. See your
band saw owner’s manual for instructions on making this adjustment.
With the band saw table properly adjusted, position the fence assembly on
the mounting rail and lightly tighten the lock knob to hold the assembly in
place. Thread in the nylon screws at the front corners of the clamp block
until the tips contact the surface of the mounting rail. Check the alignment
of the face of the fence extrusion and the saw table with a square. To
adjust the alignment, loosen the lock knob and turn the right hand or left
hand screw to tilt the fence as needed. With the fence square to the saw
table, tighten the lock knob and adjust the nylon set screws at the back
corners of the clamp block so the tips contact the mounting rail.
Tip
Parallel adjustment is particularly important for cuts in which even a
small difference between the top and bottom of the cut will give poor
results, such as when cutting tenons, dovetails, and thin veneers.
Adjust either the left or right screw to align the face of
the fence extrusion perpendicular to the saw table.
Parallel Adjustment
Pencil marks