Assembly – Kreg Precision Band Saw Fence User Manual
Page 9
Assembly
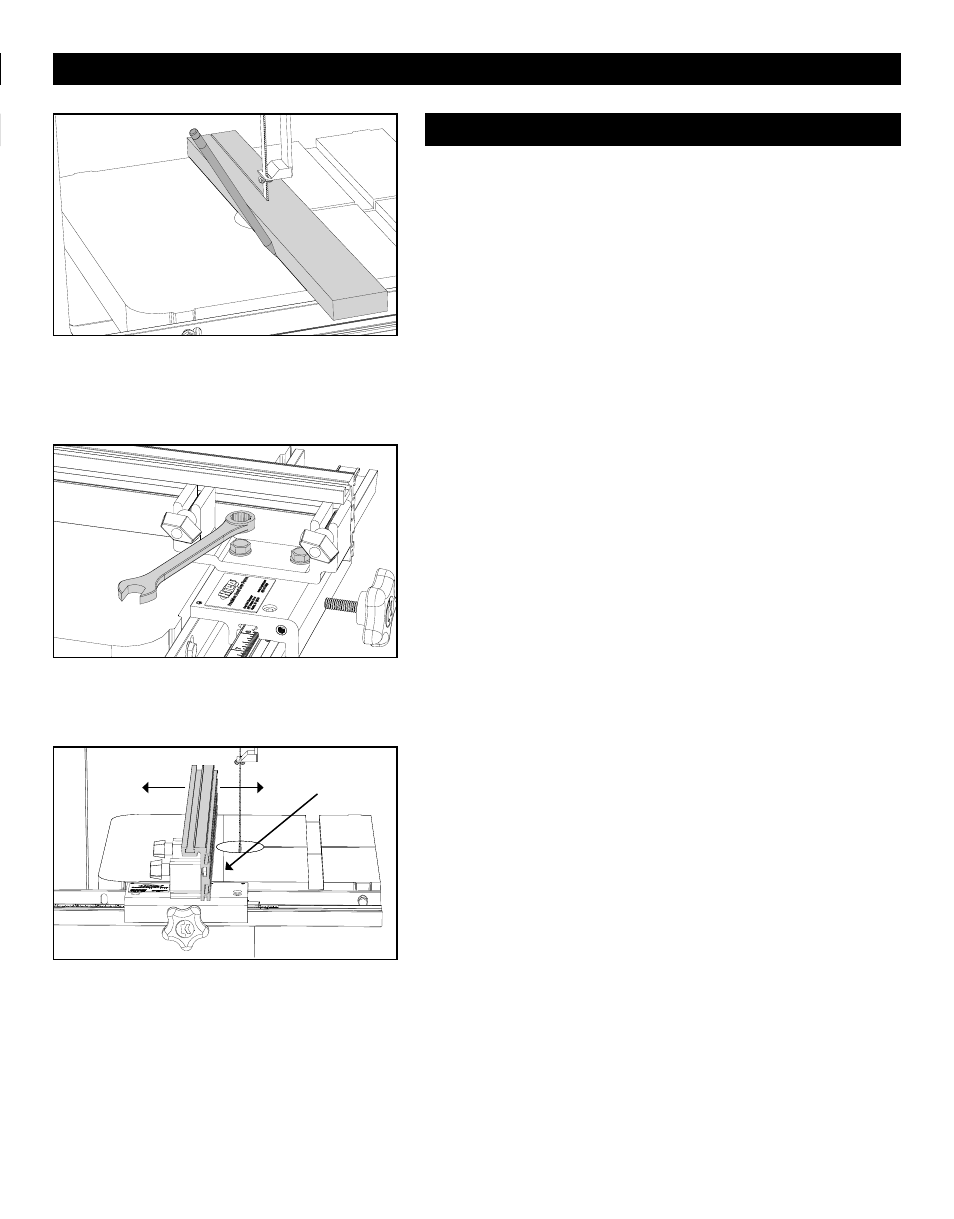
8.
Sometimes when using the fence, a band saw will make a cut that does
not track parallel to the fence, either wedging the workpiece between
the fence and the blade or pulling the workpiece away from the fence.
This “drift angle” often is caused by a blade with teeth that are not set
evenly or that have become dull on one side.
To adjust your fence to compensate for the drift angle, remove the
fence assembly from your band saw and set it aside. Mark a line down
the center of a scrap board about 2" wide and 30" long. Cut on the line
to the middle of the scrap board. Hold the board fi rmly in place, shut off
the band saw and wait for the blade to come to a complete stop. The
angle at which you fed the board in order to keep the blade cutting on
the line is the drift angle. Use a pencil to trace a line onto the band saw
table along one edge of the board. Remove the board.
Remount the fence assembly on your band saw and loosen the bolts
that attach the fence bracket to the clamp block.
Align the fence with the pencil line on the table surface. Tighten the
lock knob, recheck the fence alignment, and tighten the fence bracket
bolts. Make a test cut to ensure that the workpiece tracks parallel to the
fence.
Tip
If you are not able to adjust the fence to the angle necessary to
compensate for blade drift, either your saw geometry is out of
adjustment or it is time to replace the blade. You can minimize the
amount of blade drift by adjusting the tracking and the tension on the
band saw. Refer to your band saw manufacturer’s instructions.
Blade Drift Adjustment
Loosen the fence bracket bolts to allow the fence
extrusion to pivot.
With the blade stopped, trace a line along the edge
of the board onto the saw table
The fence extrusion/fence bracket assembly pivots
for alignment with the blade drift angle.
Pencil line