Mitered corners, Tips – Kreg Jig K5 User Manual
Page 7
www.kregtool.com
800-447-8638
Tips
Tips
For boards at least 3" wide, pocket holes
drilled with the “A” and “C” guides both
fi t entirely on the face of the board. In
this situation, simply position the mitered
workpiece on the jig, clamp it in place, and
drill.
For boards at least 2
3
/
8
" wide, pocket
holes drilled with the “B” and “C” guides
both fi t entirely on the face of the board.
In this situation, simply position the mitered
workpiece on the jig, clamp it in place, and
drill.
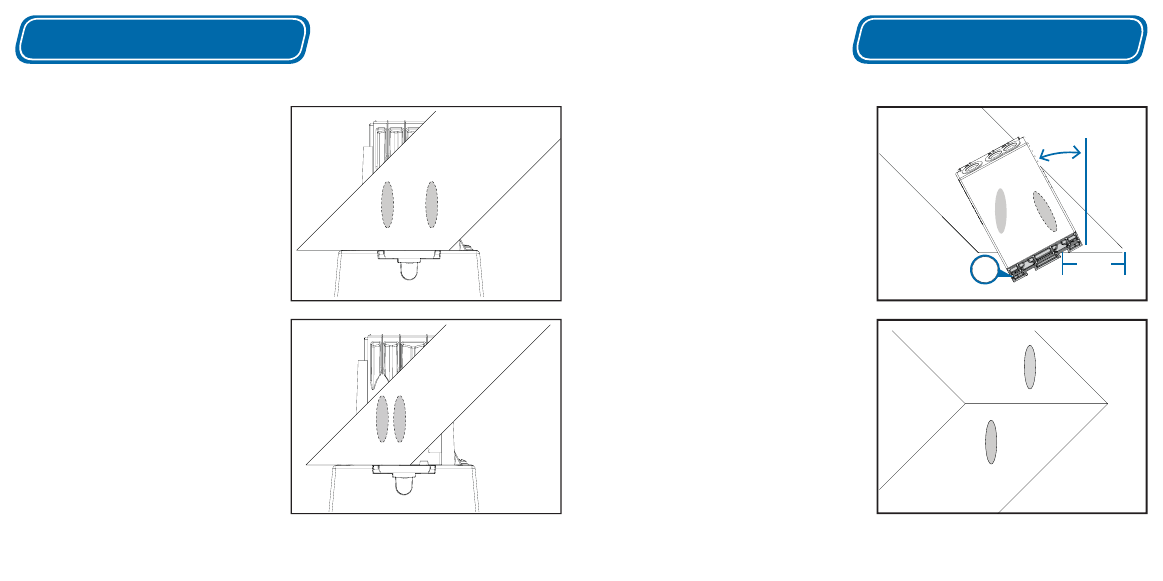
Mitered Corners
To position a pocket screw close to the miter
“toe” on a wide workpiece or to position a
second pocket screw on a narrow workpiece
and still have the hole entirely on the face of
the part, drill the pocket hole closest to the
miter heel with the drill guide in the drill guide
socket. Remove the guide from the socket. For
¾"-thick stock, attach a spacer block (U) to
the drill guide. Position the drill guide with the
spacer-block end 1½" from the miter toe, and
then angle the drill guide away from the toe
at a 30-degree angle. Clamp the drill guide
in place and drill the pocket hole.
You also can drill one pocket hole on each
side of a miter joint rather than drilling both
holes on the same side.
U
1
1
⁄
2
"
30°