Basic pos setup – OpenEye Gen6 X-Series User Manual
Page 59
60
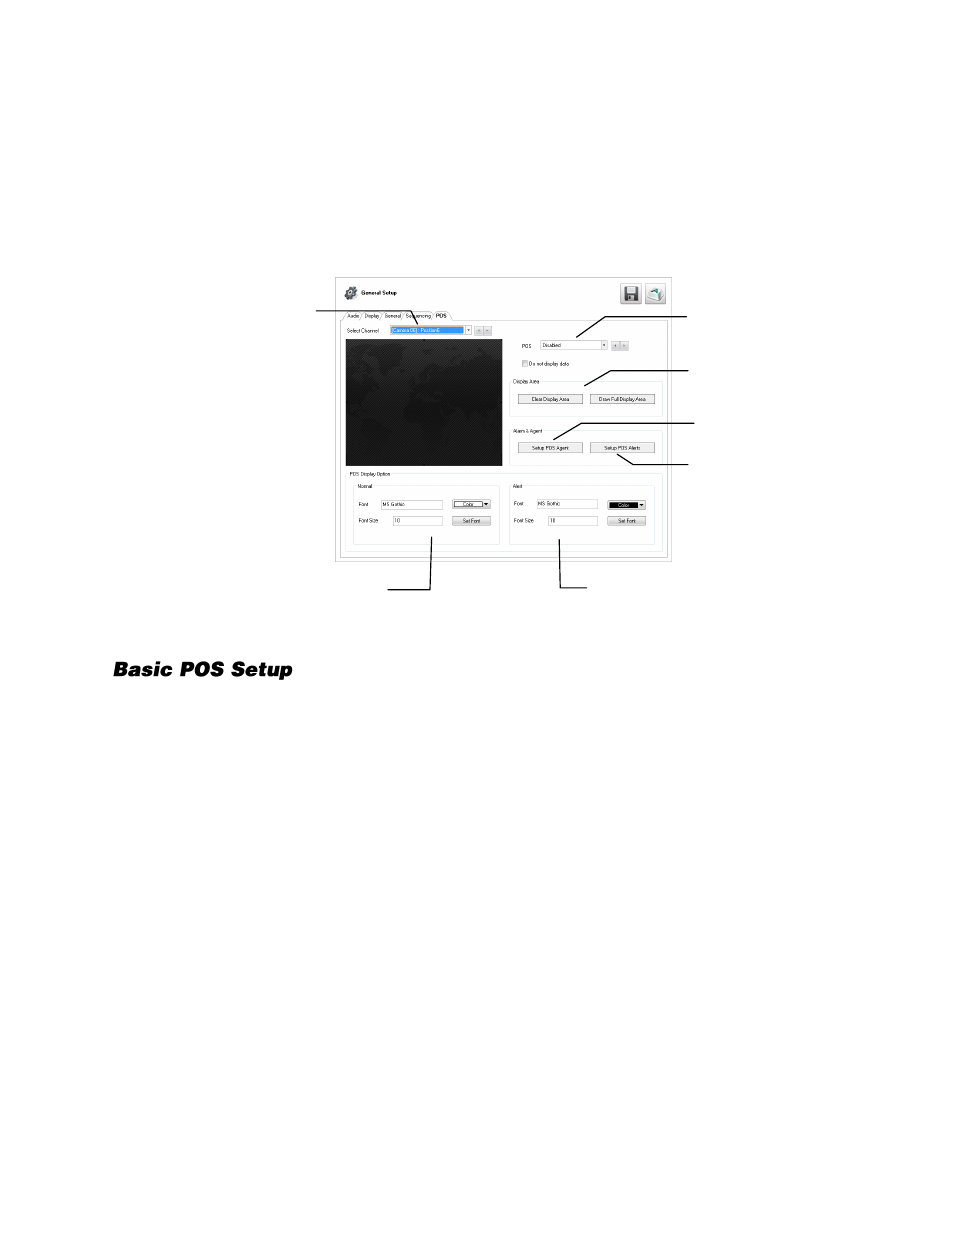
POS
The POS tab allows you to integrate your recorder with the Point of Sale (POS) function of Video
Analytics software.
Note
You must have Video Analytics software installed on your recorder to access the POS setup
tab. Contact an OpenEye sales representative for more information about video analytics
software.
You can display real-time information from POS transactions over live video. To set up this function,
you will need to link camera channels to the appropriate POS stations. You can also set the font, size,
and color for the overlay during normal POS transactions, and set different text settings for Alert POS
transactions.
For more information about setting up your POS system, please refer to the manuals for your POS
system and your Video Analytics software.
1.
Select you desired camera channel in the
Select Channel
list.
2.
Select your desired POS station in the
POS
list.
3.
If you want to record POS data over the video, but not display it live, select
Do Not Display Data
.
4.
Set your desired
Font
,
Color
, and
Font Size
in the
Normal
section, and then click
Set Font
.
5.
Set your desired
Font
,
Color
, and
Font Size
in the
Alert
section, and then click
Set Font
.
6.
Click
Apply
to save our changes.
7.
Repeat these steps for all camera channels to be associated with POS terminals.
Select camera
channel
Select a POS
register for
this channel
Change Normal POS
Overlay text font, color,
and size
Set display
area
Setup POS
Agent
Setup POS
Agent
Change POS Overlay
text font, color, and size
on Alert