Motion search, Performing a motion search, Audio playback – OpenEye Gen6 X-Series User Manual
Page 96
32539AF
97
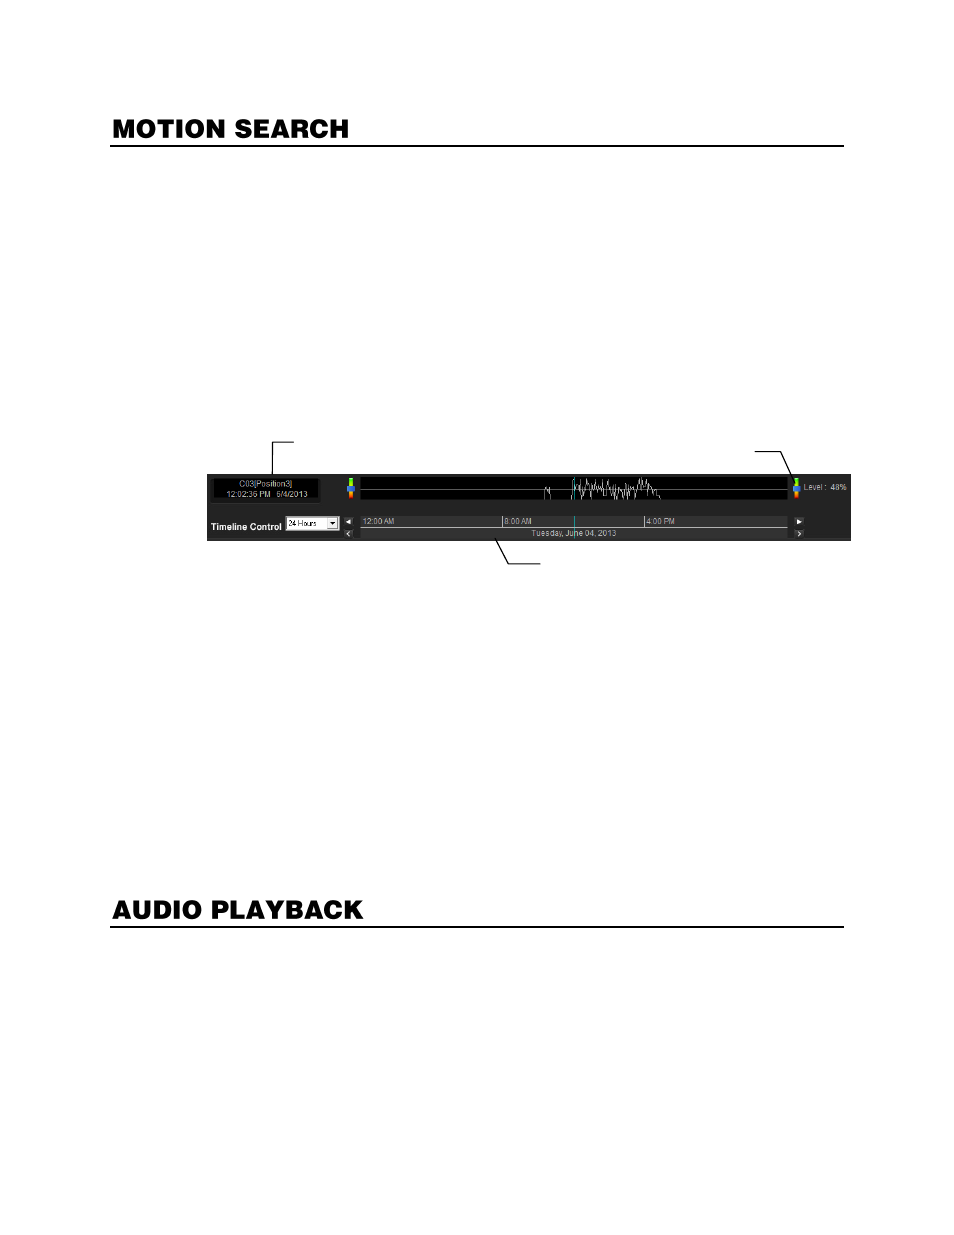
The Motion Search provides a dynamic display of the levels of motion in recorded video. Adjust the
level of motion to only play clips of video at or above that level.
To enable motion data to be saved for Motion search, ensure that you select the following settings:
1.
On the Live screen, click
Setup
, and then click
Motion Detection
.
2.
Select the camera you want to enable for motion detection in the Select Channel list.
3.
Select
Detect Detail Motion Area
.
4.
Repeat steps 2 and 3 for each of your desired cameras.
5.
Click the
Etc
. tab, and then select
Enable Motion Detection on Continuous Recording
.
Note
Motion Search is only available for newly recorded video; it is not compatible with video
recorded prior to installing version 3.6.
Performing a Motion Search
1.
In the Live screen, click
Search
.
2.
Select a single camera channel.
3.
Click
Motion
.
4.
Click the calendar icon to select a day.
5.
Adjust the motion level line.
6.
Adjust the timeline display settings.
7.
Click the play button to start playback.
8.
To exit
Motion
search with the current image still selected, click
Motion
again.
Tip
You can drag the blue line on the Timeline or motion level box to adjust the time.
Audio is played back at 48,000Hz.
To play audio with the video:
1.
Select a single camera channel. The audio channel options will be displayed in the lower right.
2.
Select a single audio channel to play. When an audio channel is selected,
Sync
will be
automatically selected.
3.
Click
Play
.
Camera Information
Timeline
Motion Tolerance Level