4 operation, Operation, 4operation – REMKO RVT 263 DC User Manual
Page 19
4
Operation
The indoor unit is easily operated using the
standard infrared remote control. The indoor unit
beeps to acknowledge the correct transmission of
data. If it is not possible to program the indoor unit
with the remote control, then it can also be man-
ually operated.
Manual mode
The indoor units can be put into operation man-
ually. After the air inlet screen has been opened,
the inner recessed key can be pressed and auto-
matic mode can be activated. In manual mode, the
following settings apply:
Cooling mode: last setting
Fan speed: AUTO
Heating mode: last setting
Fan: AUTO
Press a key on the infrared remote control to inter-
rupt manual mode.
Infrared remote control
The infrared remote control sends the programmed
settings a distance of up to 6 m to the receiver of
the indoor unit. Data will only be received correctly
if the remote control is pointed at the receiver and
no objects are obstructing the transmission path.
Two AAA batteries must be inserted into the
remote control in preparation. To do so, remove
the flap from the battery compartment and insert
the batteries the correct way around (see mark-
ings). Removing the batteries causes all stored
data to be lost. The remote control will then access
the default settings, which you are free to cus-
tomise at any time.
max. 6 m
Fig. 17: Maximum distance
Alarms are indicated by a code (see chapter
Troubleshooting and customer service).
NOTICE!
Immediately replace flat batteries with a new
set, otherwise there is a risk of leakage. It is
recommended that the batteries are removed if
the equipment is shut down for longer periods.
Help save on energy consumption in stand-by
mode! If the device, system or component is
not in use, we recommend disconnecting the
power supply. Components with a safety func-
tion is excluded from our recommendation!
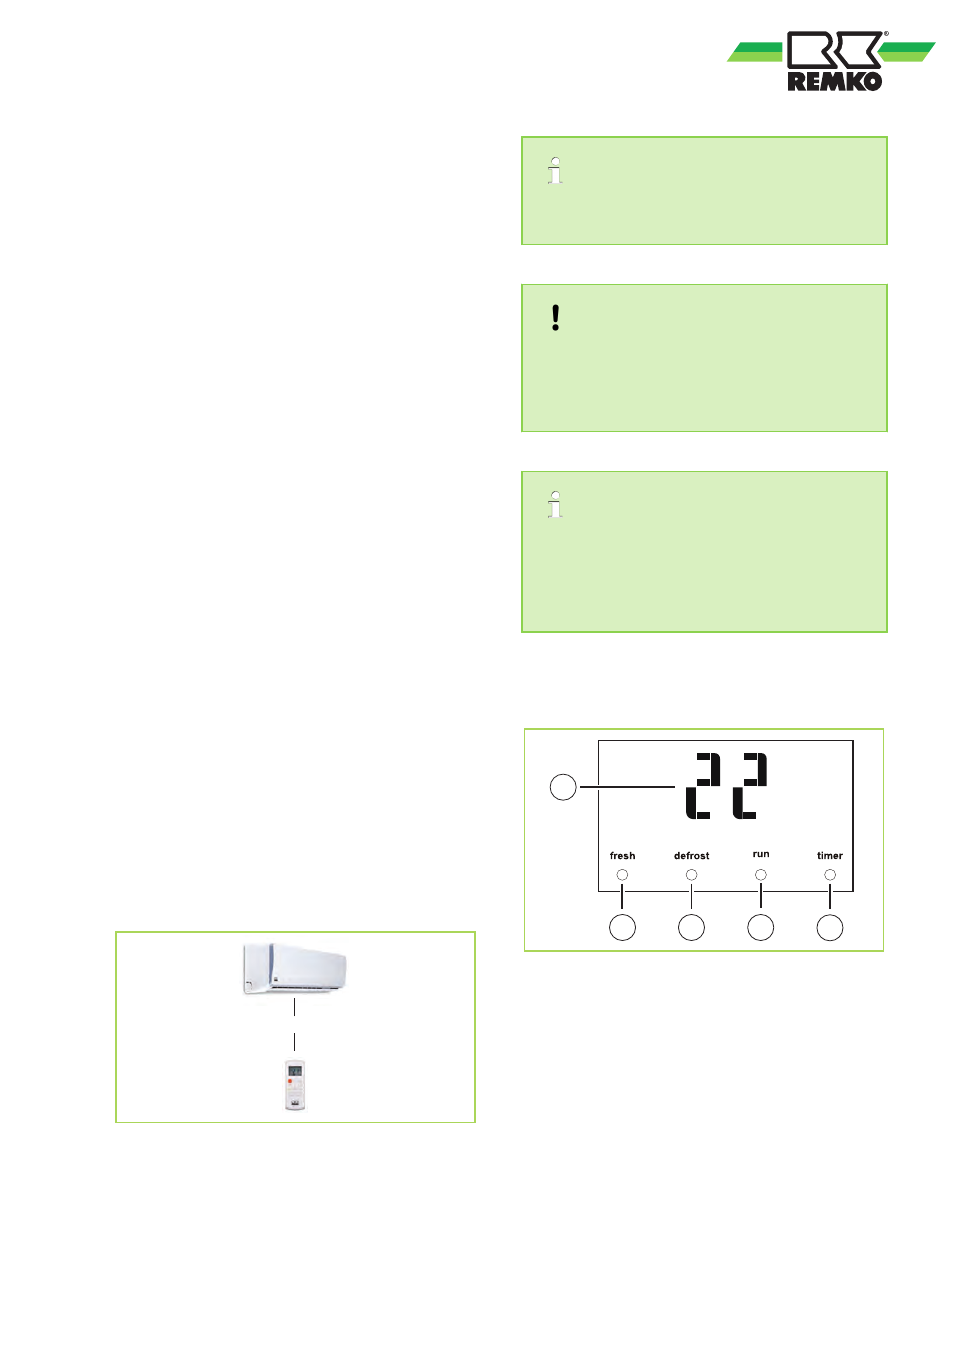
Display on indoor unit
The display illuminates according to the settings.
2
1
4
3
5
Fig. 18: Display on indoor unit
1: Set target value/fault indicator
2: Ionic function activated/deactivated
3: De-frosting function activated or pre-heating (in
heating mode) activated
4: Operating lamp
5: Timer activated/deactivated
19