Click supervisor, Reset to default settings – Wavetronix Click 400 (900 MHz radio) (CLK-400) - User Guide User Manual
Page 102
CHAPTER 9 • CLICK 110
101
After you have viewed the outstation mode configuration, press and release the mode
switch to exit.
Reset to Default Settings
The final option that comes up in the menu is Reset to Default Settings. To select this func-
tion, release the mode switch when the red LED starts flashing.
Note
This parameter can only be configured using the DIP switches.
This function will restore all configuration settings to factory defaults, even those param-
eters not configured using the front panel menu: baud rate, channel map, channel enable,
description field, location field, and device ID. (The exceptions are fault latch and outstation
mode, which are not reset by this option.)
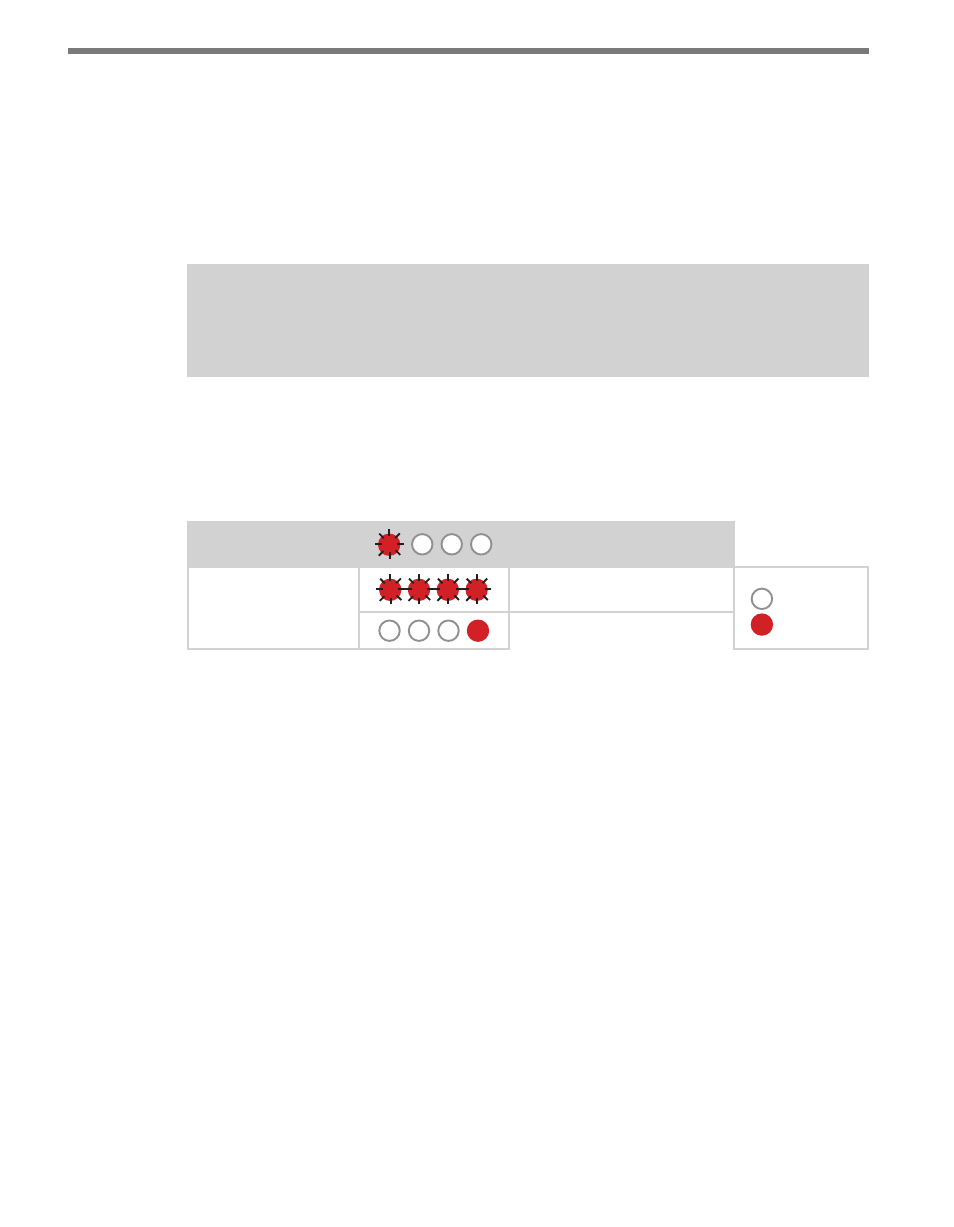
Level 1 LEDs
Reset to Default Settings
Level 2 LEDs
Reset to default settings
LED off
LED on
Cancel and exit menu
Table 9.14 – Front Panel Menu Reset to Default Settings
See the earlier Navigating through the Menu and the Menu Operation Example sections for
how to view this parameter.
After the Click 110 has reset to factory defaults, it will check the DIP switches; if any of
them are set to Hardware mode, it will apply those settings to the parameter in question. If
resetting to factory defaults doesn’t change certain settings the way you expected it to, check
the DIP switches to see if they are causing settings to be changed to something other than
the default.
Click Supervisor
Click Supervisor is the only way to configure non-data path type parameters such as the
description, location, and device ID. See Chapters 4 and 5 of this document for instructions
on how to download and install Click Supervisor and how to connect to your device using
the software.
- Click 421 (bluetooth to serial converter) (CLK-421) - User Guide Click 342 (lean managed ethernet switch) (CLK-342) - User Guide Click 341 (lean managed ethernet switch) (CLK-341) - User Guide Click 340 (lean managed ethernet switch) (CLK-340) - User Guide Click 331 (unmanaged ethernet switch) (CLK-331) - User Guide Click 330 (unmanaged ethernet switch) (CLK-330) - User Guide Click 304 (RS-232 to RS-485 converter) (CLK-304) - User Guide Click 305 (RS-232 to RS-485 converter) (CLK-305) - User Guide Click 301 (serial to ethernet converter) (CLK-301) - User Guide Click 100 (16 output contact closure) (CLK-100) - User Guide Click 104 (4-channel DIN rail contact closure) (CLK-104) - User Guide Click 110 (4-channel contact closure eurocard) (CLK-110) - User Guide Click 112 (detector rack card) (CLK-112) - User Guide Click 114 (detector rack card) (CLK-114) - User Guide Click 120 (screw terminal relay) (CLK-120) - User Guide Click 121 (spring cage relay) (CLK-121) - User Guide Click 200 (surge suppression) (CLK-200) - User Guide Click 201 (1 amp AC to DC converter) (CLK-201) - User Guide Click 202 (2 amp AC to DC converter) (CLK-202) - User Guide Click 203 (UPS and battery) (CLK-203) - User Guide Click 204 (4 amp AC to DC converter) (CLK-204) - User Guide Click 210 (AC circuit breaker) (CLK-210) - User Guide Click 211 (AC outlet) (CLK-211) - User Guide Click 221 (DC surge protector) (CLK-221) - User Guide Click 222 (system surge protector) (CLK-222) - User Guide Click 223 (dual-485 surge protector) (CLK-223) - User Guide Click 230 (AC surge protector) (CLK-230) - User Guide Click 250 (wireless surge protector) (CLK-250) - User Guide