H3C Technologies H3C S12500X-AF Series Switches User Manual
Page 14
10
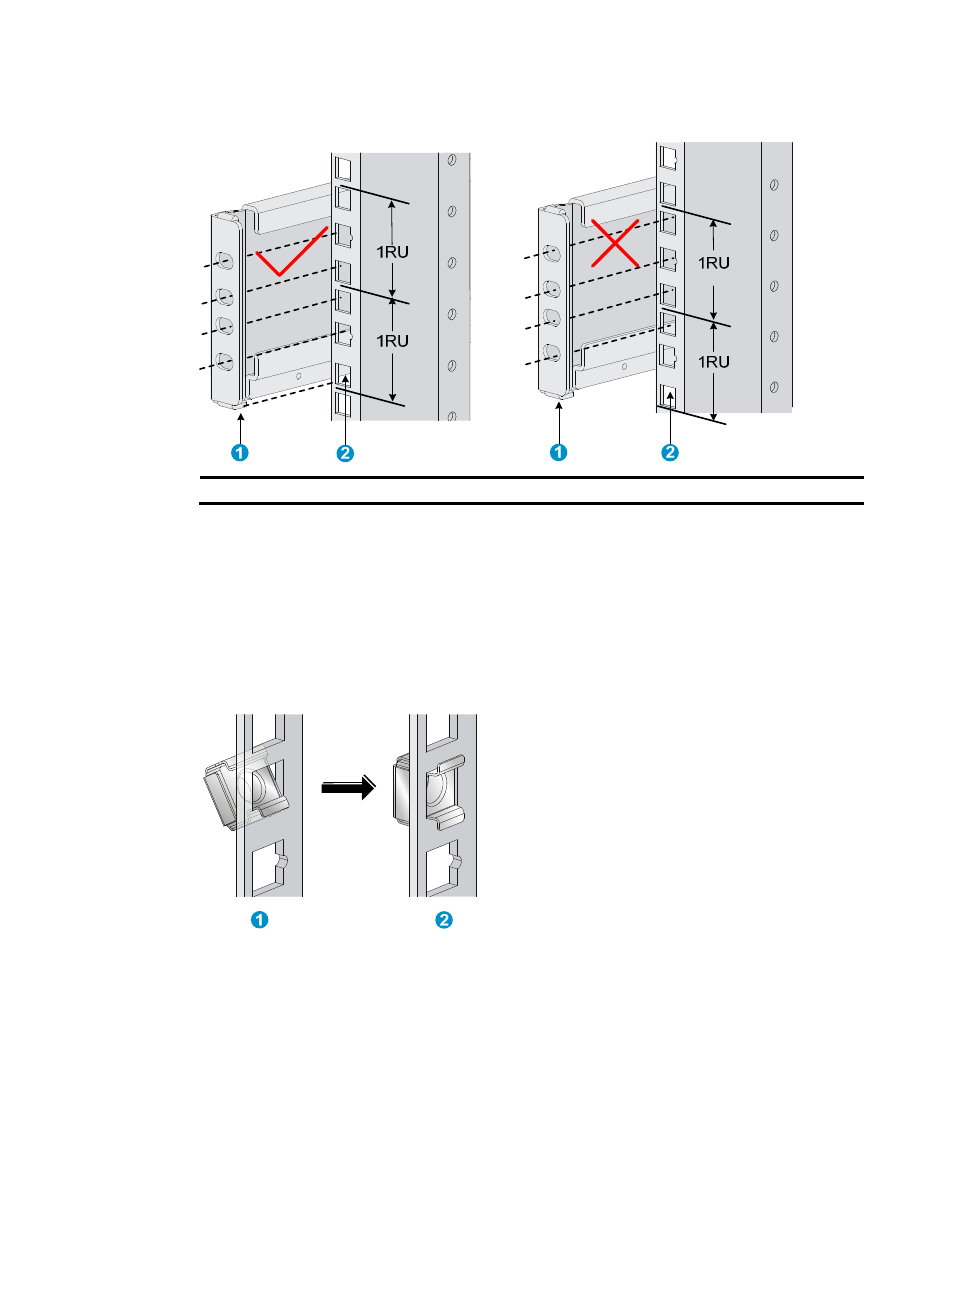
Figure 11 Marking the installation position on the rack for the slide rails
(1) Positioning tab
(2) Lowest square hole within the 2U space
3.
Install cage nuts in the marked square holes on the rack posts:
a.
As shown by callout 1 in
, insert the lower ear of a cage nut into the corresponding
installation hole.
b.
As shown by callout 2 in
, compress the upper and lower ears of the cage nut to
lead the upper ear through the hole.
c.
Repeat steps a and b to install cage nuts in all the marked square holes in the rack posts.
Figure 12 Installing a cage nut
4.
Perform the following tasks as shown in
.
a.
Align the installation holes on the two ends of a slide rail with the cage nuts on the front and
rear rack posts.
b.
Compress the slide rail, making sure the positioning tabs at both ends of the slide rail are
inserted into the lowest square holes within the 2U space on the rack posts.
c.
Use screws to secure the slide rail to the rack posts.